• Book
    • Watercolor with Brush Pens
    • Watercolor Flowers Using Markers
    • Paint a Watercolor Galaxy Butterfly with Markers
    • Paint Watercolor Galaxy Bookmarks using Markers
    • Timelapse Video for Artists
  • Shop
  • Society6 Store
  • Blog
  • Portfolio
  • About
  • Contact
Menu

Brown Paper Bunny Studio

Art & Fashion Illustration
  • Book
  • Classes
    • Watercolor with Brush Pens
    • Watercolor Flowers Using Markers
    • Paint a Watercolor Galaxy Butterfly with Markers
    • Paint Watercolor Galaxy Bookmarks using Markers
    • Timelapse Video for Artists
  • Shop
  • Society6 Store
  • Blog
  • Portfolio
  • About
  • Contact
Make a Book Quote Wall Hanging with Jessica Mack of BrownPaperBunny

Make a Book Quote Wall Hanging

September 8, 2018

Please note: This blog post contains affiliate links, which help pay for the upkeep of this site. That being said, I will never, ever promote anything I am not 100% in love with!

----------

This week I am all about literature, so I’m going to show you an easy way to turn your favorite book quote into a wall hanging.
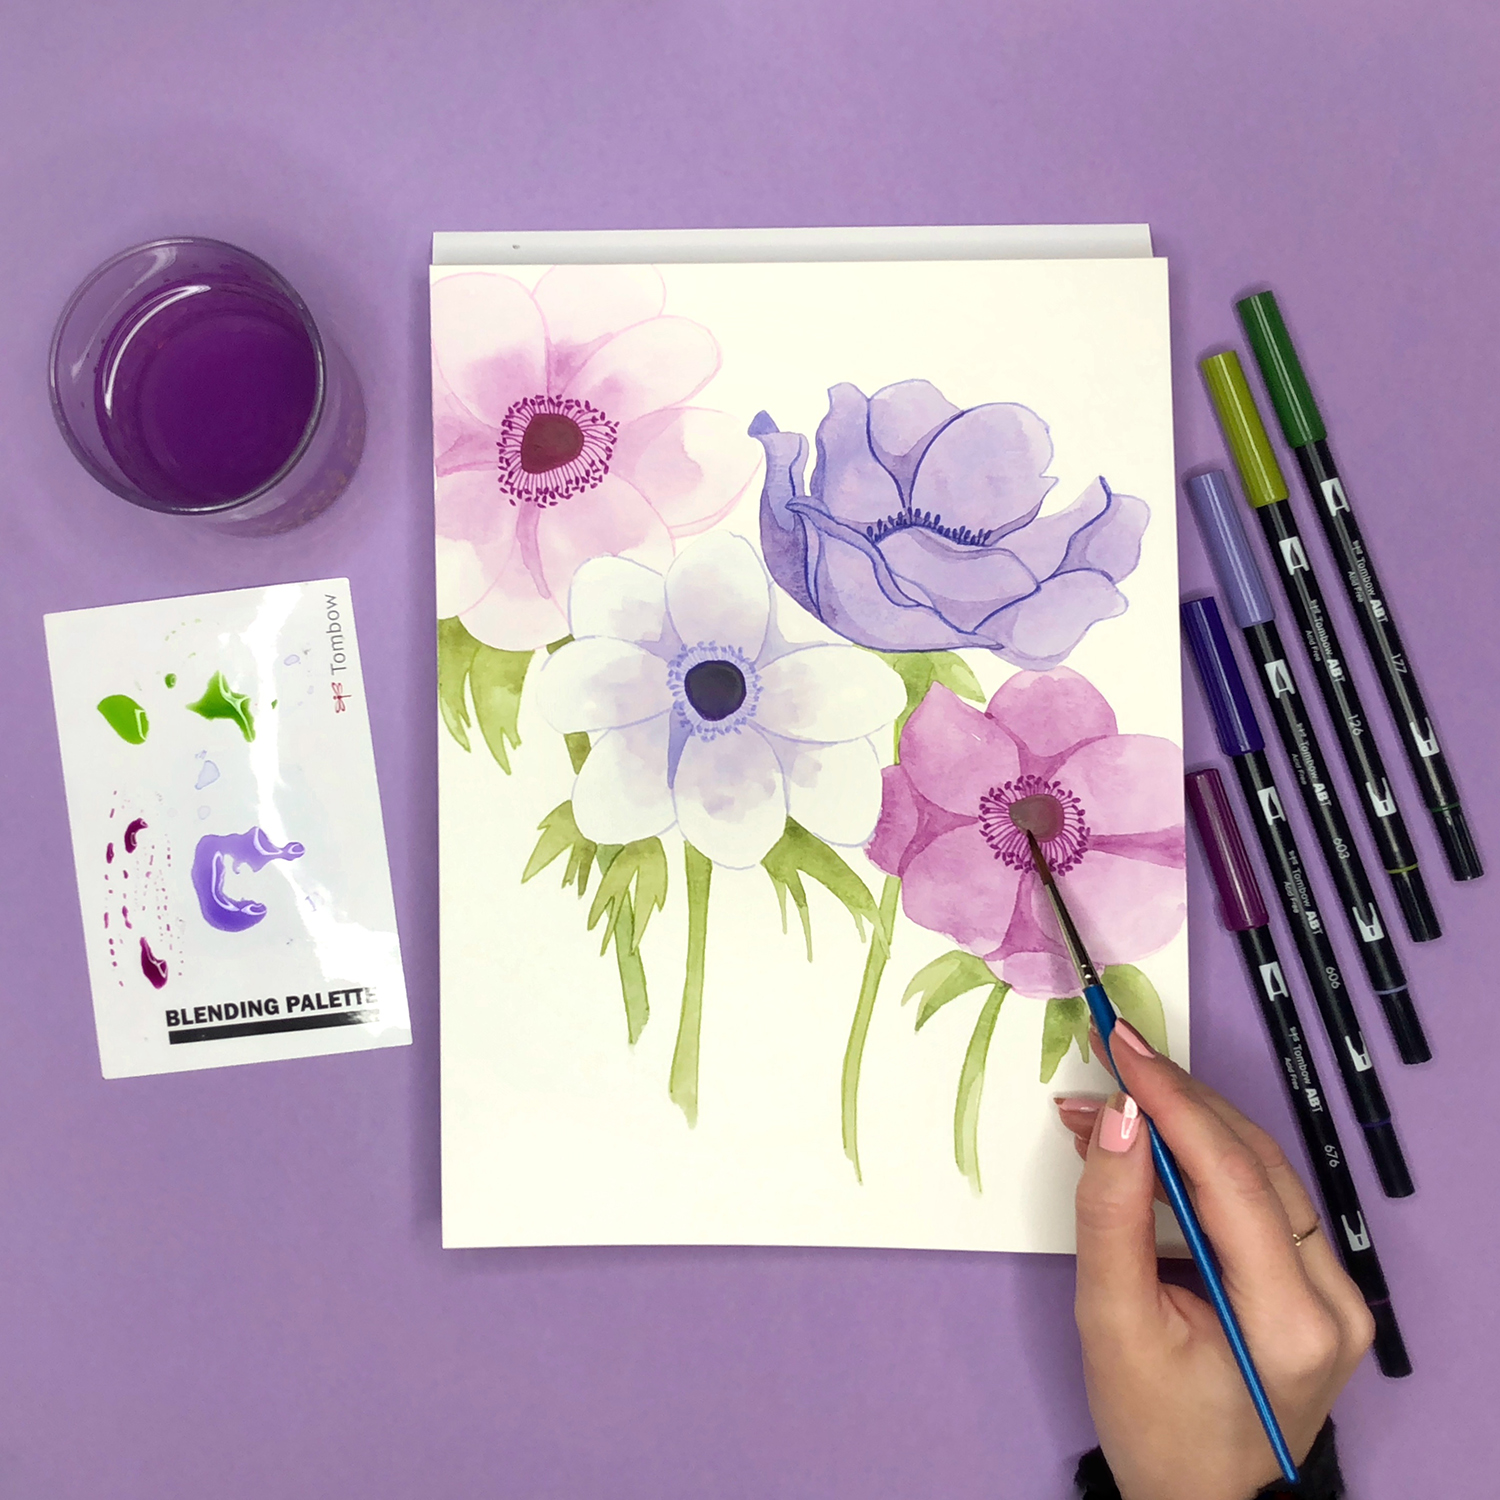
Supplies:

  • Tombow Dual Brush Pens
  • A page of text from the book (typed or handwritten)
  • Tombow Mono Drawing Pen
  • Pencil
  • A cute frame

The first step in creating your literature-inspired wall hanging is to letter your favorite quote onto your page of text. Using a separate sheet of paper I got my lettering just how I wanted then used a light-box to trace it onto my page filled with text.

Make a Book Quote Wall Hanging with Jessica Mack of BrownPaperBunny

Once your text is dry repeat the quote in a darker shade, and offset it slightly. This will create a fun drop shadow effect.

Make a Book Quote Wall Hanging with Jessica Mack of BrownPaperBunny

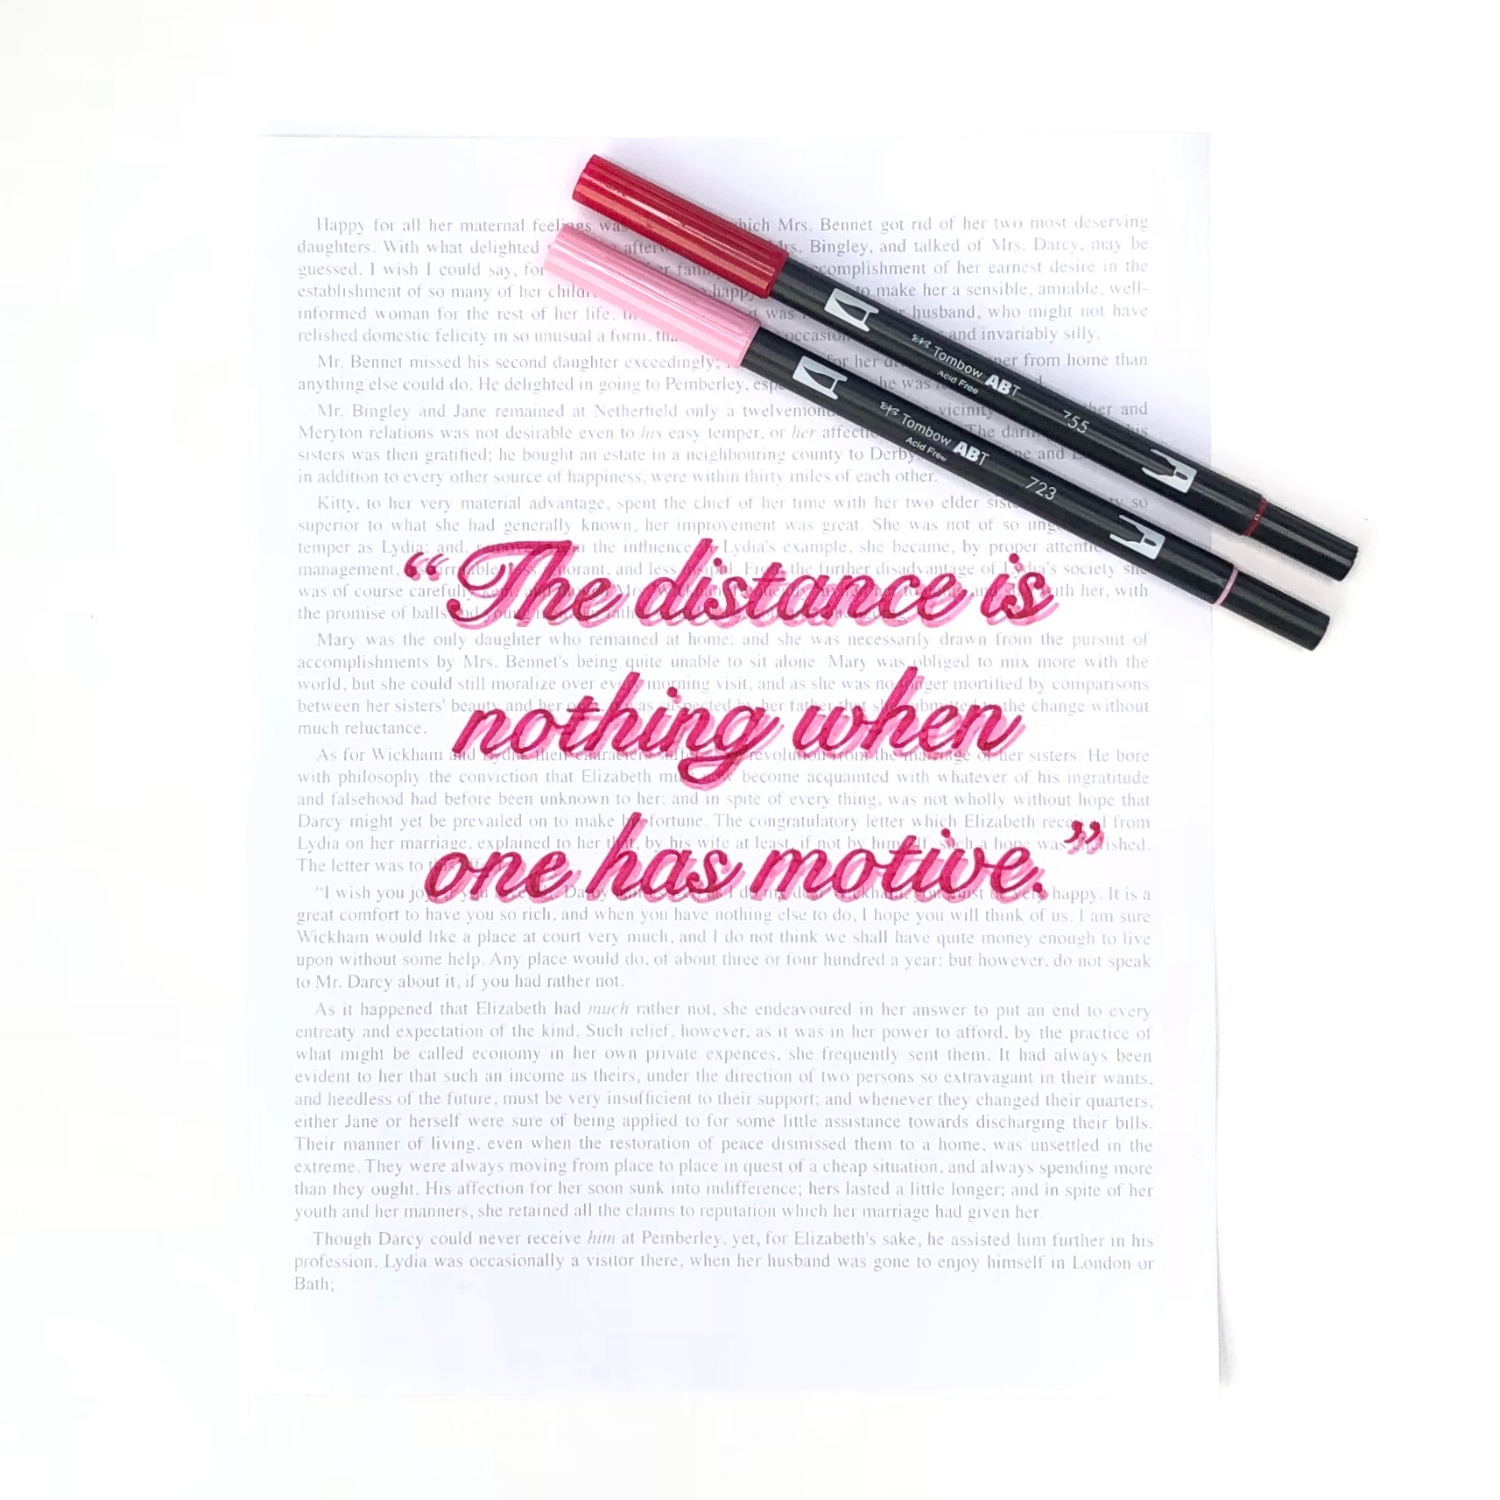
Once it is dry you can outline the words with your Mono Drawing Pen for extra impact. Then it’s time to frame it and hang it on the wall. I used a cute magnetic frame for mine.

Make a Book Quote Wall Hanging with Jessica Mack of BrownPaperBunny

What's your all-time favorite book? Let me know in the comments!


In Ink, Aug 2017, Tutorial, Type
9 Comments
How to Create a Watercolor Background for Your Lettering by Jessica Mack of BrownPaperBunny

How to Create a Watercolor Background for Your Lettering

September 1, 2018

Please note: This blog post contains affiliate links, which help pay for the upkeep of this site. That being said, I will never, ever promote anything I am not 100% in love with!

----------

I just love using Tombow Dual Brush Pens to create a watercolor effect and the new XL Blending Palette is perfect for that! Today I’m going to show you how I create watercolor backgrounds for lettering projects. You’ll need the XL Blending Palette, Dual Brush Pens in your favorite colors, a water mister, watercolor paper, and Mono Drawing Pen or Fudenosuke Pen.

How to Create a Watercolor Background for Your Lettering by Jessica Mack of BrownPaperBunny

To create your watercolor background start by adding some ink to your XL Blending Palette with your Dual Brush Pens. Spray a little water over the ink then press your watercolor paper down onto the palette. Blot any extra water with some paper towel, and if you want the color to run a little more you can spray water directly onto your paper. While you’re waiting for your paper to dry, wipe down your blending palette with damp paper towel and you’re ready to start again! What are your favorite colors to blend together?

How to Create a Watercolor Background for Your Lettering by Jessica Mack of BrownPaperBunny

Here's a video of the whole process.

Once your watercolor background is dry you’re ready to start your lettering project. I used Mono Drawing Pens, Dual Brush Pens and my Fudenosuke to create the lettering on this project. Do you have a favorite quote, let me know in the comments!

In Type, Ink, Watercolor, Aug 2017, Tutorial, Sketchbook
6 Comments
How to Make a Watercolor Background for Your Planner by Jessica Mack from BrownPaperBunny

Watercolor Background for Your Planner

August 9, 2018

Please note: This blog post contains affiliate links, which help pay for the upkeep of this site. That being said, I will never, ever promote anything I am not 100% in love with!

----------

Hello, hello! I'm collaborating with Bloom Planners this week and I’m super excited to show you an easy way to add a colorful background to your weekly spreads.

Here's what you'll need to get started:

  • Your favorite planner
  • Tombow Dual Brush Pens
  • XL Blending Palette
  • Water Mister or Spray Bottle

Optional Things to decorate with:

  • Tombow TwinTone Markers
  • Tombow Mono Adhesive + Permanent
  • Planner Stickers
  • Magnetic bookmark / Planner Band etc
How to Make a Watercolor Background for Your Planner by Jessica Mack from BrownPaperBunny

To quickly add a pop of background color to your planner start by scribbling some ink onto your blending palette with your Tombow Dual Brush Pens.

How to Make a Watercolor Background for Your Planner by Jessica Mack from BrownPaperBunny

Lightly mist the ink with water then press your planner page down onto the palette.

How to Make a Watercolor Background for Your Planner by Jessica Mack from BrownPaperBunny

Blot any excess water with some paper towel and give it a blast with a hairdryer or heat tool to dry it quickly and stop it seeping through to the next page. Which do you prefer, the blue or the pink page?

Once your watercolor background is dry you can start planning out your week and adding a little extra sparkle here and there! I had so much fun decorating this spread with Bloom stickers and Tombow TwinTone Markers! What are your favorite planner decorations?

How to Make a Watercolor Background for Your Planner by Jessica Mack from BrownPaperBunny

I love the Bloom Planner products, but one of the other reasons I love them so much is that the brand is run by a full team of awesome lady bosses, and that they are encouraging us all to grow and be the best women we can be!

In Aug 2017, Watercolor, Tutorial, Ink
Comment
Make Your Own Superhero Card by Jessica Mack of BrownPaperBunny

Make Your Own Superhero Card

July 26, 2018

Please note: This blog post contains affiliate links, which help pay for the upkeep of this site. That being said, I will never, ever promote anything I am not 100% in love with!

----------

Hello hello! Today I'm going to show you how to make your own superhero card. It's a great way to let someone know that they are a superhero to you (even if they don't technically have superpowers), and they'll only take you a few minutes to create!

Here's what you'll need to get started...

Supplies

  • Blank card or thick watercolor paper
  • Tombow Mono Drawing Pencil
  • Tombow Dual Brush Pens
  • Scissors
  • Tombow Mono Drawing Pen
  • Tombow 1500 Colored Pencils (optional)
Make Your Own Superhero Card by Jessica Mack of BrownPaperBunny

Step 1: Sketch Your Outlines

Use your Mono Drawing Pencils to lightly sketch a superhero crown or shield onto the bottom half of your card (which will end up being the front). You can make up your own using geometric shapes and bright colors. Then decide if you want to add words to the front, or maybe just the inside once you've folded the finished card. I sketched the words 'You are my superhero' onto the front of this one.

Make Your Own Superhero Card by Jessica Mack of BrownPaperBunny

Step 2: Add Some Color

Using your Dual Brush Pens color in your design. I usually start with the lightest colors first, letting them dry completely before I move onto the darker ones. By letting them dry fully you'll have less chance of bleeding where the colors touch.

Pro Tip: Use a wet paintbrush to blend the ink on your card for a watercolor look. Again, make sure you apply one color at a time and let each one dry completely before applying the next one. This technique works best on very thick card or thick watercolor paper.

Make Your Own Superhero Card by Jessica Mack of BrownPaperBunny

Step 3: Outline Your Design

Use your Mono Drawing Pens (I used number 03) to outline your design and give it that comic-book superhero look.

Make Your Own Superhero Card by Jessica Mack of BrownPaperBunny

Step 4: Add Some Shading

This step is optional, but you can use your Tombow 1500 Colored Pencils to add some subtle shading to your design to help it stand off the page a little more. I used a dark yellow around the stars, and along the edges of the blue stripes, and gave the crown a drop shadow using light grey.

Make Your Own Superhero Card by Jessica Mack of BrownPaperBunny

Step 5: Fold and Mail Your Superhero Card

All that's left is to fold your card, write in it and mail it off. If you want to add a little extra sparkle, decorate the envelope as well.

Make Your Own Superhero Card by Jessica Mack of BrownPaperBunny

I'd love to see your superhero-inspired projects! Tag @BrownPaperBunny on social media!

In Ink, Aug 2017, Tutorial
7 Comments
How to create an emoji mood wheel by Jessica Mack of BrownPaperBunny

Create an Emoji Mood Wheel

July 19, 2018

Hello, hello! Today I’m going to show you how to make a fun emoji wheel that you can stick up at your desk to let your coworkers or family know how you’re feeling. You’ll need some card, cut into a large circle, an arrow, and enough left over for eight smaller circles. Go ahead and grab a paper brad, some scissors, your Dual Brush Pens, Mono Aqua Liquid Glue, a pencil and a Mono Drawing Pen too! 

How to create an emoji mood wheel by Jessica Mack of BrownPaperBunny

The next steps in creating your emoji wheel are to color eight even segments on your large circle, and on the left-over card draw eight of your favorite emojis. Often feel like a unicorn? Go on, add it to your wheel! 

How to create an emoji mood wheel by Jessica Mack of BrownPaperBunny

To finish off your emoji wheel cut out your emojis and glue them into each segment of the wheel using your Mono Aqua Liquid Glue. Then use your paper brad to attach the arrow to the center and you’re finished!

How to create an emoji mood wheel by Jessica Mack of BrownPaperBunny

Comment below and tell me what emoji you feel like right now. 

In Tutorial, Aug 2017, Ink
Comment
Easy watercolor word art by Jessica Mack of BrownPaperBunny

Easy Watercolor Word Art

July 14, 2018

Please note: This blog post contains affiliate links, which help pay for the upkeep of this site. That being said, I will never, ever promote anything I am not 100% in love with!

----------

When I think of the color indigo I think of stargazing on warm summer nights. I just love the inky color of sky after the sun has completely disappeared. Today I'm going to show you how to make this easy watercolor word art so you can dream of the stars anytime you like.

Supplies:

  • Tombow Dual Brush Pens (N25 and 565)
  • 140 lb Watercolor paper
  • Tombow Mono Plastic Eraser
  • Paintbrush and water
  • Tombow Mono Drawing Pencil (4H)
Easy watercolor word art by Jessica Mack of BrownPaperBunny

Step 1: Sketch Your Words in Pencil

Use a nice light pencil (2H or 4H works well) to sketch in your words and stars. You'll be able to erase any visible lines at the end so don't worry about it being too neat at this stage.

Easy watercolor word art by Jessica Mack of BrownPaperBunny

Step 2: Outline Your Words

Outline your words and stars in black or charcoal Dual Brush Pen ink. This gives you greater contrast around the letters once everything is blended together.

Easy watercolor word art by Jessica Mack of BrownPaperBunny

Step 3: Color in the Background

Using your dark blue Dual Brush Pen (I used 565) fill in the background around your stars and words. You don't need to fill in every tiny space, it's ok if there is some white showing through. In the next step you're going to blend it all together anyway.

Easy watercolor word art by Jessica Mack of BrownPaperBunny

Step 4: Blend the Ink With Water

Using your paintbrush and some water start blending the ink together. I find it easiest to start with the fiddly bits around the letters and stars first and then fill in the larger areas. The ink won't be perfectly uniform, it will have dark areas and water marks, which gives you that great watercolor look.

Easy watercolor word art by Jessica Mack of BrownPaperBunny

Once you're happy with the way it is blended, let it dry, erase any visible pencil lines, and you're ready to frame your watercolor word art!

In Watercolor, Type, Ink, Tutorial, Aug 2017
2 Comments
Summer Happy Mail: Make Your Own Envelopes by Jessica Mack of BrownPaperBunny

Summer Happy Mail: Make Your Own Envelopes

July 8, 2018

Is there anything better than getting snail mail? Yes...getting cute, hand-made snail mail! So I'm going to show you a fun way to add a little summer surprise to the next mail you send out. You’ll need some watercolor or mixed media paper, Tombow Dual Brush Pens, a paintbrush and water, Tombow Mono Drawing Pen, scissors and Tombow Mono Adhesive + Permanent. 

Summer Happy Mail: Make Your Own Envelopes by Jessica Mack of BrownPaperBunny

We’re going to make our own envelopes with summer-themed decorations on the inside, so the recipient gets a fun surprise when they open it up! Gently open up an old envelope to use as a template, and measure out your watercolor paper to the right size. Fill the paper with ice-cream cones, watermelon slices, pineapples, or anything else that makes you think of summer, using your Tombow Dual Brush Pens. Then with a paintbrush wet the ink to blend it together and get a watercolor look. Once the ink is dry draw cute little faces or add details with your Mono Drawing Pen. 

Summer Happy Mail: Make Your Own Envelopes by Jessica Mack of BrownPaperBunny

To finish off your envelopes cut your paper using your envelope template, fold in the sides and glue the bottom three together with your Mono Adhesive + Permanent. Write a letter, or make a cute card to go inside and your fun summer envelopes are ready to be sent! Leave a comment and tell me who you’re going to send some cute mail to this summer! 

In Illustrations, Ink, Watercolor, Tutorial, Aug 2017
2 Comments
Bright Playroom Decor with Walnut Hollow — by Jessica Mack of BrownPaperBunny

Bright Playroom Decor with Walnut Hollow

June 28, 2018

Please note: I received these products for free, but my review and use of them is 100% honest and all me.

----------

This week I'm going to show you how I created these bright playroom decor pieces with Walnut Hollow and Tombow products. Here's what you'll need to get started:

Supplies:

  • Cactus Shape from Walnut Hollow
  • Trapezoid Shelf from Walnut Hollow
  • Tombow Dual Brush Pens
  • Paint Brush
  • Tombow Blending Palette
  • Watercolor Paper
  • Tombow Mono Aqua Liquid Glue
  • Scissors
  • Tombow Mono Drawing Pen
  • Tombow Xtreme Tabs
Bright Playroom Decor with Walnut Hollow — by Jessica Mack of BrownPaperBunny

Step 1: Stain Your Walnut Hollow Pieces

I wanted to color my wooden pieces, but still preserve the tips on my Dual Brush Pens, one way to do that is to use a blending palette, water and a paintbrush to transfer the Dual Brush Pen ink onto the wood and create a colorful stain. Let each application of ink dry before adding another layer for a deeper color. To get the color shown here use Dual Brush Pen 245 (Sap Green) for the first two coats and 296 (Green) for the last two coats.

Bright Playroom Decor with Walnut Hollow — by Jessica Mack of BrownPaperBunny

Step 2: Draw Your Decorations

Next draw some cactus flowers and a cute little llama (see Marie B's llama tutorial and download here) to decorate your colorful wooden pieces. Start by applying Dual Brush Pen ink via the blending palette and a paintbrush. Then once the ink is dry outline them and add detail using Mono Drawing Pens.

Bright Playroom Decor with Walnut Hollow — by Jessica Mack of BrownPaperBunny

Step 3: Add Your Decorations

Once you've finished drawing your decorations, cut them out and stick them to the Walnut Hollow pieces using Tombow Xtreme Tabs. Now they're ready for the playroom!

Bright Playroom Decor with Walnut Hollow — by Jessica Mack of BrownPaperBunny
In Ink, Aug 2017, Tutorial
11 Comments
How to make your own drink umbrellas, mermaid straws, and strawberry drink toppers by Jessica Mack of BrownPaperBunny

How to Make Your Own Drink Umbrellas

June 21, 2018

Please note: This blog post contains affiliate links, which help pay for the upkeep of this site. That being said, I will never, ever promote anything I am not 100% in love with!

----------

Today I thought I'd show you how to make your own cute drink umbrellas and other fun drink toppers! Whether you’re trying to increase your water intake or relaxing on the deck with something refreshingly fruity, these will definitely liven up your glass.

Mermaid Drink Toppers

Start by drawing your mermaids using Tombow Dual Brush Pens on watercolor paper (you can copy these if you don’t feel confident creating your own) then use a paintbrush and water to soften and blend each area of ink to get the watercolor effect. Once they are dry, draw on the details with your Mono Drawing Pen, cut them out, and glue them onto pink paper straws with Mono Aqua Liquid Glue!

How to make your own drink umbrellas, mermaid straws, and strawberry drink toppers by Jessica Mack of BrownPaperBunny

Watermelon Drink Umbrellas

To make these watermelon drink umbrellas start by cutting a circle out of green paper, and a slightly smaller circle out of pink paper (you can make your own colored paper with Dual Brush Pens, water, and watercolor paper). On the pink circle, use your Mono Drawing Pen to draw some watermelon seeds. Fold each circle in half, unfold it, turn it and fold again. Repeat until you have eight evenly-spaced creases coming out from the center. Cut along one of the creases, to the center, overlap those panels at the cut and glue them together with Mono Adhesive Dots. Repeat on the second circle and glue the pink circle on top of the green one. Dot some Mono Aqua Liquid Glue on the inside point of the umbrella and push a long toothpick through from the inside. If you’re worried about it being too pointy, snip off the very tip of the toothpick once the glue is dry.

How to make drink umbrellas, mermaid straws, and strawberry drink toppers by Jessica Mack of BrownPaperBunny

Strawberry Drink Toppers

For the last pink drink topper, start by drawing strawberry shapes using Dual Brush Pens on watercolor paper. Next, soften and blend the ink with a paintbrush and water for a watercolor look. Once they are dry use your Mono Drawing Pen to outline the strawberries and draw on some seeds. Cut them out, and use Mono Aqua Liquid Glue to glue them to toothpicks and you’re done!

How to make drink umbrellas, mermaid straws, and strawberry drink toppers by Jessica Mack of BrownPaperBunny

Out of the three drink toppers I showed you today which is your favorite?

In Watercolor, Aug 2017, Tutorial, Ink
10 Comments
Template for Easy Weekly Planner Spreads by Jessica Mack of BrownPaperBunny

Template for Easy Weekly Planner Spreads

June 15, 2018

Please note: This blog post contains affiliate links, which help pay for the upkeep of this site. That being said, I will never, ever promote anything I am not 100% in love with!

----------

Hi there! I'm going to show you my template for creating easy weekly planner spreads. I love using notebooks to plan, but I don't have a lot of time to spend creating my weekly layouts — so here's how I make setup a lot faster (there's only two steps)!

Supplies:

  • Archer and Olive Dot Grid Notebook
  • Planner Stickers (mine are also from Archer and Olive)
  • Tombow Dual Brush Pens
  • Piece of card or thick paper (the size of your open notebook)
  • Tombow Mono Drawing Pens
  • Pencil
  • Ruler
  • Scissors

Step 1: Plan Your Template

The first step is to think about what items you want to have in your weekly spread template. You'll most likely want days of the week, but you might also want a monthly calendar, a tracker of some sort (I'm tracking my workouts), and why not a little bit of inspiration for the week. Here are a few other things you could include: a specific to-do list area, goal tracking, list of calls you need to make, errands, a weekly shopping list, water intake, your daily mood, the weather, daily gratitude, or upcoming birthdays.

I kept mine simple with four main areas, because I found that the more I tried to track the less consistent I was at doing it. Once I settled on my main items I measured them out on my piece of card and cut out the areas I wanted to use as a template. This saves me so much time each week because I don't have to measure everything out from scratch, I just use the template to trace the areas out and then I'm ready to give it a little decoration.

Template for Easy Weekly Planner Spreads by Jessica Mack of BrownPaperBunny

Step 2: Decorate Your Weekly Planner Spread

Now on to the really fun part, decorating! I want my weekly spreads to look pretty but in order to save time I choose a set of stickers, like these pretty floral ones from Archer and Olive, and then base my color theme around the stickers. The stickers do all the heavy lifting in making the page look nice, and I just fill in the rest with Dual Brush Pens in similar colors so the page has a cohesive look. Using the template and stickers means I can create a whole spread in under 10 minutes.

Template for Easy Weekly Planner Spreads by Jessica Mack of BrownPaperBunny

I'd love to see your planner spreads, show me by tagging @BrownPaperBunny on social media!

In Ink, Tutorial, Aug 2017
2 Comments
Watercolor Watermelons by Jessica Mack of BrownPaperBunny

Watercolor Watermelon

June 4, 2018

Please note: This blog post contains affiliate links, which help pay for the upkeep of this site. That being said, I will never, ever promote anything I am not 100% in love with!

----------

Today I want to show you how to create some watercolor-look watermelons that you can use on all sorts of fun summer projects! Here's what you'll need to get started.

Supplies:

  • Tombow Dual Brush Pens (Numbers 847, 245 and N15)
  • 140 lb Watercolor Paper
  • Paintbrush
  • Jar of Water
  • Scissors
  • String
Watercolor Watermelons by Jessica Mack of BrownPaperBunny

Project 1: Watermelon Wallpaper for Your Phone

The first step is to draw your watermelon shapes onto the watercolor paper. Using Tombow Dual Brush Pen number 847 (Crimson), draw half moon, full circle, or triangle pieces of watermelon, or a combination of different shapes. Next, go over the ink with your wet paintbrush so the ink blends together. Once that dries, draw the watermelon rind using Dual Brush Pen 245 (Sap Green), and wet the green ink with your paintbrush too. Once both colors are dry, draw watermelon seeds with Dual Brush Pen N15 (Black). Watch the video below to see each of the steps.

Once you've filled the page, snap a photo and turn your delicious little watermelons into a wallpaper (or background) for your phone, like the image below!

Watercolor Watermelons by Jessica Mack of BrownPaperBunny

Project 2: Watermelon Cards

Because watercolor paper is pretty thick you can cut cute little cards out of your finished watermelon drawings. Experiment with a variety of sizes for different effects. Your friends and family will love getting these refreshing cards in the mail!

Watercolor Watermelons by Jessica Mack of BrownPaperBunny

Project 3: Watermelon Banner

Cut around each of your watermelon shapes, punch holes in each side and you can thread them together to make a cute summer banner. I drew simple faces on these ones instead of watermelon seeds. These can add a fun addition to a summer BBQ or birthday party, or just string them up in your kitchen for a daily dose of cute.

Watercolor Watermelons by Jessica Mack of BrownPaperBunny

I'd love to see your watercolor watermelon projects! Share them with me on social media by tagging @BrownPaperBunny!

In Aug 2017, Free Downloads, Illustrations, Ink, Pattern, Tutorial, Watercolor
Comment
How to Make Watercolor Wedding Invitations by Jessica Mack of BrownPaperBunny

How to Make Watercolor Wedding Invitations

June 4, 2018

Please note: This blog post contains affiliate links, which help pay for the upkeep of this site. That being said, I will never, ever promote anything I am not 100% in love with!

----------

If your big day is coming up and you want to make your own watercolor wedding invitations (these work well for baby showers, engagement parties, and bridal showers too) then you're in luck! I often create custom wedding invitation artwork for brides but today I’m going to show you three watercolor-look invitations you can create yourself, with your Tombow Dual Brush Pens.

Supplies:

  • Smooth watercolor paper
  • A paintbrush
  • Jar of water
  • Tombow Dual Brush Pens in the colors of your wedding or event

Romantic Wedding Invitation

Start by drawing some flower and leaf shapes with your Dual Brush Pens then soften the edges with water and your paintbrush. Let it dry and repeat if you want a little extra color. Scan or photograph your artwork and add the text on your computer and voila, your invitations are ready for printing! Watch the time-lapse video below to see the steps sped up.

Feminine Wedding Invitation

To create these invitations start by adding some color to the corners of your watercolor paper, using Tombow Dual Brush Pens, then blend and soften the ink using water and a paintbrush. Once the paper is dry, draw some simple flowers using Tombow Mono Drawing Pens. Scan or photograph your artwork and add the event details on your computer.

How to Make Watercolor Wedding Invitations by Jessica Mack of BrownPaperBunny

Modern Invitation

This last wedding invitation is a little more subtle and modern. Start by coloring a one inch strip at the bottom of your 140 lb watercolor paper, using a Tombow Dual Brush Pen in your event color. Next, use a paintbrush and some water to wet the ink and drag the water up the paper (by going back and forth horizontally) until you have a gradient effect. Once the paper is dry take a photo or scan it and add the event details on your computer and you’re ready to print your invitations!

How to Make Watercolor Wedding Invitations by Jessica Mack of BrownPaperBunny

Of the three invitations I showed you today which was your favorite? If you know someone who is getting married, send them a link to this post!

In Aug 2017, Illustrations, Ink, Tutorial, Watercolor
7 Comments
50 Ways to Draw Your Ordinary Life by Jessica Mack of BrownPaperBunny

50 Ways to Draw

May 22, 2018

Please note: This blog post contains affiliate links, which help pay for the upkeep of this site. That being said, I will never, ever promote anything I am not 100% in love with!

----------

I was sent a review copy of 50 Ways to Draw Your Beautiful Ordinary Life by the creators of Flow Magazine and OMG it is beautiful!

There are step-by-step instructions for drawing adorable objects, along with a pull-out sketchbook, paper dolls, postcards and watercolor paper — basically I'm in heaven!

I've been having so much fun sketching the things around me, as well as working through the book to draw some of the objects they have in there. 

I'd definitely recommend checking it out! 

In Aug 2017, Illustrations, Ink, Product Reviews, Sketchbook, Watercolor
Comment
52 Quote Challenge by Jessica Mack of BrownPaperBunny

52 Quote Challenge

May 22, 2018

I decided I didn't already have enough going on right now ;) so this year I'm participating in Smitha Katti's 52 Quote Challenge. We use a list of quotes she put together and do one a week through 2018. I'm carrying my little sketchbook around with me and working in it when I have a few moments, and photographing each layout on my walks around Seattle. There are so many beautiful trees and flowers blossoming everywhere still, so I've had plenty of pretty backdrops to choose from! 

Here are a few of the quotes I've completed so far.

A post shared by Jessica 🎨 Seattle Artist (@brownpaperbunny) on Apr 2, 2018 at 9:37pm PDT

A post shared by Jessica 🎨 Seattle Artist (@brownpaperbunny) on Apr 6, 2018 at 6:16am PDT

A post shared by Jessica 🎨 Seattle Artist (@brownpaperbunny) on Apr 12, 2018 at 7:59am PDT

A post shared by Jessica 🎨 Seattle Artist (@brownpaperbunny) on Apr 16, 2018 at 4:43pm PDT

A post shared by Jessica 🎨 Seattle Artist (@brownpaperbunny) on Apr 27, 2018 at 7:08am PDT

A post shared by Jessica 🎨 Seattle Artist (@brownpaperbunny) on May 13, 2018 at 6:41pm PDT

52 Quote Challenge by Jessica Mack of BrownPaperBunny

Do you ever do hand lettering as part of your artwork?

In Aug 2017, Ink, Sketchbook, Type
14 Comments
Watercolor and Ink Illustrated Map by Jessica Mack from BrownPaperBunny

The Art of Map Illustration

May 14, 2018

Please note: This blog post contains affiliate links, which help pay for the upkeep of this site. That being said, I will never, ever promote anything I am not 100% in love with!

----------

I've been in love with maps since I was a little girl, and while I might still have trouble navigating with them, they spark my wanderlust and make me dream of far away places and adventures yet to be had.

I was recently given a review copy of The Art of Map Illustration: A Step-By-Step Artistic Exploration of Contemporary Cartography and Mapmaking by James Gulliver Hancock, Hennie Haworth, Stuart Hill and Sarah King and I have been having SO much fun working my way through it. There are over 75 examples of beautifully illustrated maps, along with all the techniques, tricks, and tips you need to create your own! 

Watercolor and Ink Illustrated Map by Jessica Mack from BrownPaperBunny

For my first illustrated map I'm drawing the downtown Edmonds city center. We've recently moved to the Seattle area and I've fallen in love with Edmonds. It has views of The Puget Sound, the Olympic Mountains, and is filled with the cutest little cafes, restaurants, bookstores, galleries and art shops you'll ever find! This is a work in progress (I plan to add a lot more of my favorite shops) but here's what I've done so far. I've got the Edmonds Ferry, Art Spot, Salt & Iron restaurant and the little water fountain in the center of town.

Watercolor and Ink Illustrated Map by Jessica Mack from BrownPaperBunny

Have you ever drawn your own map? Leave me a comment and let me know!

In Aug 2017, Illustrations, Ink, Product Reviews, Watercolor
10 Comments
How to Make Your Own Art Journal by Jessica Mack of BrownPaperBunny

How to Make Your Own Art Journal

May 1, 2018

Please note: This blog post contains affiliate links, which help pay for the upkeep of this site. That being said, I will never, ever promote anything I am not 100% in love with!

----------

This week I'm going to show you how to create your own mini art journal from scratch. There are lots of reasons to make your own journal: you get exactly the size, number of pages, and type of paper you want. Plus the book itself can be a work of art, and can save you some money too! I was inspired by my fellow design teammate Katie Smith, who makes beautiful hand-bound art journals AND is a big fan of Bob Ross!

Here's what you'll need to get started...

Supplies:

  • Paper (I'm using 140 lb watercolor paper but you can use any paper you like)
  • Cardboard for the cover
  • Large needle
  • Strong nylon thread
  • Bone folder
  • Ruler
  • Pencil
  • Scissors

Supplies to decorate your journal: (I used the following Tombow products, but you can use whatever you like)

  • MONO Drawing Pens
  • Dual Brush Pens
  • MONO Aqua Liquid Glue
  • Irojiten Colored Pencils
  • MONO Permanent + Adhesive
  • MONO Air Correction Tape
How to Make Your Own Art Journal by Jessica Mack of BrownPaperBunny

Step 1: Prepare Your Art Journal Pages

The first step is to cut your paper and journal cover to the size you want (if they aren't already), then you're going to score a line down the middle of each page and the cover using your ruler and bone folder. This helps the paper fold neatly and evenly, especially if you're using thick watercolor paper or cardboard. If you don't have a bone folder you can use anything pointy but not sharp (the back of a butter knife for example).

Along the center of one of your pages measure out where you're going to put your five holes, starting with the middle hole and working outwards. You could put more holes if you're making a large book, just make sure you always use an odd number.

If your paper is thick you'll want to pre punch the holes using a bookbinders awl, a large needle, or even a metal kitchen skewer. Punch the holes on one page then use it as a template for the rest. Stack all of your prepared pages together inside the cover and you're ready for Step 2!

How to Make Your Own Art Journal by Jessica Mack of BrownPaperBunny

Step 2: Stitch Your Pages Together

To stitch your pages together using a saddle stitch, thread your needle but don't tie a knot in the end. Start on the inside of your art journal pushing the needle through the center hole. Leave yourself a thread 'tail' about three inches long. You can either go left or right but sew your way through all of the holes until you get to one of the edges, then turn around and sew through the holes to the opposite edge.

Once you get to the second edge, sew your way back until your needle and your tail are on the inside of your art journal.

Tie the two ends together with a secure knot and trim the ends off. Here's a quick video showing all of the steps.

Step 3: Decorate Your Art Journal

Now that your journal is sewn together you're ready to decorate it. Taking my inspiration from Katie, I filled my journal with lots of color, and quotes from Bob Ross. You could use your journal for anything: drawing your dreams, everything you ate that day, things you see on a walk, lists of your favorite things, a book of maps, poems, pictures of cats...the list is endless!

On a lot of the pages I created a background using Dual Brush Pens and a wet paintbrush, then used collage and MONO Drawing Pens over the top. The video below shows a time-lapse of some of my pages coming together, and you can see all of the finished pages at the end.

I'd love to see some of your art journal pages, tag @BrownPaperBunny on social media so I can take a look! And in the comments tell me your favorite thing to journal about!

How to Make Your Own Art Journal by Jessica Mack of BrownPaperBunny
In Aug 2017, Ink, Sketchbook, Tutorial, Watercolor
13 Comments
How to Draw an Anemone Flower by Jessica Mack from BrownPaperBunny

How To Draw An Anemone Flower

April 19, 2018

Please note: This blog post contains affiliate links, which help pay for the upkeep of this site. That being said, I will never, ever promote anything I am not 100% in love with!

----------

With Earth Day coming up I thought I’d show you how to draw one of my favorite flowers, the anemone. They’re super simple to draw, come in a rainbow of colors and look great on cards, in your planner, or as wall art!

Here’s what you’ll need to get started.

Supplies:

  • Pencil (My favorite is the Tombow MONO Drawing Pencil)

  • Tombow MONO Knock Eraser

  • Tombow Dual Brush Pens

  • Paper (I’m using Strathmore Heavyweight Mixed Media paper)

  • Tombow Blending Palette

  • Paintbrush

  • Tombow MONO Drawing Pen (optional: for line work)

How to Draw an Anemone Flower by Jessica Mack from BrownPaperBunny

Step 1: Drawing the Anemone Shape

There are really only four simple steps for drawing an anemone flower. Start with a circle, then leaving a gap, draw small oval shapes and connect them to the center circle with thin lines. This will be the flower’s stamen. Next work your way around the center, drawing the petals. It helps to move the paper as you go, so the petal you’re drawing is always right in front of you. Don’t worry if the shapes are a little wonky, real flower petals are never exactly the same!

I’m drawing mine in ink so you can see the lines, but I recommend drawing your initial flower shape using light pencil lines.

How to Draw an Anemone Flower by Jessica Mack from BrownPaperBunny

Step 2: Adding Color to Your Anemone

I love using the Tombow Dual Brush Pens as watercolor, especially when adding color to flowers. A great way to do this is by using the Blending Palette. Draw some ink directly onto the blending palette then use a wet paintbrush to transfer the ink to your paper.

Anemones come in so many different colors that you can really have fun with this step. Try creating a rainbow bouquet, or perhaps a line of them in different shades of the same color.

How to Draw an Anemone Flower by Jessica Mack from BrownPaperBunny

If you use anemones in your own project I'd love to see! Tag @BrownPaperBunny on social media.

In Aug 2017, Illustrations, Ink, Tutorial, Watercolor
16 Comments
100 Days of Flowers and Faces by Jessica Mack of BrownPaperBunny

The 100 Day Project 2018

April 19, 2018

The 100 Day Project is designed to make creativity a habit. The theory is that if you can do something for 100 straight days it will be easier to keep doing it after that. So each April, hundreds of thousands of artists, photographers, and other creatives pick a theme or project for themselves and start creating. 

For 2018 my project is 100 Days of Flowers and Faces (because I couldn't choose between the two). I'm creating them in all manner of styles and using lots of different media from acrylic paint to markers, colored pencils, and collage. 

Here is my progress so far: 

Day 1

A post shared by Jessica 🎨 Seattle Artist (@brownpaperbunny) on Apr 3, 2018 at 5:10am PDT

Day 2

A post shared by Jessica 🎨 Seattle Artist (@brownpaperbunny) on Apr 4, 2018 at 6:48am PDT

Day 3

A post shared by Jessica 🎨 Seattle Artist (@brownpaperbunny) on Apr 5, 2018 at 8:04am PDT

Day 4

Does art imitate life or does life imitate art? Either way, these colors are blooming with possibility. Day 4 of #100DaysofFlowersandFaces for #the100dayproject pic.twitter.com/OD5afkQDFQ

— Jessica Mack (@BrownPaperBunny) April 6, 2018

Day 5

A post shared by Jessica 🎨 Seattle Artist (@brownpaperbunny) on Apr 7, 2018 at 6:01pm PDT

Day 6

A post shared by Jessica 🎨 Seattle Artist (@brownpaperbunny) on Apr 8, 2018 at 6:58pm PDT

Day 7

A post shared by Jessica 🎨 Seattle Artist (@brownpaperbunny) on Apr 9, 2018 at 5:25pm PDT

Day 8

A post shared by Jessica 🎨 Seattle Artist (@brownpaperbunny) on Apr 10, 2018 at 7:46am PDT

Day 9

A post shared by Jessica 🎨 Seattle Artist (@brownpaperbunny) on Apr 11, 2018 at 6:49am PDT

Day 10

Day 10/100 of #100DaysofFlowersAndFaces — not everything works out quite how you picture it in your head. But I figure failed experiments are still useful. #the100dayproject #watercolor pic.twitter.com/A0Xr3OTrOQ

— Jessica Mack (@BrownPaperBunny) April 13, 2018

Day 11

A post shared by Jessica 🎨 Seattle Artist (@brownpaperbunny) on Apr 13, 2018 at 6:57am PDT

Day 12

A post shared by Jessica 🎨 Seattle Artist (@brownpaperbunny) on Apr 14, 2018 at 6:11pm PDT

Day 13

A post shared by Jessica 🎨 Seattle Artist (@brownpaperbunny) on Apr 15, 2018 at 8:53pm PDT

Day 14

A post shared by Jessica 🎨 Seattle Artist (@brownpaperbunny) on Apr 16, 2018 at 4:43pm PDT

Day 15

A post shared by Jessica 🎨 Seattle Artist (@brownpaperbunny) on Apr 17, 2018 at 7:56am PDT

Day 16

I forgot to post Day 16/100 of #100DaysOfFlowersAndFaces you can follow my Anemone drawing tutorial over on the @tombowusa blog: https://t.co/JpxWstBqkZ #the100dayproject pic.twitter.com/SnFeclK1T4

— Jessica Mack (@BrownPaperBunny) April 19, 2018

Day 17

A post shared by Jessica 🎨 Seattle Artist (@brownpaperbunny) on Apr 19, 2018 at 6:50am PDT

Leave me a comment and let me know if you're doing The 100 Day Project this year, and if you are, what you theme or project is! 

In Aug 2017, Fashion Illustration, Illustrations, Ink, Portraits, Sketchbook, Watercolor
14 Comments
Watercolor easter eggs using Tombow Dual Brush Pens by Jessica Mack of BrownPaperBunny

3 Watercolor-Look Easter Egg Decorating Techniques

March 19, 2018

Please note: This blog post contains affiliate links, which help pay for the upkeep of this site. That being said, I will never, ever promote anything I am not 100% in love with!

----------

Hello! I'm a little obsessed with pastels, as we approach Easter, so I'm going to show you three watercolor-look easter egg decorating techniques using your Tombow Dual Brush Pens! Each technique is super easy and loads of fun!

Here's what you'll need to get started:

Supplies

  • Tombow Dual Brush Pens (Pastel 10-Pack)
  • Eggs (white ones will work best)
  • Water
  • Paintbrush
  • Tombow Blending Palette
  • Egg carton
Watercolor easter eggs using Tombow Dual Brush Pens by Jessica Mack of BrownPaperBunny

Technique 1: Watercolor Streaks

For this first technique start by adding some ink from the Dual Brush Pen to your Blending Palette, then use a wet paintbrush to transfer the ink from the palette to your egg. Use lots of water and let the ink drip down the egg. This is where the egg carton comes in handy, to help you decorate one side at a time without getting your fingers too messy. Start with the lightest colors first, letting them dry a little before adding the next color.

Watercolor easter eggs using Tombow Dual Brush Pens by Jessica Mack of BrownPaperBunny

Technique 2: Drawing Directly on the Eggs

This one is super easy! You're going to use your Dual Brush Pens to draw directly onto the eggs. Pick an easy-to-replicate shape like a flower or polka dots and repeat all over each egg. The trick to giving them a watercolor look is to start with the lightest colors first and make sure you overlap the shapes slightly so you get some color blending and transparency like you would with watercolor paint.

Watercolor easter eggs using Tombow Dual Brush Pens by Jessica Mack of BrownPaperBunny

Technique 3: Wetting the Eggs

The last technique involves drawing directly onto the eggs like you did in technique 2, but this time we're going to use a wet paintbrush to blend the ink directly on the egg for a more watery look. Super easy!

Watercolor easter eggs using Tombow Dual Brush Pens by Jessica Mack of BrownPaperBunny

If you make some eggs of your own I'd love to see them! Tag @BrownPaperBunny on social media.

**Please note: Do not eat these eggs after decorating them. These are for decorative purposes only.

In Aug 2017, Ink, Tutorial, Watercolor
Comment
Easy Ways to Create Mail Art by Jessica Mack of BrownPaperBunny

3 Mail Art Techniques

March 4, 2018

Please note: This blog post contains affiliate links, which help pay for the upkeep of this site. That being said, I will never, ever promote anything I am not 100% in love with!

----------

One of my favorite creative hobbies is mail art, AND one of my 2018 resolutions is to send more snail mail, so I’m going to walk you through three easy-to-create types of mail art.

The first technique is decorating the envelope with patterns or doodles. You’ll need some blank envelopes, Tombow MONO Drawing Pens, Dual Brush Pens, a ruler, MONO Eraser and pencil (if you’re like me and have trouble writing in a straight line without guides). 

Easy Ways to Create Mail Art by Jessica Mack of BrownPaperBunny

This technique focuses more on fun lettering and a little less on envelope decoration (although you could always combine the two for that extra WOW factor). Make the name of the recipient really stand out and have some fun with your lettering! Just make sure the address is still legible. The supplies you’ll need are blank envelopes, your Tombow Dual Brush Pens, MONO Drawing Pens, pencil, eraser, and a ruler.

Easy Ways to Create Mail Art by Jessica Mack of BrownPaperBunny

And now for my all-time favorite mail art technique. This one has the name and address of the recipient inside a drawing. This fun balloon design would be great with a birthday card, and click through on the Instagram post below to see how to use the Tombow Dual Brush Pens to create a watercolor-look umbrella design. For this technique you’ll need thick envelopes, a paint-brush, jar of water, Tombow Blending Palette, MONO Drawing Pens, pencil, eraser, and of course Dual Brush Pens in your favorite colors. Will you be creating any mail art in 2018?

Easy Ways to Create Mail Art by Jessica Mack of BrownPaperBunny

A post shared by Jessica 🎨 Fashion Illustration (@brownpaperbunny) on Jan 29, 2018 at 7:31pm PST

In Aug 2017, Illustrations, Ink, Tutorial, Type, Watercolor
21 Comments
← Newer Posts Older Posts →

Subscribe

Sign up to receive social media tips, freebies, special promotions, and art tutorials!

Thank you!

Please click confirm in the email you were just sent!

Directory of Illustration Jessica Mack

Shop my work on Society6

Watercolor World Map by Jessica Mack of BrownPaperBunny

Follow on Instagram

For the 100 Days Project this year I’m keeping it super low pressure. I’ve got a very busy couple of months coming up and want to set myself up to be able to stick with it, while still making sure I do something creative every day. You ca

See my classes on Skillshare

Skillshare Classes by Jessica Mack

Popular Posts

Popular Posts
CRL-Horizontal-Laptop-Beige-Floral-Painting.jpg
Creative Retreat Live
Rainbow-Watercolor-Wreath-Using-Markers.JPG
Rainbow Wreath Tutorial
15 Ways to Journal by Jessica on BrownPaperBunny
15 Ways to Journal
Tombow Brush Pen Markers and Colored Pencils
Brown Paper Bunny

Privacy + Terms of Use

Shop

Watercolor with Markers Book

Classes

Art Tutorials

Art & Illustration Portfolio

About

Contact

Custom Book Print

Custom Book Mug

How to Paint Watercolor Flowers Using Markers

Free Fashion Croquis

Start an Art Journal

6 Easy Flowers to Draw with Tombow Markers

Make Your Own Watercolor Bookmarks