• Book
    • Watercolor with Brush Pens
    • Watercolor Flowers Using Markers
    • Paint a Watercolor Galaxy Butterfly with Markers
    • Paint Watercolor Galaxy Bookmarks using Markers
    • Timelapse Video for Artists
  • Shop
  • Society6 Store
  • Blog
  • Portfolio
  • About
  • Contact
Menu

Brown Paper Bunny Studio

Art & Fashion Illustration
  • Book
  • Classes
    • Watercolor with Brush Pens
    • Watercolor Flowers Using Markers
    • Paint a Watercolor Galaxy Butterfly with Markers
    • Paint Watercolor Galaxy Bookmarks using Markers
    • Timelapse Video for Artists
  • Shop
  • Society6 Store
  • Blog
  • Portfolio
  • About
  • Contact
DIY Happy Mail with Mixbook and Tombow by Jessica Mack of BrownPaperBunny

DIY Happy Mail with Mixbook and Tombow

October 19, 2018

Please note: This blog post contains affiliate links, which help pay for the upkeep of this site. That being said, I will never, ever promote anything I am not 100% in love with!

----------

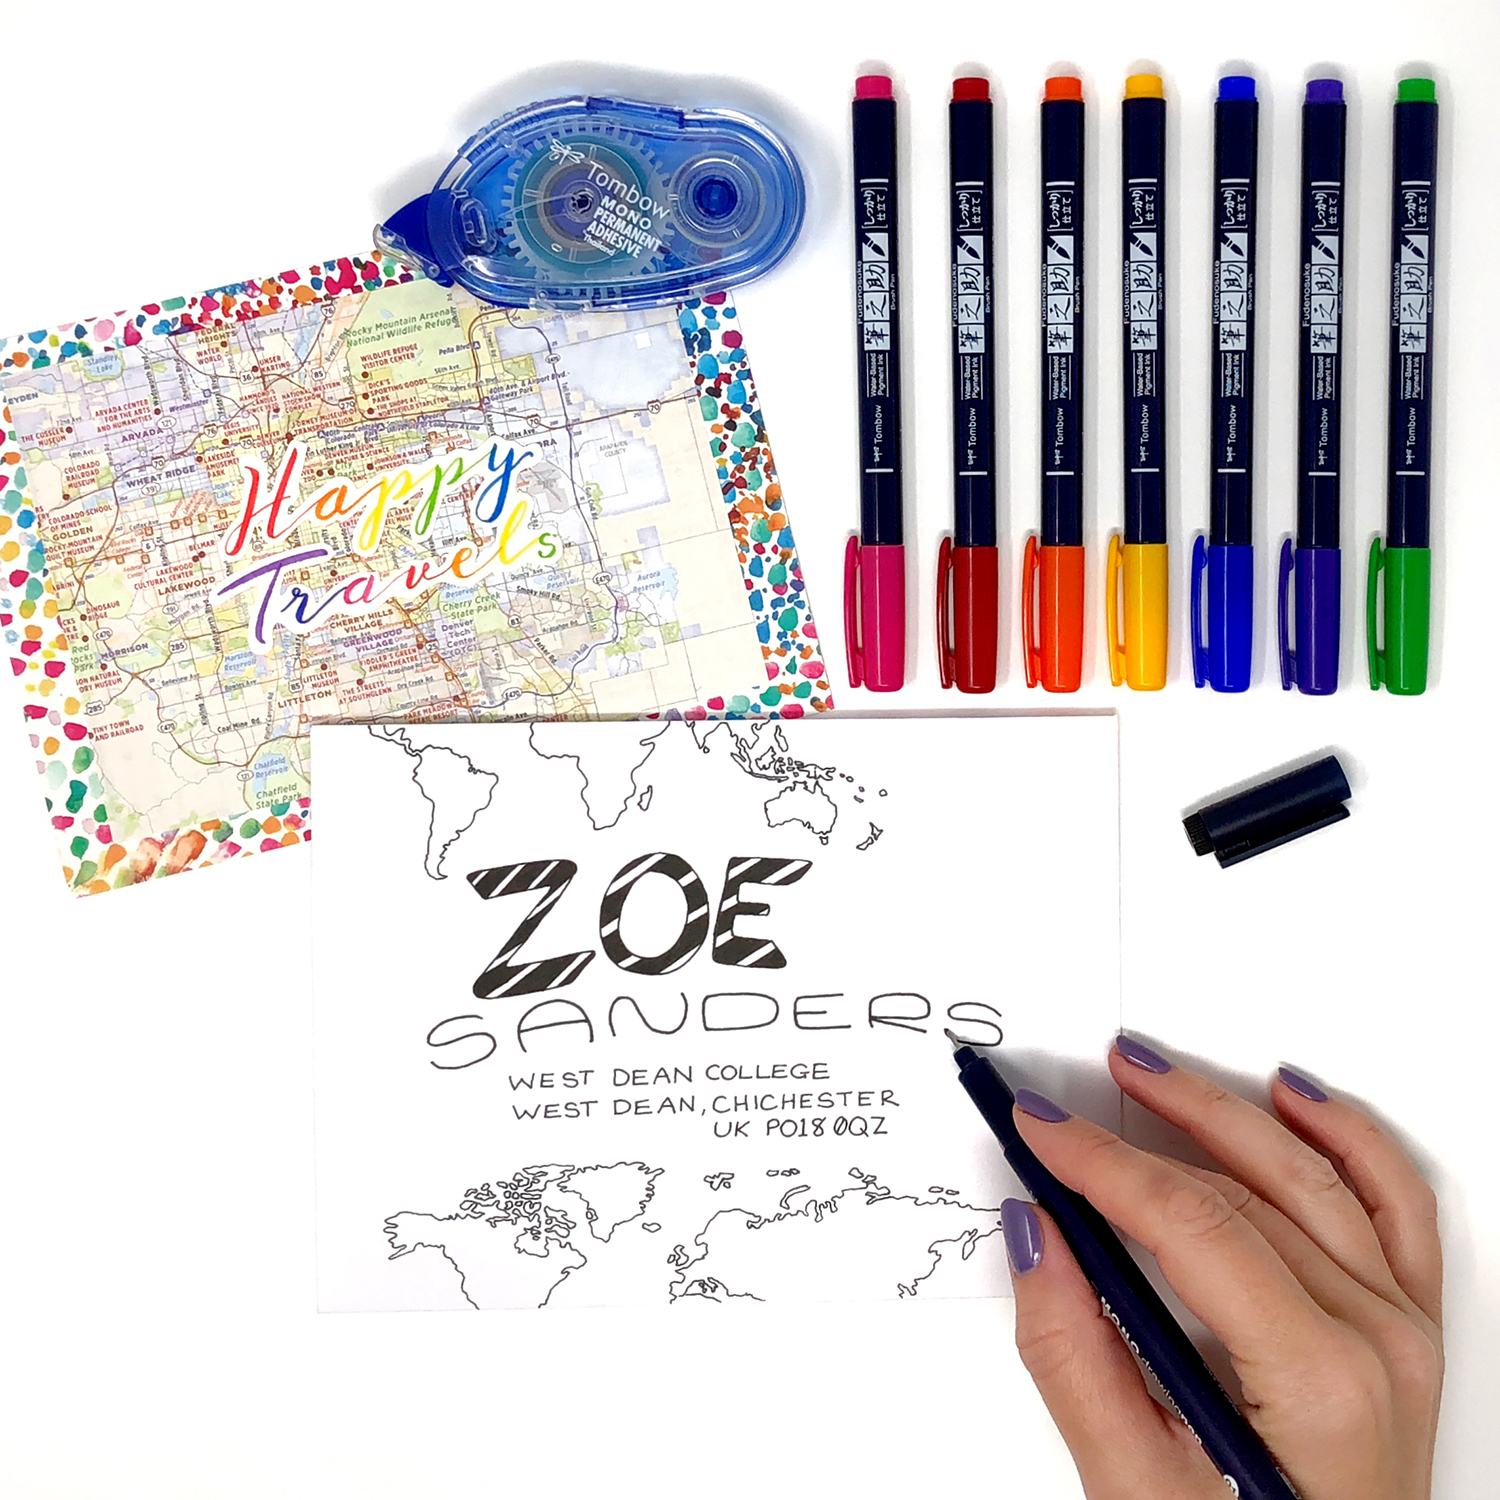
Hello hello! This week I’m going to show you how to make some fun travel-themed happy mail with Mixbook and Tombow supplies. I think the world would be a happier place in general if we all sent a little more snail mail to each other!
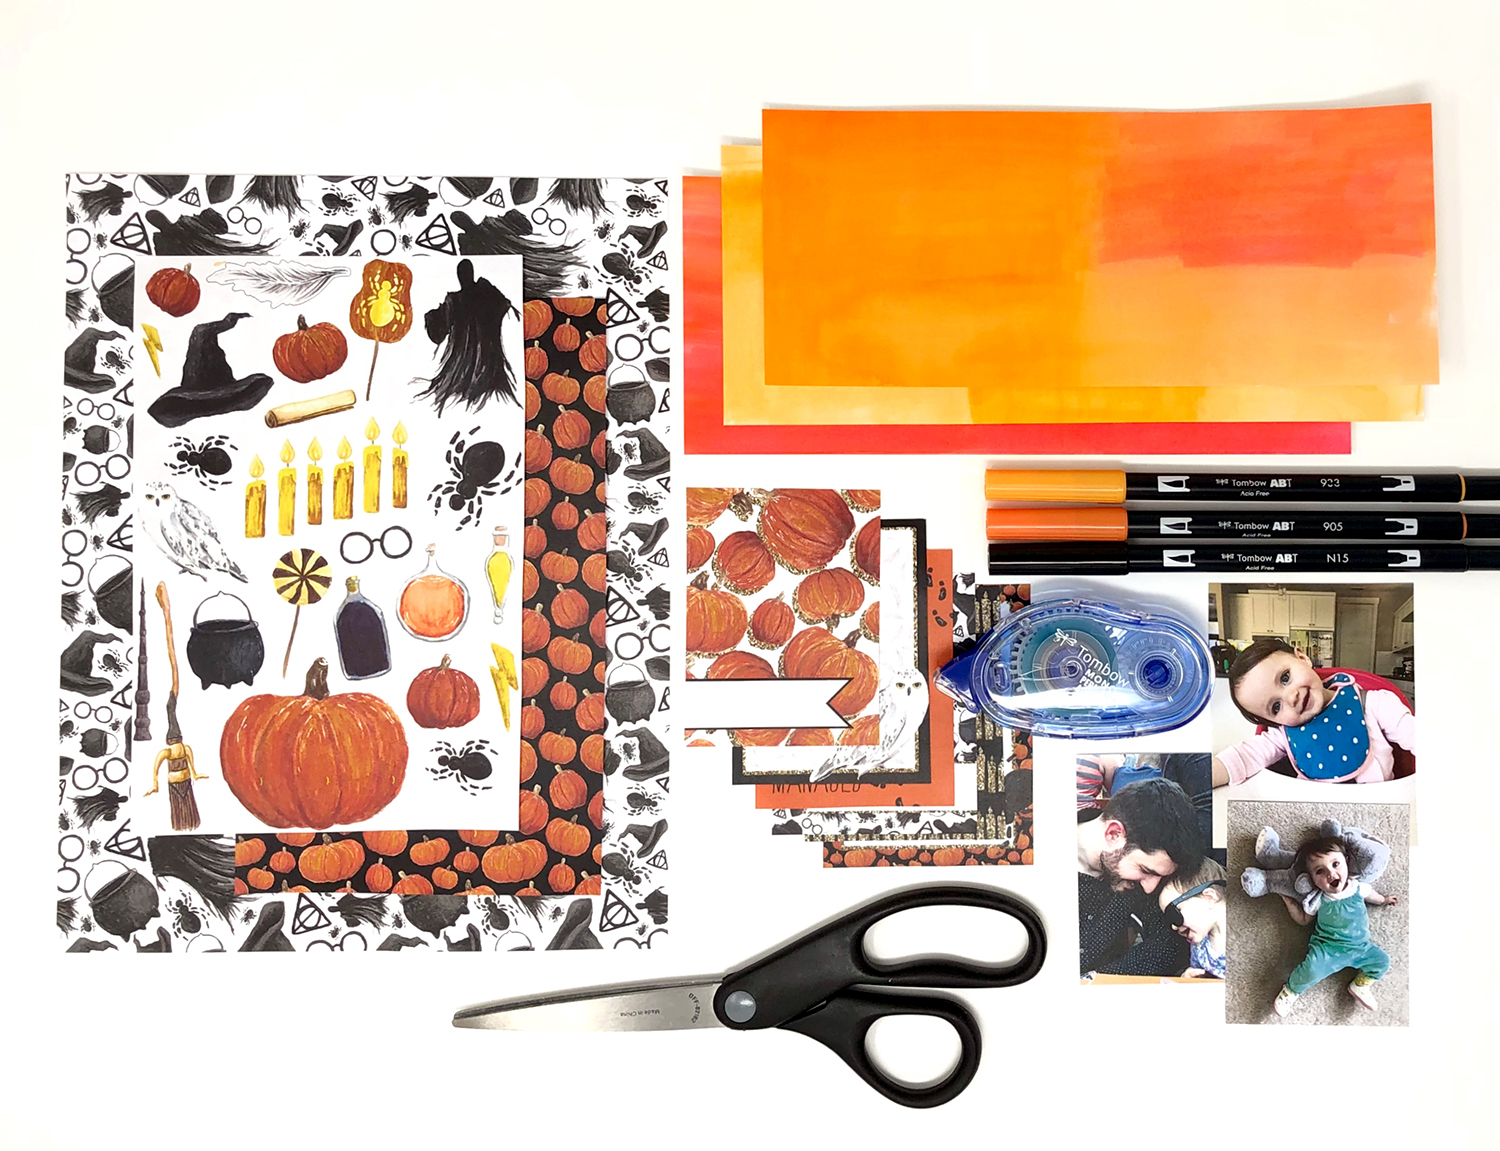
Supplies:

  • Tombow Fudenosuke Color Brush Pens

  • Mixbook Invitation Cards

  • Tombow Mono Drawing Pen

  • Map or travel photo

  • Tombow Mono Adhesive + Permanent

  • Plain paper

  • Scissors

DIY Happy Mail with Mixbook and Tombow by Jessica Mack of BrownPaperBunny

Step 1: Write Your Greeting

Use your colored Fudenosuke brush pens to write your greeting onto a separate piece of paper. Have some fun with the colors and try some different writing styles!

DIY Happy Mail with Mixbook and Tombow by Jessica Mack of BrownPaperBunny

Step 2: Cut Everything Out

Cut out your greeting, and trim down your map or travel photos so they fit just inside the border of your Mixbook invitation cards.

Step 3: Stick the Pieces Together

Using your Mono Permanent + Adhesive stick your map or photos to the card, then layer your greeting on top. Use your Fudenosuke brush pens to add some fun details or finishing touches then write on the back with your Mono Drawing Pen and your DIY Mixboook happy mail is ready to be sent!

DIY Happy Mail with Mixbook and Tombow by Jessica Mack of BrownPaperBunny

To put a little extra sparkle in your recipient's day why not decorate the envelope as well. Use your Fudenosuke or Mono Drawing Pens to continue the travel theme on the outside.

I’d love to see your happy mail, tag @BrownPaperBunny on social media so I can take a look!

In Tutorial, Type, Ink, Aug 2017
2 Comments
Make a Folding Halloween Card with Jessica Mack of BrownPaperBunny

Make a Folding Halloween Card

October 12, 2018

Please note: This blog post contains affiliate links, which help pay for the upkeep of this site. That being said, I will never, ever promote anything I am not 100% in love with!

----------

This week I’m going to show you how to make this cute folding Halloween card, perfect for sending to the grandparents! To start, gather your supplies and then read through the steps below!

Supplies:

  • Scary Harry Halloween paper from PopFizz Paper

  • Tombow Dual Brush Pens

  • Card or watercolor paper

  • Tombow Mono Permanent Adhesive

  • Scissors

  • Photos 

Make a Folding Halloween Card with Jessica Mack of BrownPaperBunny

Step 1: Cut Everything Out

First, cut out your photos and decorative elements like spiders, pumpkins, and lightning bolts. Next, glue your strips of card together to make one long strip, and fold it into even sections, working backward and forwards so you get a concertina effect. Color your card using Dual Brush Pens, leave it white or use card that is already colored. 

Make a Folding Halloween Card with Jessica Mack of BrownPaperBunny

Step 2: Stick Everything Down

Move your cut-out elements around until you're happy with the placement of them, then use your Mono Adhesive Permanent roller to stick everything to the card backing. Add on some decorative elements, maybe a spider or two, a hat, or wand. Create a few finishing touches with your Dual Brush Pen and you're ready to send your cute, folding Halloween card!

Make a Folding Halloween Card with Jessica Mack of BrownPaperBunny

I’d love to see your finished card, tag @BrownPaperBunny on social media! And let me know in the comments if you dress up for Halloween!

In Tutorial, Aug 2017
9 Comments
How to Draw a Witch by Jessica Mack of BrownPaperBunny

How to Draw a Witch

October 1, 2018

Please note: This blog post contains affiliate links, which help pay for the upkeep of this site. That being said, I will never, ever promote anything I am not 100% in love with!

----------

I hate when people tell themselves that they can’t draw. I hear it WAY too often!

So I’m here to tell you that it’s really just breaking objects down into shapes and lines, and today I’m going to show you how to draw a cute little witch so you can make your own Halloween cards!

Here’s what you’ll need to get started.

Supplies:

  • Tombow Dual Brush Pens

  • Scissors

  • Thick card or watercolor paper (I’m using Strathmore Bristol)

How to Draw a Witch by Jessica Mack of BrownPaperBunny

Step 1: Draw Your Shapes

To draw your cute little witch start with a circle for her head, a Hershey's Kiss shaped body, and little sausage-shaped arms and legs.

Draw a line for the broomstick and a rounded rectangle for the broom bristles.

Step 2: Add Details

Once you’re happy with the basic shapes starting adding some details. Give her a face, hair and clothes.

How to Draw a Witch by Jessica Mack of BrownPaperBunny

Step 3: Add Color

The last step is to color your cute little witch, using your Dual Brush Pens. Add a darker shade anywhere there might be a shadow (under her arm, the brim of her hat etc). Once the ink is dry, cut her out and you’ve got a fun Halloween card! For an extra special touch make your own matching envelopes.

How to Draw a Witch by Jessica Mack of BrownPaperBunny

If you make some of your own I’d love to see! Tag @BrownPaperBunny on social media.

In Ink, Aug 2017, Tutorial
6 Comments
Make a Halloween Candy Card with Jessica Mack of BrownPaperBunny

Make a Halloween Candy Card

September 28, 2018

Please note: This blog post contains affiliate links, which help pay for the upkeep of this site. That being said, I will never, ever promote anything I am not 100% in love with!

----------

Today I’m going to show you how to make these deliciously simple Halloween candy cards. These tasty greetings are great for work colleagues, friends or family. Here's what you'll need to get started.

Supplies:

  • Tombow Dual Brush Pens

  • Strathmore Bristol or other cardstock

  • Tombow Mono Drawing Pen

  • Scissors

  • Tombow Mono Permanent Adhesive 

  • Individually-Wrapped Halloween Candy 

Make a Halloween Candy Card with Jessica Mack of BrownPaperBunny

Step 1: Draw a Cauldron

Using your Tombow Dual Brush Pens, draw a cauldron and some bubbles onto the right-hand side of your card. Try spooky Halloween colors like purples or oranges!

Make a Halloween Candy Card with Jessica Mack of BrownPaperBunny

Step 2: Cut Out The Cauldron

The next step is to carefully cut out the center of your cauldron, this way the candy will show through to the front once the card is finished. 

Make a Halloween Candy Card with Jessica Mack of BrownPaperBunny

Step 3: Add Detail

Use your Mono Drawing Pen to add lines around the bubbles and give them a little more definition.

Make a Halloween Candy Card with Jessica Mack of BrownPaperBunny

Step 4: Color The Background

Using your Dual Brush Pens again color the background of your Halloween candy card. If you want to leave the front of the card white you can skip this step.

Make a Halloween Candy Card with Jessica Mack of BrownPaperBunny

Step 5: Stick On Your Candy

Now fold your card in half, then use the cutout section on the front of your card to draw a cauldron outline on the inside of the card. Next, use your Mono Permanent Adhesive to cover the cauldron shape and stick down your Halloween candy.

Make a Halloween Candy Card with Jessica Mack of BrownPaperBunny

Voila, you're finished! It's time to hand out your delicious Halloween candy cards, who will you give yours to?

Make a Halloween Candy Card with Jessica Mack of BrownPaperBunny

I’d love to see how your Halloween candy cards came out, so tag @BrownPaperBunny on social media!

In Ink, Tutorial, Aug 2017
Comment
Make Fall Leaf Place Cards with Jessica Mack of BrownPaperBunny

Make Fall Leaf Place Cards

September 21, 2018

Please note: This blog post contains affiliate links, which help pay for the upkeep of this site. That being said, I will never, ever promote anything I am not 100% in love with!

----------

Fall is the perfect season to host lots of cozy dinner parties, so today I’m going to show you how to make some fun fall-themed place cards.  But first, you'll need to gather a few supplies. 

Supplies:

  • A pencil

  • Watercolor paper

  • Tombow Dual Brush Pens

  • Tombow Mono Drawing Pens

  • A paintbrush

  • Scissors

To create your fall-themed place cards start by using your pencil to draw a mason jar and some leaf shapes onto your watercolor paper.

Make Fall Leaf Place Cards with Jessica Mack of BrownPaperBunny

Next, color in your leaves with Dual Brush Pens, and use a wet paintbrush over the ink to get a watercolor effect. Once they are dry you can add lines and detail with your Mono Drawing pens, then cut everything out. Check out the time-lapse video below to see each step, sped up.

To finish off your place cards write your guest's name on the jar and fall-themed questions on the back of each leaf as conversation starters, then make a slit in the top of your mason jar, and arrange the leaves in the top.

Make Fall Leaf Place Cards with Jessica Mack of BrownPaperBunny

The cards look great laid on top of a plate or held up in a place-card holder.

What’s your favorite fall dish to have at a dinner party or pot-luck? 

In Aug 2017, Ink, Tutorial, Watercolor
6 Comments
Create a Floral Self-Portrait with Jessica Mack of BrownPaperBunny

Create a Floral Self-Portrait

September 15, 2018

Please note: This blog post contains affiliate links, which help pay for the upkeep of this site. That being said, I will never, ever promote anything I am not 100% in love with!

----------

Hello hello! Today I'm going to show you how to create an easy floral self-portrait. You could make one for all the members of your family and hang them on the wall together!

Here are the supplies you'll need to get started.

Supplies:

  • Tombow Dual Brush Pens
  • Watercolor Paper
  • Tombow Mono Drawing Pen
  • Pencil
  • Paintbrush
Create a Floral Self-Portrait with Jessica Mack of BrownPaperBunny

Step One: Draw Your Silhouette

An easy way to capture your profile silhouette is to sit near a wall with a lamp on your other side and have a friend or family member trace your shadow onto the paper. Once your silhouette has been captured you can go over it with Mono Drawing Pen to make it stand out.

Create a Floral Self-Portrait with Jessica Mack of BrownPaperBunny

Step Two: Fill Your Silhouette with Loose Floral Shapes

Using your Dual Brush Pens fill your silhouette with loose florals. Then, with your wet paintbrush, go over the ink to give it a soft watercolor effect. 

Create a Floral Self-Portrait with Jessica Mack of BrownPaperBunny

You can leave some white space, or fill everything in completely.

Create a Floral Self-Portrait with Jessica Mack of BrownPaperBunny

Step Three: Outline Your Flowers

This step is optional, but if you want to add a little more definition to your flower shapes, use your Mono Drawing Pen to add in some lines and details. 

Create a Floral Self-Portrait with Jessica Mack of BrownPaperBunny

Voila, you're ready to frame your self-portrait and hang it on the wall! And if flowers aren't your thing, you could fill your silhouette with patterns, fruit, or anything else that feels like you! If you really like tennis, fill it with tennis rackets and balls. Maybe books are more your thing, you could fill it with all your favorite titles. Tell me in the comments what you'd fill yours with!

I'd love to see your finished self-portrait, so share it on social media and tag @BrownPaperBunny!

In Portraits, Ink, Illustrations, Aug 2017, Tutorial, Watercolor
10 Comments
Make a Book Quote Wall Hanging with Jessica Mack of BrownPaperBunny

Make a Book Quote Wall Hanging

September 8, 2018

Please note: This blog post contains affiliate links, which help pay for the upkeep of this site. That being said, I will never, ever promote anything I am not 100% in love with!

----------

This week I am all about literature, so I’m going to show you an easy way to turn your favorite book quote into a wall hanging.

Supplies:

  • Tombow Dual Brush Pens
  • A page of text from the book (typed or handwritten)
  • Tombow Mono Drawing Pen
  • Pencil
  • A cute frame

The first step in creating your literature-inspired wall hanging is to letter your favorite quote onto your page of text. Using a separate sheet of paper I got my lettering just how I wanted then used a light-box to trace it onto my page filled with text.

Make a Book Quote Wall Hanging with Jessica Mack of BrownPaperBunny

Once your text is dry repeat the quote in a darker shade, and offset it slightly. This will create a fun drop shadow effect.

Make a Book Quote Wall Hanging with Jessica Mack of BrownPaperBunny

Once it is dry you can outline the words with your Mono Drawing Pen for extra impact. Then it’s time to frame it and hang it on the wall. I used a cute magnetic frame for mine.

Make a Book Quote Wall Hanging with Jessica Mack of BrownPaperBunny

What's your all-time favorite book? Let me know in the comments!


In Ink, Aug 2017, Tutorial, Type
9 Comments
Art Journaling with the Tombow XL Blending Palette by Jessica Mack of BrownPaperBunny

Art Journaling with the Tombow XL Blending Palette

September 1, 2018

Please note: This blog post contains affiliate links, which help pay for the upkeep of this site. That being said, I will never, ever promote anything I am not 100% in love with!

----------

Hello hello, today I'm going to show you a fun way to do some art journaling with the new Tombow XL Blending Palette! The new extra large size means you can color an entire journal page with a watercolor effect quickly and easily, so we're going to turn three pages into one (because why not). Here's what you'll need to get started.

Supplies:

  • Tombow XL Blending Palette

  • Your Art Journal (preferably one with thick pages to hold water without warping)

  • Tombow Dual Brush Pens

  • Water Spritzer

  • Tombow Mono Aqua Liquid Glue

  • Scissors

  • Tombow Mono Drawing Pen

  • Extra paper (preferably watercolor paper)

  • Tombow Mono Drawing Pencil (optional)

Art Journaling with the Tombow XL Blending Palette by Jessica Mack of BrownPaperBunny

Step 1: Ink Your XL Blending Palette

Start by scribbling some ink onto the XL Blending Palette with your Dual Brush Pens. You can try a few different colors together, like blues and greens or oranges and pinks. Then lightly spritz some water over the inked palette. Once the ink is wet lay your art journal page face down onto it. Smush it around to make sure the ink covers the page, then carefully lift it off (it might get drippy so it pays to lay down some scrap paper underneath). Once that page dries, repeat on the next page, and the one after that.

Art Journaling with the Tombow XL Blending Palette by Jessica Mack of BrownPaperBunny

Step 2: Cut Windows Into Your Pages

Who says you have to stick to just ONE page or spread when art journaling? We're going to cut windows through our first two pages to add some depth and dimension to our journal. Because I'm creating an underwater scene I cut my windows into wavy rectangles for a more organic look, but you can cut them out more neatly if you like. Keep your scraps for the next step!

Art Journaling with the Tombow XL Blending Palette by Jessica Mack of BrownPaperBunny

Step 3: Make Your Decorations

I used scraps of paper I had already colored with Tombow Dual Brush Pens, but you could create some on your spare watercolor paper using the same method as the journal pages above. Then draw on your shapes, patterns or whatever else you'd like with your Mono Drawing Pens.

Art Journaling with the Tombow XL Blending Palette by Jessica Mack of BrownPaperBunny

Step 4: Cut Out Your Decorations

Get out your scissors and start cutting out those fun little decorations you just created, then use your Mono Aqua Liquid Glue to stick them to the three different layers of your journal page(s).

Art Journaling with the Tombow XL Blending Palette by Jessica Mack of BrownPaperBunny

Step 5: Add Some Text

The final step is to add some words to your art journaling. Maybe you want to write something that happened that day, a memory, or a favorite quote.

Art Journaling with the Tombow XL Blending Palette by Jessica Mack of BrownPaperBunny

I'd would love to see your art journaling adventures! Tag @BrownPaperBunny on social media!

In Watercolor, Aug 2017, Tutorial, Sketchbook
10 Comments
How to Create a Watercolor Background for Your Lettering by Jessica Mack of BrownPaperBunny

How to Create a Watercolor Background for Your Lettering

September 1, 2018

Please note: This blog post contains affiliate links, which help pay for the upkeep of this site. That being said, I will never, ever promote anything I am not 100% in love with!

----------

I just love using Tombow Dual Brush Pens to create a watercolor effect and the new XL Blending Palette is perfect for that! Today I’m going to show you how I create watercolor backgrounds for lettering projects. You’ll need the XL Blending Palette, Dual Brush Pens in your favorite colors, a water mister, watercolor paper, and Mono Drawing Pen or Fudenosuke Pen.

How to Create a Watercolor Background for Your Lettering by Jessica Mack of BrownPaperBunny

To create your watercolor background start by adding some ink to your XL Blending Palette with your Dual Brush Pens. Spray a little water over the ink then press your watercolor paper down onto the palette. Blot any extra water with some paper towel, and if you want the color to run a little more you can spray water directly onto your paper. While you’re waiting for your paper to dry, wipe down your blending palette with damp paper towel and you’re ready to start again! What are your favorite colors to blend together?

How to Create a Watercolor Background for Your Lettering by Jessica Mack of BrownPaperBunny

Here's a video of the whole process.

Once your watercolor background is dry you’re ready to start your lettering project. I used Mono Drawing Pens, Dual Brush Pens and my Fudenosuke to create the lettering on this project. Do you have a favorite quote, let me know in the comments!

In Type, Ink, Watercolor, Aug 2017, Tutorial, Sketchbook
6 Comments
Make a Pencil Housewarming Card by Jessica Mack of BrownPaperBunny

Make a Pencil Housewarming Card

August 20, 2018

Please note: This blog post contains affiliate links, which help pay for the upkeep of this site. That being said, I will never, ever promote anything I am not 100% in love with!

----------

Hello hello! Today I want to show you how to make this cute little housewarming card using Mono Drawing Pencils! It's perfect to send to someone who's moving, going off to college, or maybe just bought their first home! Here's what you'll need to get started:

Supplies:

  • Tombow Mono Drawing Pencils
  • A ruler
  • A blank card
  • Tombow Mono Eraser
  • Tombow Dual Brush Pens (optional)
  • Paintbrush and water (optional)
Make a Pencil Housewarming Card by Jessica Mack of BrownPaperBunny

Step 1: Sketch Your Design

The first step is to sketch out your design on the front of the card. Get creative with the style of house (or houses) you draw. And if you are worried about drawing, don't be. Houses, in particular, are just a series of lines, squares, and rectangles. It will be easy, I promise! If you like you can add some text to the front of the card, or maybe just on the inside, it's up to you!

Make a Pencil Housewarming Card by Jessica Mack of BrownPaperBunny

Step 2: Add Shading to Your Card

Start coloring in your card design using the Mono Drawing Pencils. Use harder pencils (2H for example) for lighter shades, and softer pencils (2B, 4B, 6B) to get darker shades. And if you make a mistake, the beauty of drawing in pencil is that you can just use your Mono Eraser to fix it and start again!

Make a Pencil Housewarming Card by Jessica Mack of BrownPaperBunny

Step 3: Add Some Color (optional)

The final step is optional, if you want to add a little bit of color to your card. Choose a light color of Dual Brush Pen and draw on some ink around your house (or houses) then use a damp paintbrush (or your colorless blender) to wet the ink and blend it outwards for a soft glow effect. And then you're ready to send your card!

Make a Pencil Housewarming Card by Jessica Mack of BrownPaperBunny

If you create a housewarming card using the Mono Drawing Pencils I'd love to see it! Tag  @BrownPaperBunny on social media.

In Tutorial, Aug 2017, Illustrations
4 Comments
How to Make a Watercolor Background for Your Planner by Jessica Mack from BrownPaperBunny

Watercolor Background for Your Planner

August 9, 2018

Please note: This blog post contains affiliate links, which help pay for the upkeep of this site. That being said, I will never, ever promote anything I am not 100% in love with!

----------

Hello, hello! I'm collaborating with Bloom Planners this week and I’m super excited to show you an easy way to add a colorful background to your weekly spreads.

Here's what you'll need to get started:

  • Your favorite planner
  • Tombow Dual Brush Pens
  • XL Blending Palette
  • Water Mister or Spray Bottle

Optional Things to decorate with:

  • Tombow TwinTone Markers
  • Tombow Mono Adhesive + Permanent
  • Planner Stickers
  • Magnetic bookmark / Planner Band etc
How to Make a Watercolor Background for Your Planner by Jessica Mack from BrownPaperBunny

To quickly add a pop of background color to your planner start by scribbling some ink onto your blending palette with your Tombow Dual Brush Pens.

How to Make a Watercolor Background for Your Planner by Jessica Mack from BrownPaperBunny

Lightly mist the ink with water then press your planner page down onto the palette.

How to Make a Watercolor Background for Your Planner by Jessica Mack from BrownPaperBunny

Blot any excess water with some paper towel and give it a blast with a hairdryer or heat tool to dry it quickly and stop it seeping through to the next page. Which do you prefer, the blue or the pink page?

Once your watercolor background is dry you can start planning out your week and adding a little extra sparkle here and there! I had so much fun decorating this spread with Bloom stickers and Tombow TwinTone Markers! What are your favorite planner decorations?

How to Make a Watercolor Background for Your Planner by Jessica Mack from BrownPaperBunny

I love the Bloom Planner products, but one of the other reasons I love them so much is that the brand is run by a full team of awesome lady bosses, and that they are encouraging us all to grow and be the best women we can be!

In Aug 2017, Watercolor, Tutorial, Ink
Comment
Make Your Own Superhero Card by Jessica Mack of BrownPaperBunny

Make Your Own Superhero Card

July 26, 2018

Please note: This blog post contains affiliate links, which help pay for the upkeep of this site. That being said, I will never, ever promote anything I am not 100% in love with!

----------

Hello hello! Today I'm going to show you how to make your own superhero card. It's a great way to let someone know that they are a superhero to you (even if they don't technically have superpowers), and they'll only take you a few minutes to create!

Here's what you'll need to get started...

Supplies

  • Blank card or thick watercolor paper
  • Tombow Mono Drawing Pencil
  • Tombow Dual Brush Pens
  • Scissors
  • Tombow Mono Drawing Pen
  • Tombow 1500 Colored Pencils (optional)
Make Your Own Superhero Card by Jessica Mack of BrownPaperBunny

Step 1: Sketch Your Outlines

Use your Mono Drawing Pencils to lightly sketch a superhero crown or shield onto the bottom half of your card (which will end up being the front). You can make up your own using geometric shapes and bright colors. Then decide if you want to add words to the front, or maybe just the inside once you've folded the finished card. I sketched the words 'You are my superhero' onto the front of this one.

Make Your Own Superhero Card by Jessica Mack of BrownPaperBunny

Step 2: Add Some Color

Using your Dual Brush Pens color in your design. I usually start with the lightest colors first, letting them dry completely before I move onto the darker ones. By letting them dry fully you'll have less chance of bleeding where the colors touch.

Pro Tip: Use a wet paintbrush to blend the ink on your card for a watercolor look. Again, make sure you apply one color at a time and let each one dry completely before applying the next one. This technique works best on very thick card or thick watercolor paper.

Make Your Own Superhero Card by Jessica Mack of BrownPaperBunny

Step 3: Outline Your Design

Use your Mono Drawing Pens (I used number 03) to outline your design and give it that comic-book superhero look.

Make Your Own Superhero Card by Jessica Mack of BrownPaperBunny

Step 4: Add Some Shading

This step is optional, but you can use your Tombow 1500 Colored Pencils to add some subtle shading to your design to help it stand off the page a little more. I used a dark yellow around the stars, and along the edges of the blue stripes, and gave the crown a drop shadow using light grey.

Make Your Own Superhero Card by Jessica Mack of BrownPaperBunny

Step 5: Fold and Mail Your Superhero Card

All that's left is to fold your card, write in it and mail it off. If you want to add a little extra sparkle, decorate the envelope as well.

Make Your Own Superhero Card by Jessica Mack of BrownPaperBunny

I'd love to see your superhero-inspired projects! Tag @BrownPaperBunny on social media!

In Ink, Aug 2017, Tutorial
7 Comments
How to create an emoji mood wheel by Jessica Mack of BrownPaperBunny

Create an Emoji Mood Wheel

July 19, 2018

Hello, hello! Today I’m going to show you how to make a fun emoji wheel that you can stick up at your desk to let your coworkers or family know how you’re feeling. You’ll need some card, cut into a large circle, an arrow, and enough left over for eight smaller circles. Go ahead and grab a paper brad, some scissors, your Dual Brush Pens, Mono Aqua Liquid Glue, a pencil and a Mono Drawing Pen too! 

How to create an emoji mood wheel by Jessica Mack of BrownPaperBunny

The next steps in creating your emoji wheel are to color eight even segments on your large circle, and on the left-over card draw eight of your favorite emojis. Often feel like a unicorn? Go on, add it to your wheel! 

How to create an emoji mood wheel by Jessica Mack of BrownPaperBunny

To finish off your emoji wheel cut out your emojis and glue them into each segment of the wheel using your Mono Aqua Liquid Glue. Then use your paper brad to attach the arrow to the center and you’re finished!

How to create an emoji mood wheel by Jessica Mack of BrownPaperBunny

Comment below and tell me what emoji you feel like right now. 

In Tutorial, Aug 2017, Ink
Comment
Easy watercolor word art by Jessica Mack of BrownPaperBunny

Easy Watercolor Word Art

July 14, 2018

Please note: This blog post contains affiliate links, which help pay for the upkeep of this site. That being said, I will never, ever promote anything I am not 100% in love with!

----------

When I think of the color indigo I think of stargazing on warm summer nights. I just love the inky color of sky after the sun has completely disappeared. Today I'm going to show you how to make this easy watercolor word art so you can dream of the stars anytime you like.

Supplies:

  • Tombow Dual Brush Pens (N25 and 565)
  • 140 lb Watercolor paper
  • Tombow Mono Plastic Eraser
  • Paintbrush and water
  • Tombow Mono Drawing Pencil (4H)
Easy watercolor word art by Jessica Mack of BrownPaperBunny

Step 1: Sketch Your Words in Pencil

Use a nice light pencil (2H or 4H works well) to sketch in your words and stars. You'll be able to erase any visible lines at the end so don't worry about it being too neat at this stage.

Easy watercolor word art by Jessica Mack of BrownPaperBunny

Step 2: Outline Your Words

Outline your words and stars in black or charcoal Dual Brush Pen ink. This gives you greater contrast around the letters once everything is blended together.

Easy watercolor word art by Jessica Mack of BrownPaperBunny

Step 3: Color in the Background

Using your dark blue Dual Brush Pen (I used 565) fill in the background around your stars and words. You don't need to fill in every tiny space, it's ok if there is some white showing through. In the next step you're going to blend it all together anyway.

Easy watercolor word art by Jessica Mack of BrownPaperBunny

Step 4: Blend the Ink With Water

Using your paintbrush and some water start blending the ink together. I find it easiest to start with the fiddly bits around the letters and stars first and then fill in the larger areas. The ink won't be perfectly uniform, it will have dark areas and water marks, which gives you that great watercolor look.

Easy watercolor word art by Jessica Mack of BrownPaperBunny

Once you're happy with the way it is blended, let it dry, erase any visible pencil lines, and you're ready to frame your watercolor word art!

In Watercolor, Type, Ink, Tutorial, Aug 2017
2 Comments
Summer Happy Mail: Make Your Own Envelopes by Jessica Mack of BrownPaperBunny

Summer Happy Mail: Make Your Own Envelopes

July 8, 2018

Is there anything better than getting snail mail? Yes...getting cute, hand-made snail mail! So I'm going to show you a fun way to add a little summer surprise to the next mail you send out. You’ll need some watercolor or mixed media paper, Tombow Dual Brush Pens, a paintbrush and water, Tombow Mono Drawing Pen, scissors and Tombow Mono Adhesive + Permanent. 

Summer Happy Mail: Make Your Own Envelopes by Jessica Mack of BrownPaperBunny

We’re going to make our own envelopes with summer-themed decorations on the inside, so the recipient gets a fun surprise when they open it up! Gently open up an old envelope to use as a template, and measure out your watercolor paper to the right size. Fill the paper with ice-cream cones, watermelon slices, pineapples, or anything else that makes you think of summer, using your Tombow Dual Brush Pens. Then with a paintbrush wet the ink to blend it together and get a watercolor look. Once the ink is dry draw cute little faces or add details with your Mono Drawing Pen. 

Summer Happy Mail: Make Your Own Envelopes by Jessica Mack of BrownPaperBunny

To finish off your envelopes cut your paper using your envelope template, fold in the sides and glue the bottom three together with your Mono Adhesive + Permanent. Write a letter, or make a cute card to go inside and your fun summer envelopes are ready to be sent! Leave a comment and tell me who you’re going to send some cute mail to this summer! 

In Illustrations, Ink, Watercolor, Tutorial, Aug 2017
2 Comments
Bright Playroom Decor with Walnut Hollow — by Jessica Mack of BrownPaperBunny

Bright Playroom Decor with Walnut Hollow

June 28, 2018

Please note: I received these products for free, but my review and use of them is 100% honest and all me.

----------

This week I'm going to show you how I created these bright playroom decor pieces with Walnut Hollow and Tombow products. Here's what you'll need to get started:

Supplies:

  • Cactus Shape from Walnut Hollow
  • Trapezoid Shelf from Walnut Hollow
  • Tombow Dual Brush Pens
  • Paint Brush
  • Tombow Blending Palette
  • Watercolor Paper
  • Tombow Mono Aqua Liquid Glue
  • Scissors
  • Tombow Mono Drawing Pen
  • Tombow Xtreme Tabs
Bright Playroom Decor with Walnut Hollow — by Jessica Mack of BrownPaperBunny

Step 1: Stain Your Walnut Hollow Pieces

I wanted to color my wooden pieces, but still preserve the tips on my Dual Brush Pens, one way to do that is to use a blending palette, water and a paintbrush to transfer the Dual Brush Pen ink onto the wood and create a colorful stain. Let each application of ink dry before adding another layer for a deeper color. To get the color shown here use Dual Brush Pen 245 (Sap Green) for the first two coats and 296 (Green) for the last two coats.

Bright Playroom Decor with Walnut Hollow — by Jessica Mack of BrownPaperBunny

Step 2: Draw Your Decorations

Next draw some cactus flowers and a cute little llama (see Marie B's llama tutorial and download here) to decorate your colorful wooden pieces. Start by applying Dual Brush Pen ink via the blending palette and a paintbrush. Then once the ink is dry outline them and add detail using Mono Drawing Pens.

Bright Playroom Decor with Walnut Hollow — by Jessica Mack of BrownPaperBunny

Step 3: Add Your Decorations

Once you've finished drawing your decorations, cut them out and stick them to the Walnut Hollow pieces using Tombow Xtreme Tabs. Now they're ready for the playroom!

Bright Playroom Decor with Walnut Hollow — by Jessica Mack of BrownPaperBunny
In Ink, Aug 2017, Tutorial
11 Comments
How to make your own drink umbrellas, mermaid straws, and strawberry drink toppers by Jessica Mack of BrownPaperBunny

How to Make Your Own Drink Umbrellas

June 21, 2018

Please note: This blog post contains affiliate links, which help pay for the upkeep of this site. That being said, I will never, ever promote anything I am not 100% in love with!

----------

Today I thought I'd show you how to make your own cute drink umbrellas and other fun drink toppers! Whether you’re trying to increase your water intake or relaxing on the deck with something refreshingly fruity, these will definitely liven up your glass.

Mermaid Drink Toppers

Start by drawing your mermaids using Tombow Dual Brush Pens on watercolor paper (you can copy these if you don’t feel confident creating your own) then use a paintbrush and water to soften and blend each area of ink to get the watercolor effect. Once they are dry, draw on the details with your Mono Drawing Pen, cut them out, and glue them onto pink paper straws with Mono Aqua Liquid Glue!

How to make your own drink umbrellas, mermaid straws, and strawberry drink toppers by Jessica Mack of BrownPaperBunny

Watermelon Drink Umbrellas

To make these watermelon drink umbrellas start by cutting a circle out of green paper, and a slightly smaller circle out of pink paper (you can make your own colored paper with Dual Brush Pens, water, and watercolor paper). On the pink circle, use your Mono Drawing Pen to draw some watermelon seeds. Fold each circle in half, unfold it, turn it and fold again. Repeat until you have eight evenly-spaced creases coming out from the center. Cut along one of the creases, to the center, overlap those panels at the cut and glue them together with Mono Adhesive Dots. Repeat on the second circle and glue the pink circle on top of the green one. Dot some Mono Aqua Liquid Glue on the inside point of the umbrella and push a long toothpick through from the inside. If you’re worried about it being too pointy, snip off the very tip of the toothpick once the glue is dry.

How to make drink umbrellas, mermaid straws, and strawberry drink toppers by Jessica Mack of BrownPaperBunny

Strawberry Drink Toppers

For the last pink drink topper, start by drawing strawberry shapes using Dual Brush Pens on watercolor paper. Next, soften and blend the ink with a paintbrush and water for a watercolor look. Once they are dry use your Mono Drawing Pen to outline the strawberries and draw on some seeds. Cut them out, and use Mono Aqua Liquid Glue to glue them to toothpicks and you’re done!

How to make drink umbrellas, mermaid straws, and strawberry drink toppers by Jessica Mack of BrownPaperBunny

Out of the three drink toppers I showed you today which is your favorite?

In Watercolor, Aug 2017, Tutorial, Ink
10 Comments
Template for Easy Weekly Planner Spreads by Jessica Mack of BrownPaperBunny

Template for Easy Weekly Planner Spreads

June 15, 2018

Please note: This blog post contains affiliate links, which help pay for the upkeep of this site. That being said, I will never, ever promote anything I am not 100% in love with!

----------

Hi there! I'm going to show you my template for creating easy weekly planner spreads. I love using notebooks to plan, but I don't have a lot of time to spend creating my weekly layouts — so here's how I make setup a lot faster (there's only two steps)!

Supplies:

  • Archer and Olive Dot Grid Notebook
  • Planner Stickers (mine are also from Archer and Olive)
  • Tombow Dual Brush Pens
  • Piece of card or thick paper (the size of your open notebook)
  • Tombow Mono Drawing Pens
  • Pencil
  • Ruler
  • Scissors

Step 1: Plan Your Template

The first step is to think about what items you want to have in your weekly spread template. You'll most likely want days of the week, but you might also want a monthly calendar, a tracker of some sort (I'm tracking my workouts), and why not a little bit of inspiration for the week. Here are a few other things you could include: a specific to-do list area, goal tracking, list of calls you need to make, errands, a weekly shopping list, water intake, your daily mood, the weather, daily gratitude, or upcoming birthdays.

I kept mine simple with four main areas, because I found that the more I tried to track the less consistent I was at doing it. Once I settled on my main items I measured them out on my piece of card and cut out the areas I wanted to use as a template. This saves me so much time each week because I don't have to measure everything out from scratch, I just use the template to trace the areas out and then I'm ready to give it a little decoration.

Template for Easy Weekly Planner Spreads by Jessica Mack of BrownPaperBunny

Step 2: Decorate Your Weekly Planner Spread

Now on to the really fun part, decorating! I want my weekly spreads to look pretty but in order to save time I choose a set of stickers, like these pretty floral ones from Archer and Olive, and then base my color theme around the stickers. The stickers do all the heavy lifting in making the page look nice, and I just fill in the rest with Dual Brush Pens in similar colors so the page has a cohesive look. Using the template and stickers means I can create a whole spread in under 10 minutes.

Template for Easy Weekly Planner Spreads by Jessica Mack of BrownPaperBunny

I'd love to see your planner spreads, show me by tagging @BrownPaperBunny on social media!

In Ink, Tutorial, Aug 2017
2 Comments
Watercolor Watermelons by Jessica Mack of BrownPaperBunny

Watercolor Watermelon

June 4, 2018

Please note: This blog post contains affiliate links, which help pay for the upkeep of this site. That being said, I will never, ever promote anything I am not 100% in love with!

----------

Today I want to show you how to create some watercolor-look watermelons that you can use on all sorts of fun summer projects! Here's what you'll need to get started.

Supplies:

  • Tombow Dual Brush Pens (Numbers 847, 245 and N15)
  • 140 lb Watercolor Paper
  • Paintbrush
  • Jar of Water
  • Scissors
  • String
Watercolor Watermelons by Jessica Mack of BrownPaperBunny

Project 1: Watermelon Wallpaper for Your Phone

The first step is to draw your watermelon shapes onto the watercolor paper. Using Tombow Dual Brush Pen number 847 (Crimson), draw half moon, full circle, or triangle pieces of watermelon, or a combination of different shapes. Next, go over the ink with your wet paintbrush so the ink blends together. Once that dries, draw the watermelon rind using Dual Brush Pen 245 (Sap Green), and wet the green ink with your paintbrush too. Once both colors are dry, draw watermelon seeds with Dual Brush Pen N15 (Black). Watch the video below to see each of the steps.

Once you've filled the page, snap a photo and turn your delicious little watermelons into a wallpaper (or background) for your phone, like the image below!

Watercolor Watermelons by Jessica Mack of BrownPaperBunny

Project 2: Watermelon Cards

Because watercolor paper is pretty thick you can cut cute little cards out of your finished watermelon drawings. Experiment with a variety of sizes for different effects. Your friends and family will love getting these refreshing cards in the mail!

Watercolor Watermelons by Jessica Mack of BrownPaperBunny

Project 3: Watermelon Banner

Cut around each of your watermelon shapes, punch holes in each side and you can thread them together to make a cute summer banner. I drew simple faces on these ones instead of watermelon seeds. These can add a fun addition to a summer BBQ or birthday party, or just string them up in your kitchen for a daily dose of cute.

Watercolor Watermelons by Jessica Mack of BrownPaperBunny

I'd love to see your watercolor watermelon projects! Share them with me on social media by tagging @BrownPaperBunny!

In Aug 2017, Free Downloads, Illustrations, Ink, Pattern, Tutorial, Watercolor
Comment
How to Make Watercolor Wedding Invitations by Jessica Mack of BrownPaperBunny

How to Make Watercolor Wedding Invitations

June 4, 2018

Please note: This blog post contains affiliate links, which help pay for the upkeep of this site. That being said, I will never, ever promote anything I am not 100% in love with!

----------

If your big day is coming up and you want to make your own watercolor wedding invitations (these work well for baby showers, engagement parties, and bridal showers too) then you're in luck! I often create custom wedding invitation artwork for brides but today I’m going to show you three watercolor-look invitations you can create yourself, with your Tombow Dual Brush Pens.

Supplies:

  • Smooth watercolor paper
  • A paintbrush
  • Jar of water
  • Tombow Dual Brush Pens in the colors of your wedding or event

Romantic Wedding Invitation

Start by drawing some flower and leaf shapes with your Dual Brush Pens then soften the edges with water and your paintbrush. Let it dry and repeat if you want a little extra color. Scan or photograph your artwork and add the text on your computer and voila, your invitations are ready for printing! Watch the time-lapse video below to see the steps sped up.

Feminine Wedding Invitation

To create these invitations start by adding some color to the corners of your watercolor paper, using Tombow Dual Brush Pens, then blend and soften the ink using water and a paintbrush. Once the paper is dry, draw some simple flowers using Tombow Mono Drawing Pens. Scan or photograph your artwork and add the event details on your computer.

How to Make Watercolor Wedding Invitations by Jessica Mack of BrownPaperBunny

Modern Invitation

This last wedding invitation is a little more subtle and modern. Start by coloring a one inch strip at the bottom of your 140 lb watercolor paper, using a Tombow Dual Brush Pen in your event color. Next, use a paintbrush and some water to wet the ink and drag the water up the paper (by going back and forth horizontally) until you have a gradient effect. Once the paper is dry take a photo or scan it and add the event details on your computer and you’re ready to print your invitations!

How to Make Watercolor Wedding Invitations by Jessica Mack of BrownPaperBunny

Of the three invitations I showed you today which was your favorite? If you know someone who is getting married, send them a link to this post!

In Aug 2017, Illustrations, Ink, Tutorial, Watercolor
7 Comments
← Newer Posts Older Posts →

Subscribe

Sign up to receive social media tips, freebies, special promotions, and art tutorials!

Thank you!

Please click confirm in the email you were just sent!

Directory of Illustration Jessica Mack

Shop my work on Society6

Watercolor World Map by Jessica Mack of BrownPaperBunny

Follow on Instagram

For the 100 Days Project this year I’m keeping it super low pressure. I’ve got a very busy couple of months coming up and want to set myself up to be able to stick with it, while still making sure I do something creative every day. You ca

See my classes on Skillshare

Skillshare Classes by Jessica Mack

Popular Posts

Popular Posts
CRL-Horizontal-Laptop-Beige-Floral-Painting.jpg
Creative Retreat Live
Rainbow-Watercolor-Wreath-Using-Markers.JPG
Rainbow Wreath Tutorial
15 Ways to Journal by Jessica on BrownPaperBunny
15 Ways to Journal
Tombow Brush Pen Markers and Colored Pencils
Brown Paper Bunny

Privacy + Terms of Use

Shop

Watercolor with Markers Book

Classes

Art Tutorials

Art & Illustration Portfolio

About

Contact

Custom Book Print

Custom Book Mug

How to Paint Watercolor Flowers Using Markers

Free Fashion Croquis

Start an Art Journal

6 Easy Flowers to Draw with Tombow Markers

Make Your Own Watercolor Bookmarks