• Book
    • Watercolor with Brush Pens
    • Watercolor Flowers Using Markers
    • Paint a Watercolor Galaxy Butterfly with Markers
    • Paint Watercolor Galaxy Bookmarks using Markers
    • Timelapse Video for Artists
  • Shop
  • Society6 Store
  • Blog
  • Portfolio
  • About
  • Contact
Menu

Brown Paper Bunny Studio

Art & Fashion Illustration
  • Book
  • Classes
    • Watercolor with Brush Pens
    • Watercolor Flowers Using Markers
    • Paint a Watercolor Galaxy Butterfly with Markers
    • Paint Watercolor Galaxy Bookmarks using Markers
    • Timelapse Video for Artists
  • Shop
  • Society6 Store
  • Blog
  • Portfolio
  • About
  • Contact
Make a Color Swatch Ring using Markers. By Jessica mack on BrownPaperBunny.

Make a Color Swatch Ring

November 21, 2019

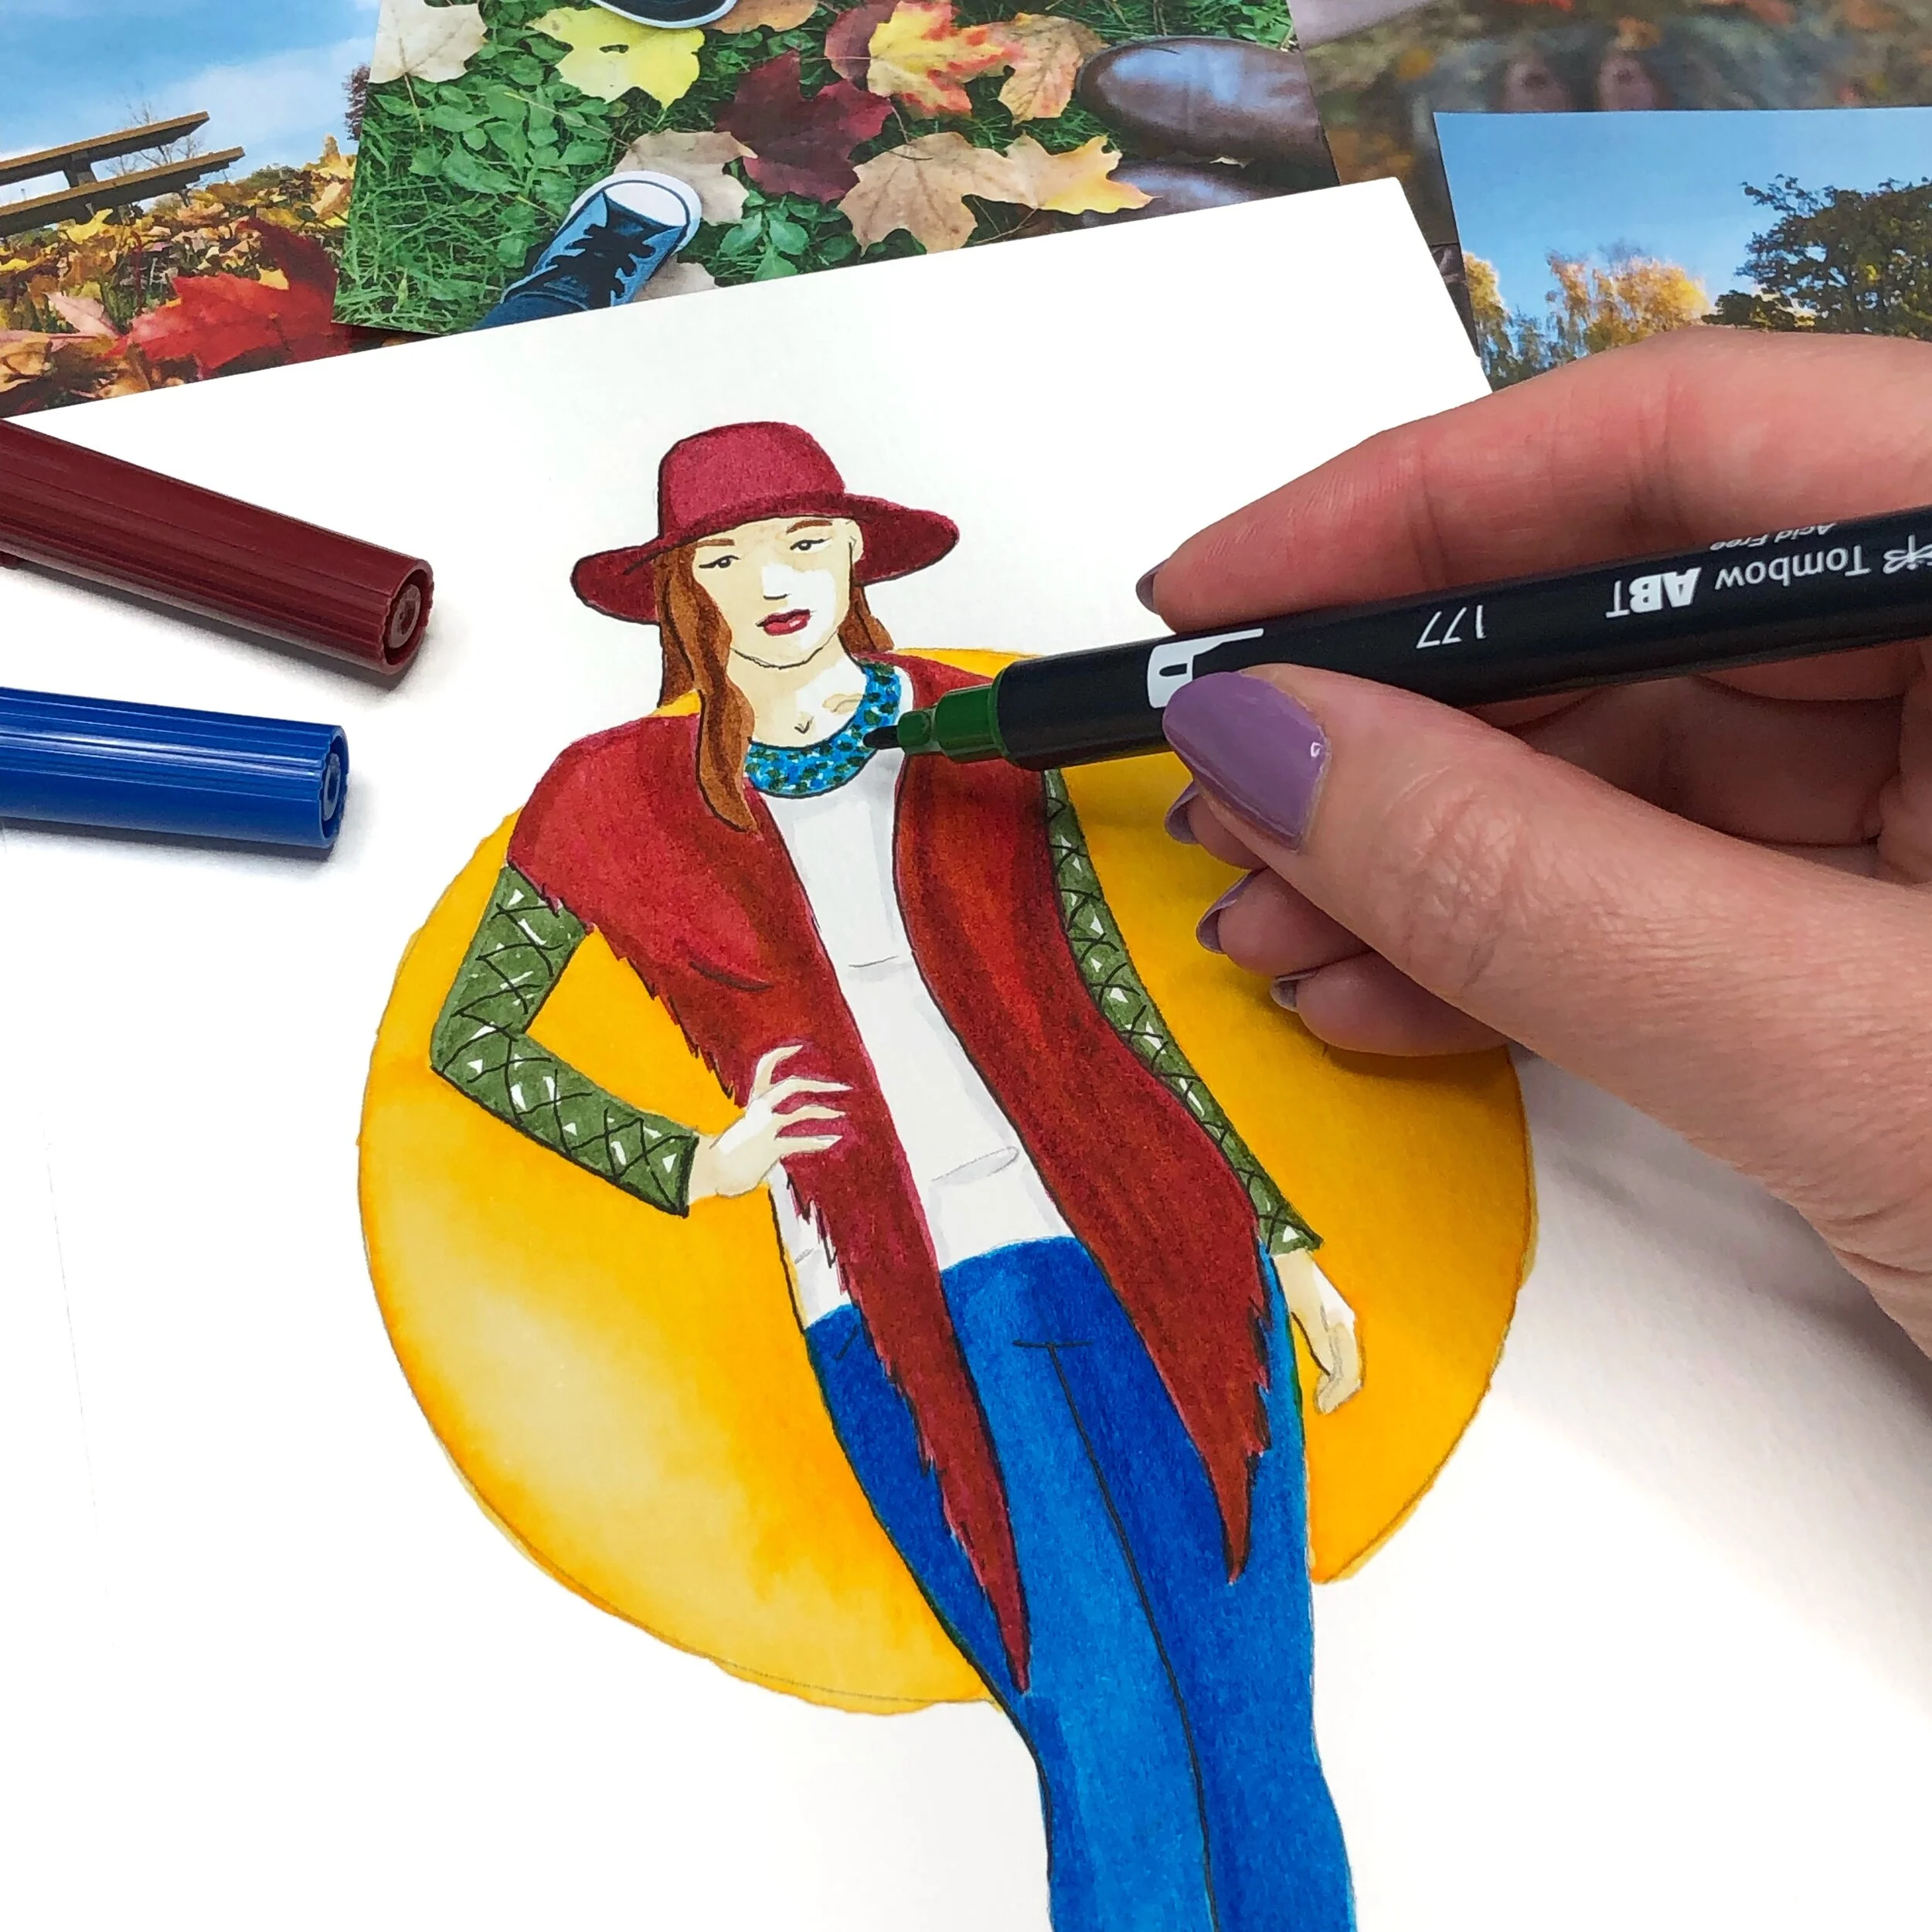
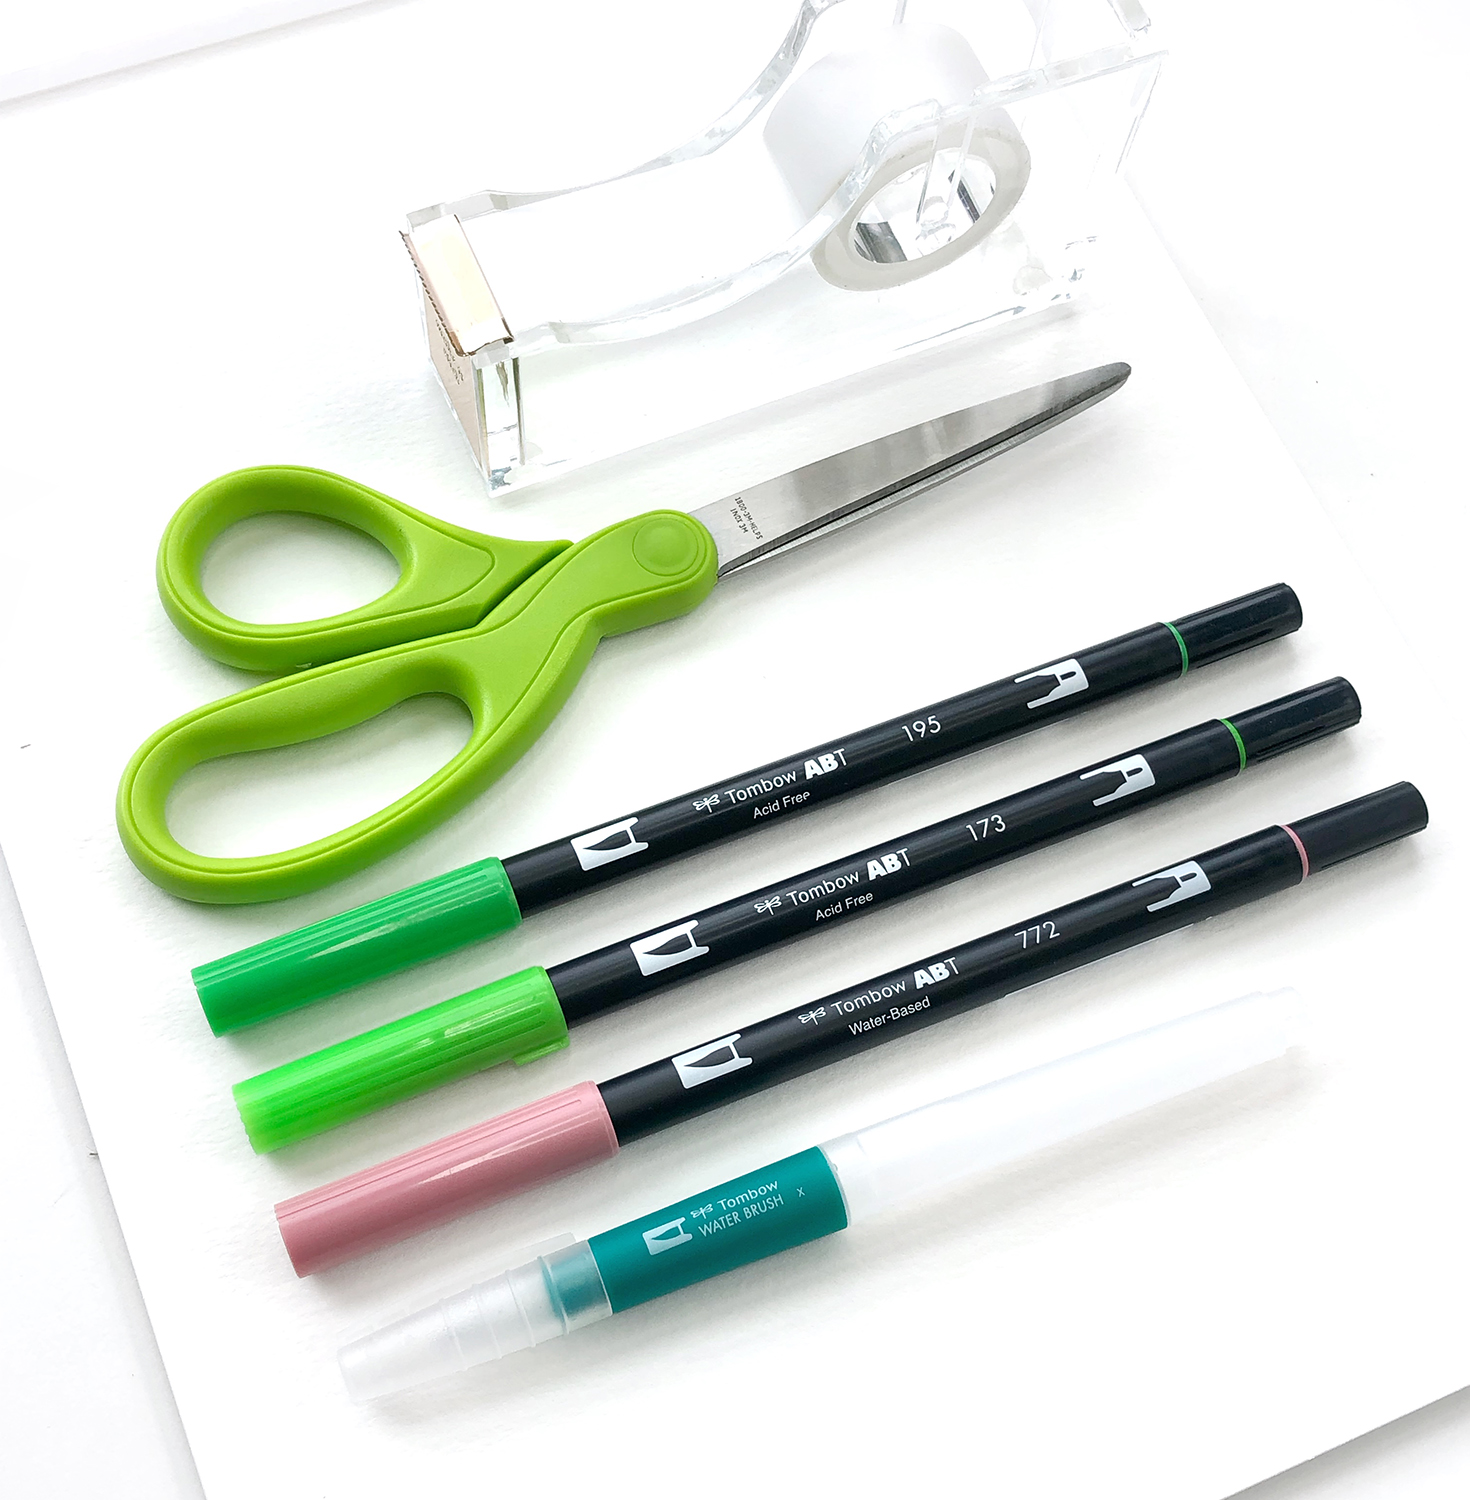
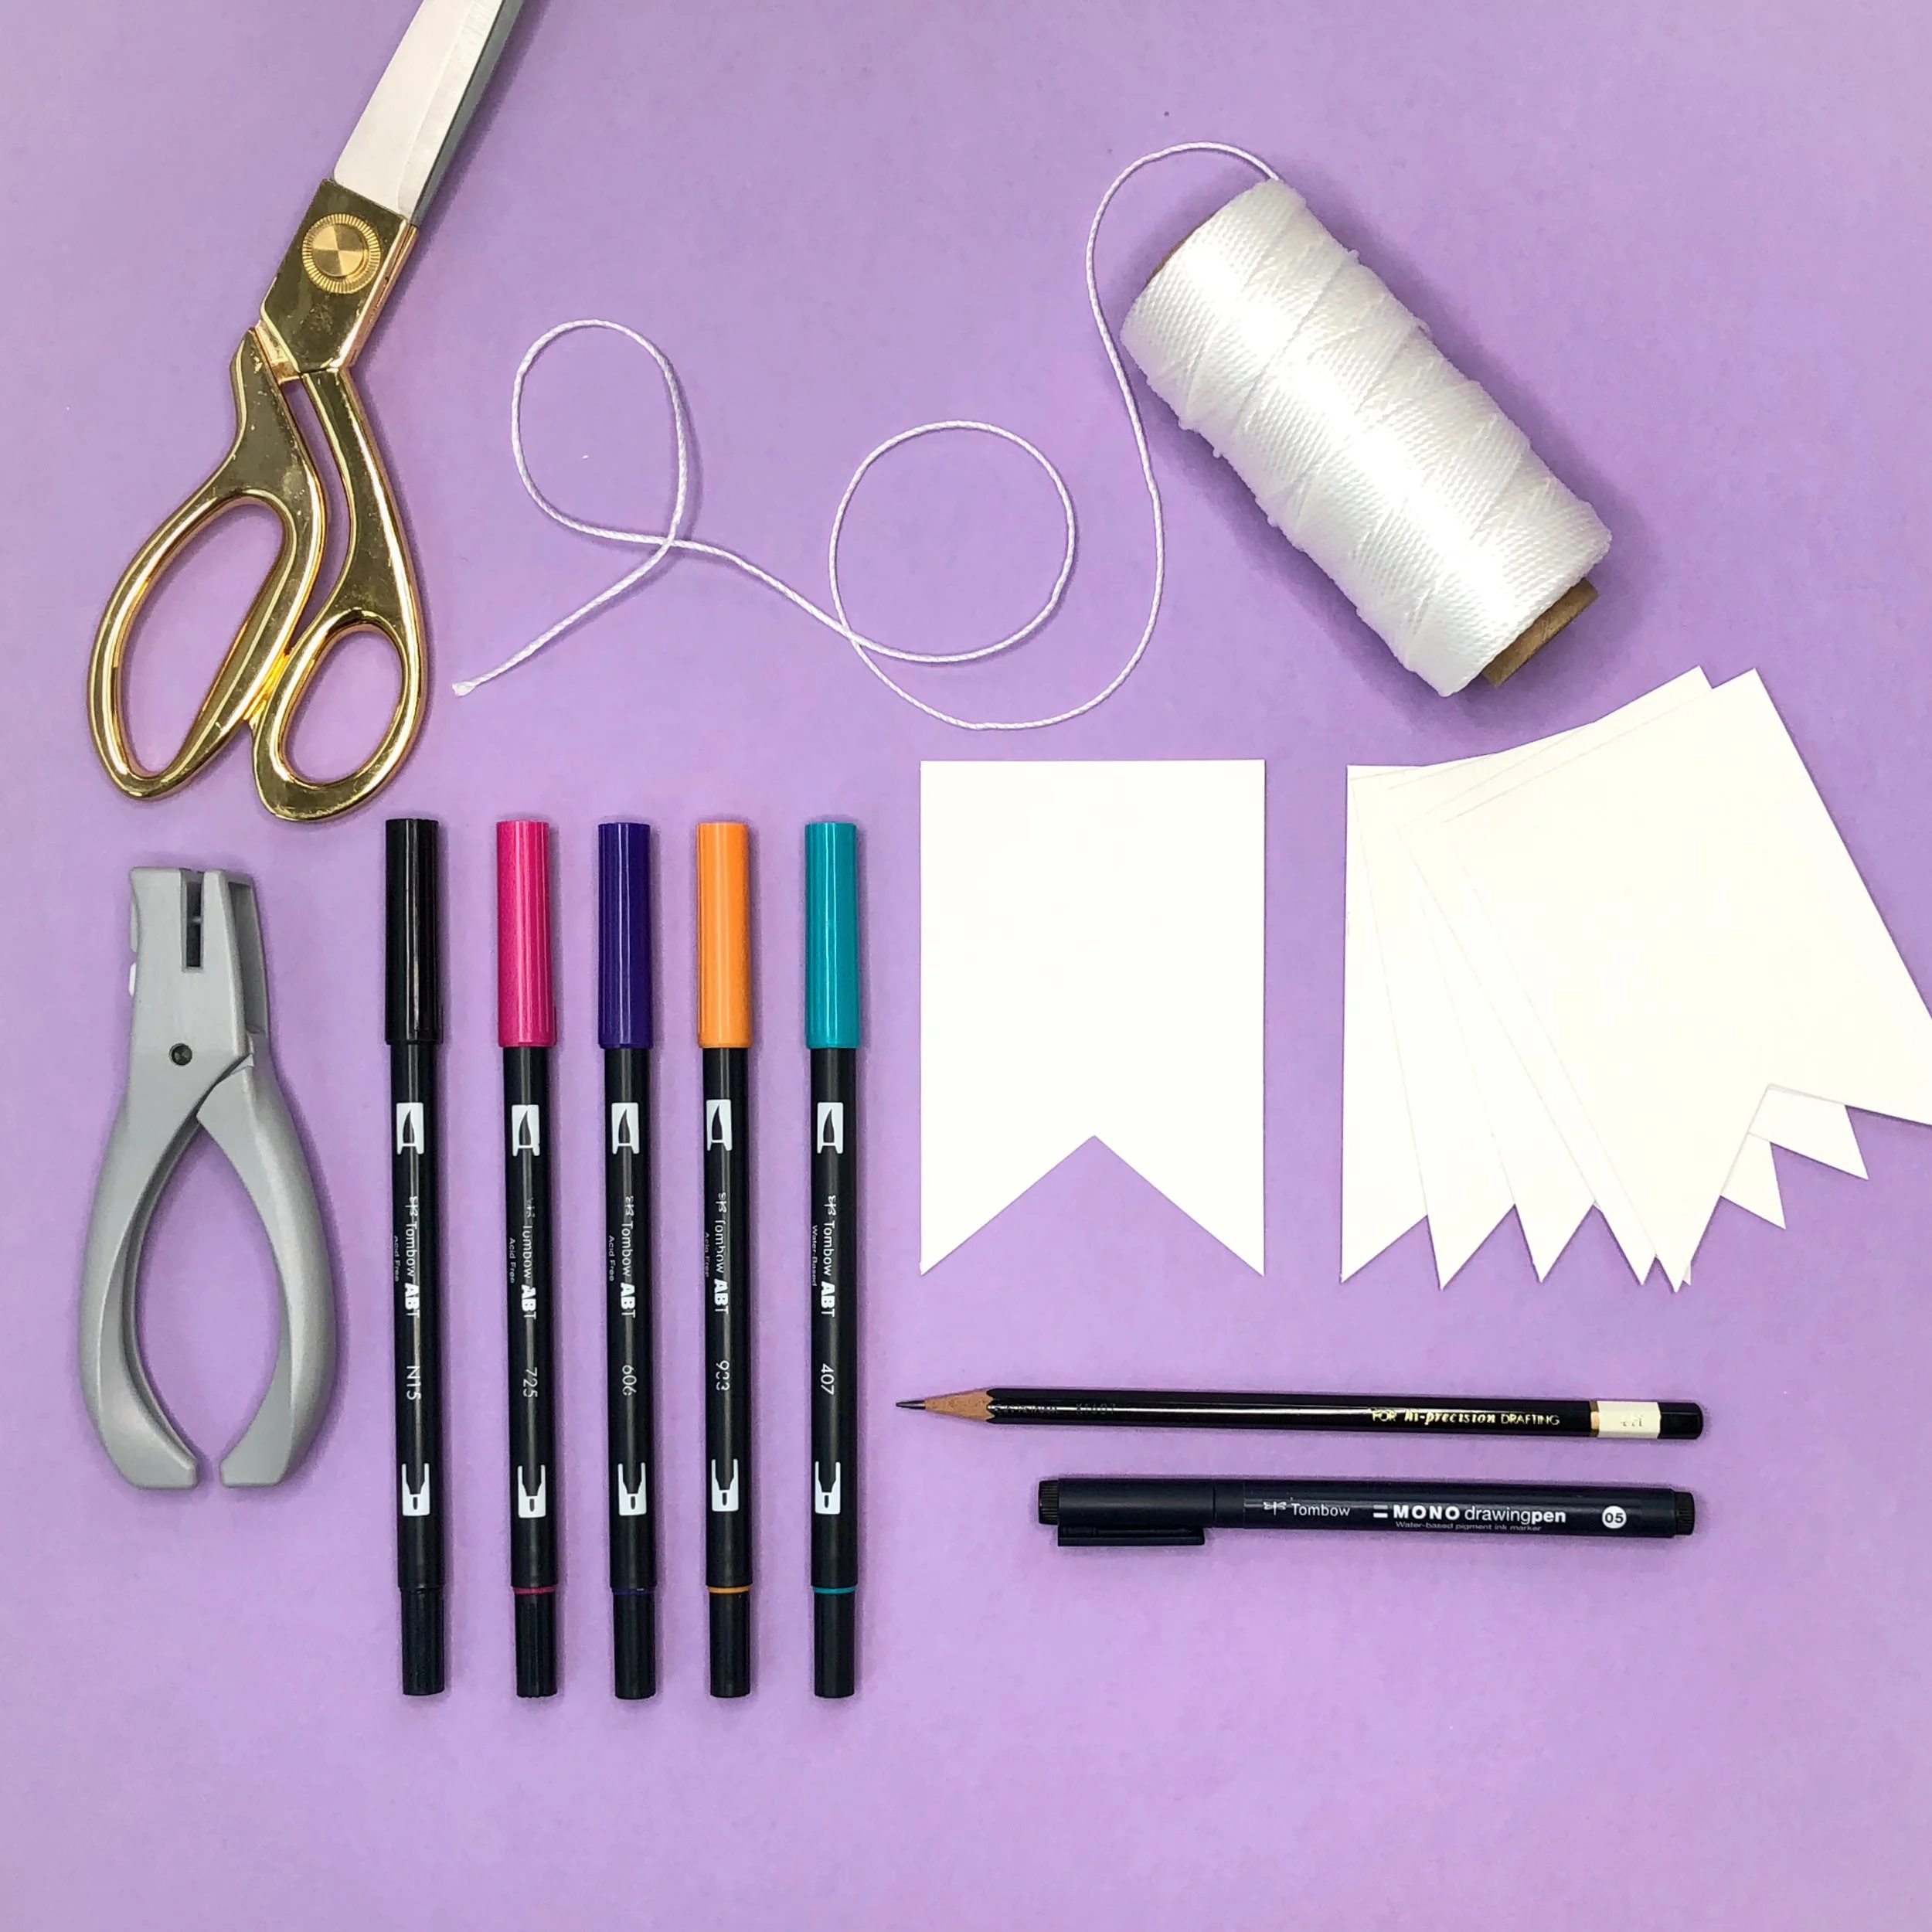
Creating color swatches is the first thing I do whenever I get new products. I like to get to know the colors and see how they look together. I find it helps to see what each one looks like on paper, but also gives you an easy way to mix and match and decide which colors to use for your next project. Here's what you'll need to get started.

Supplies:

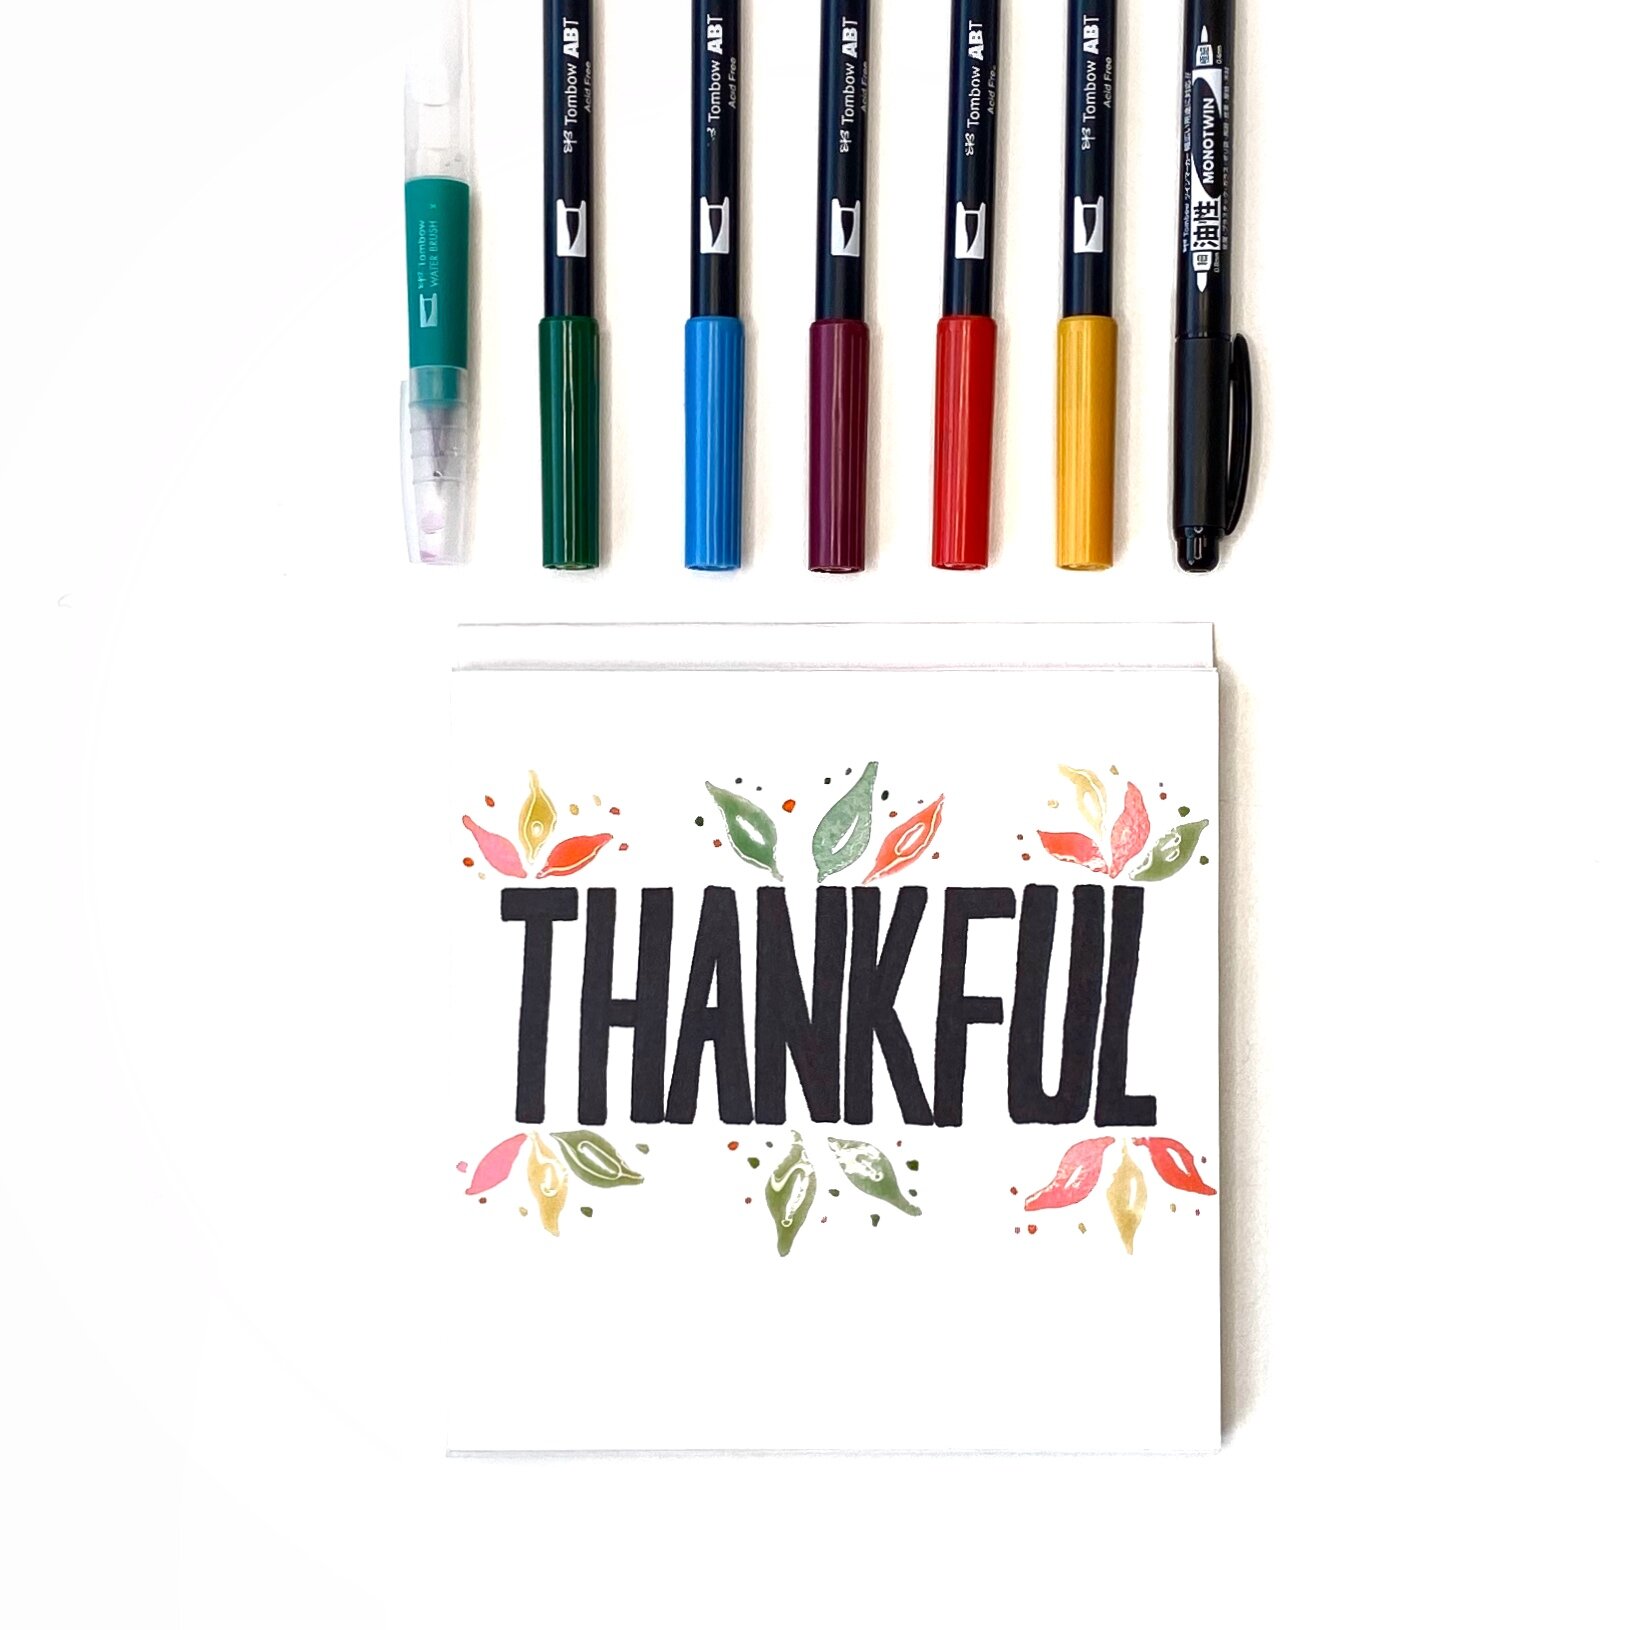
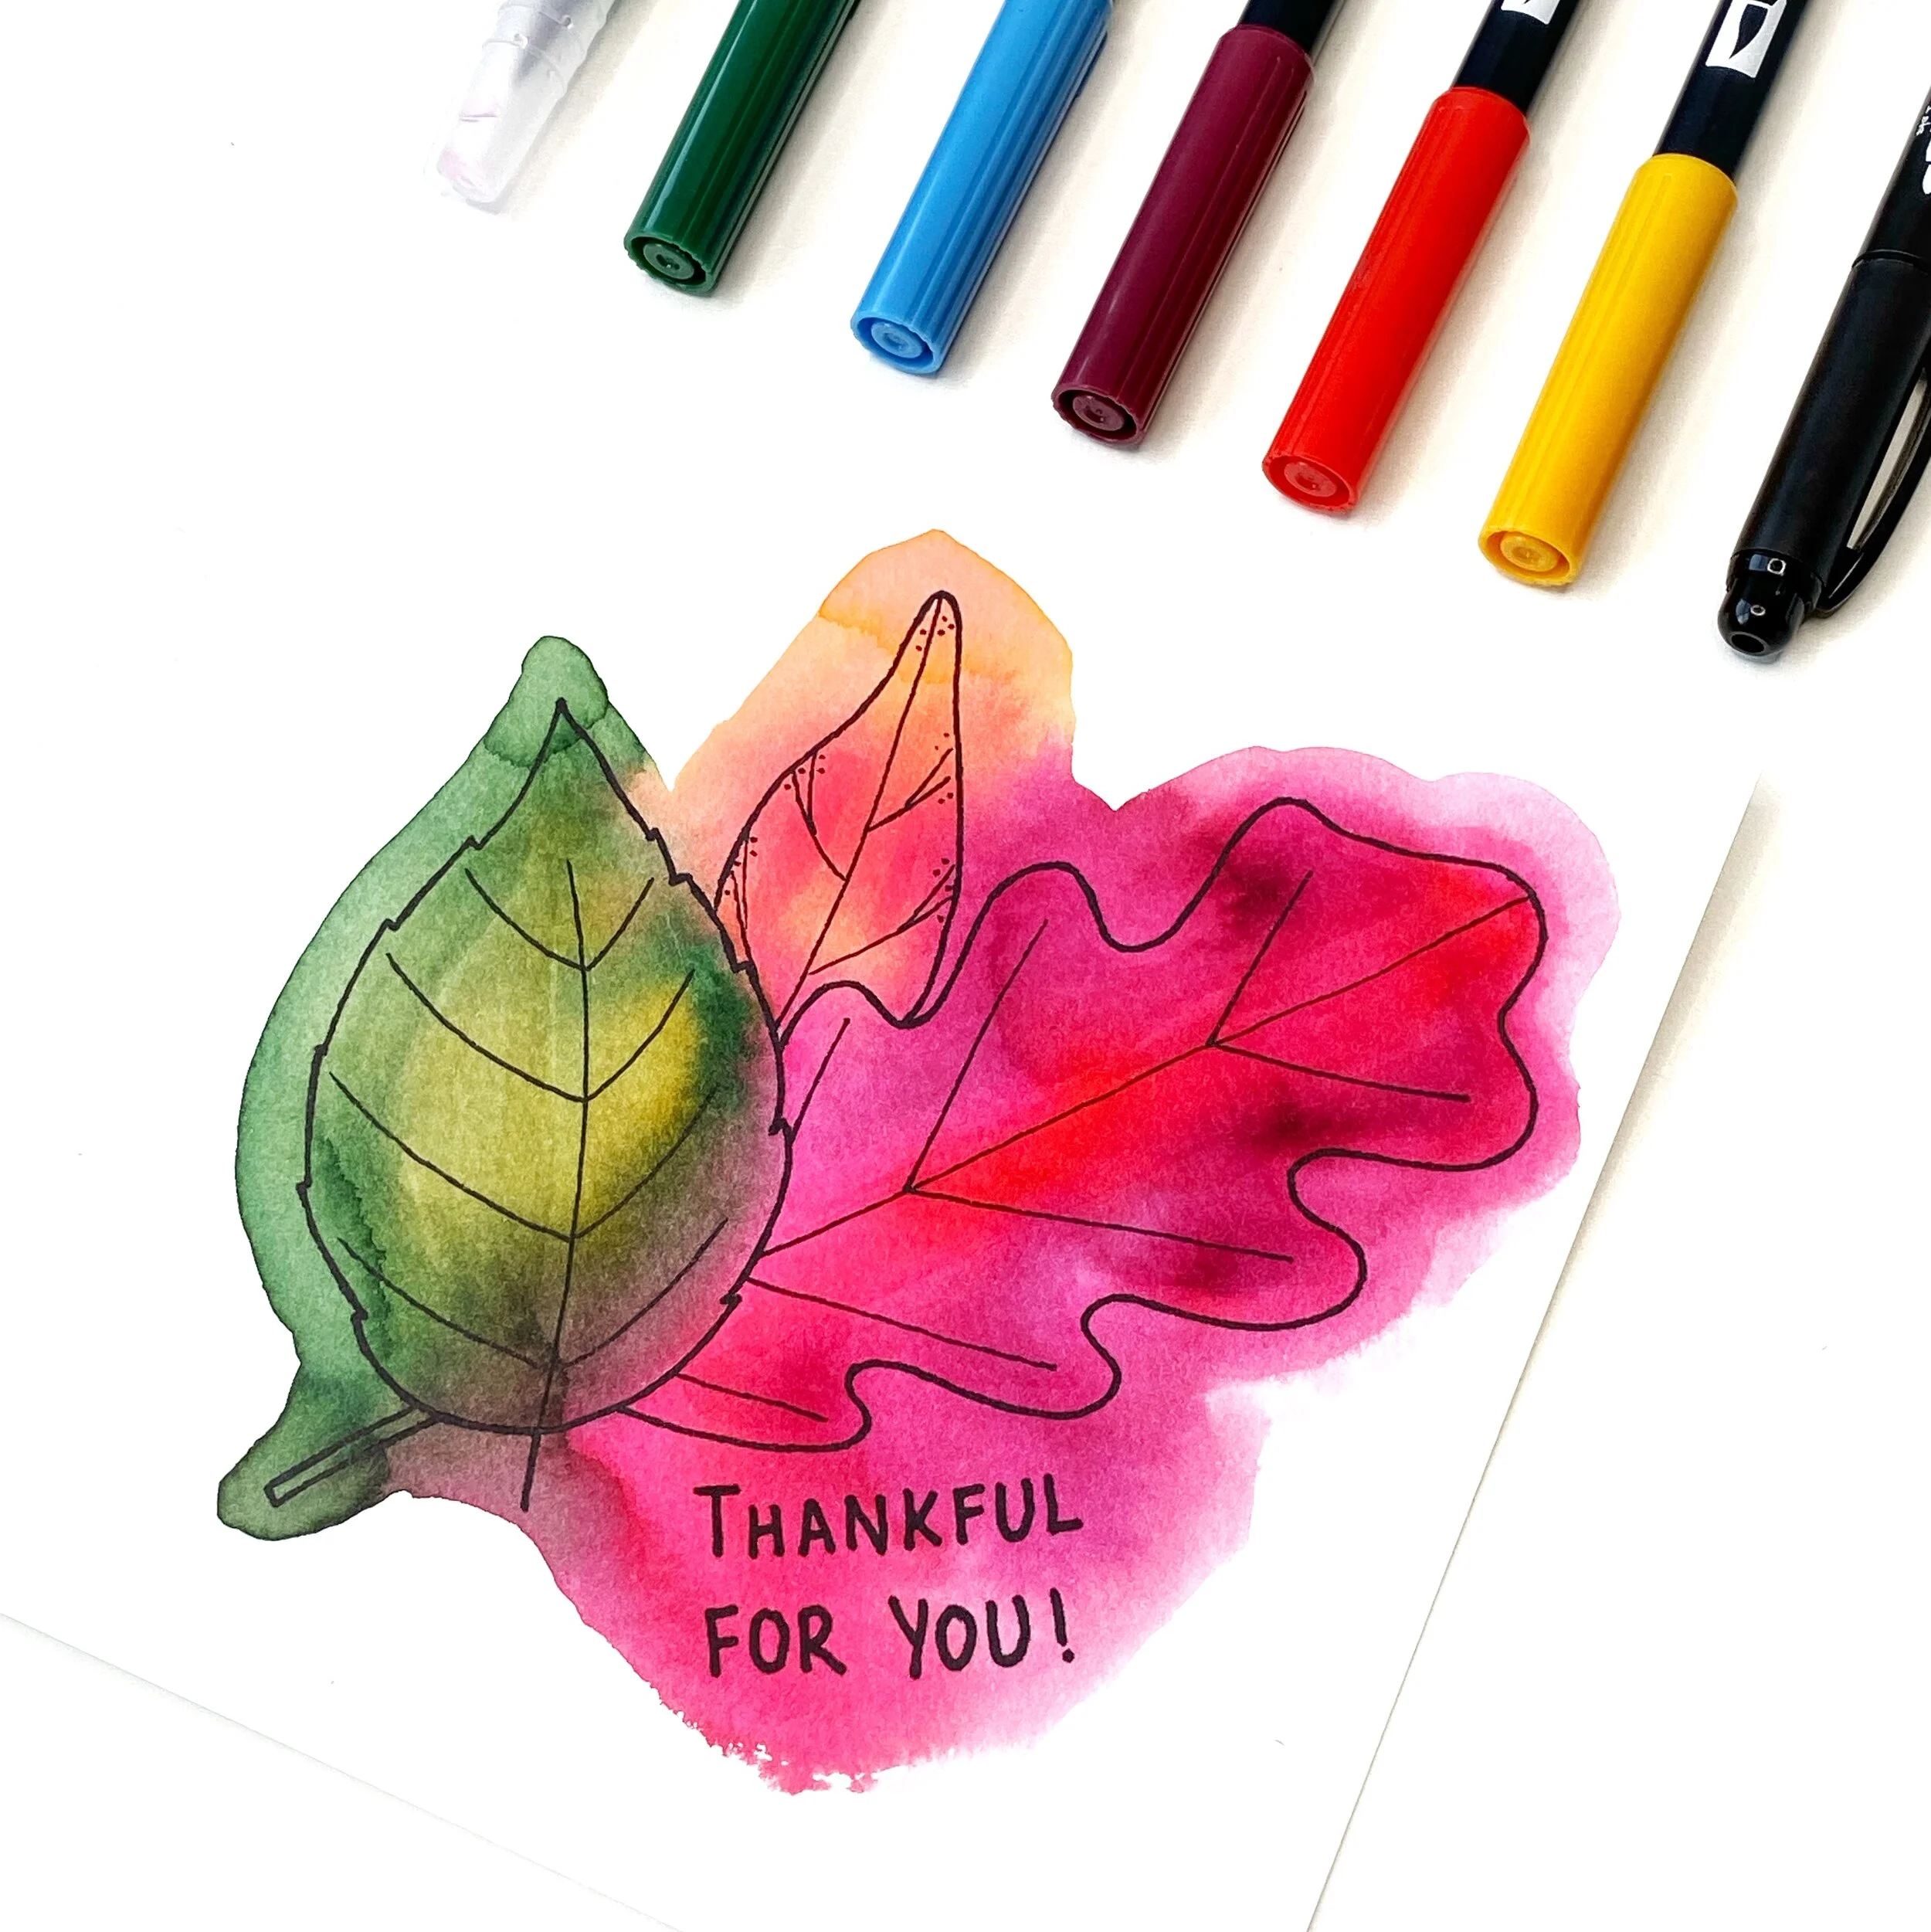
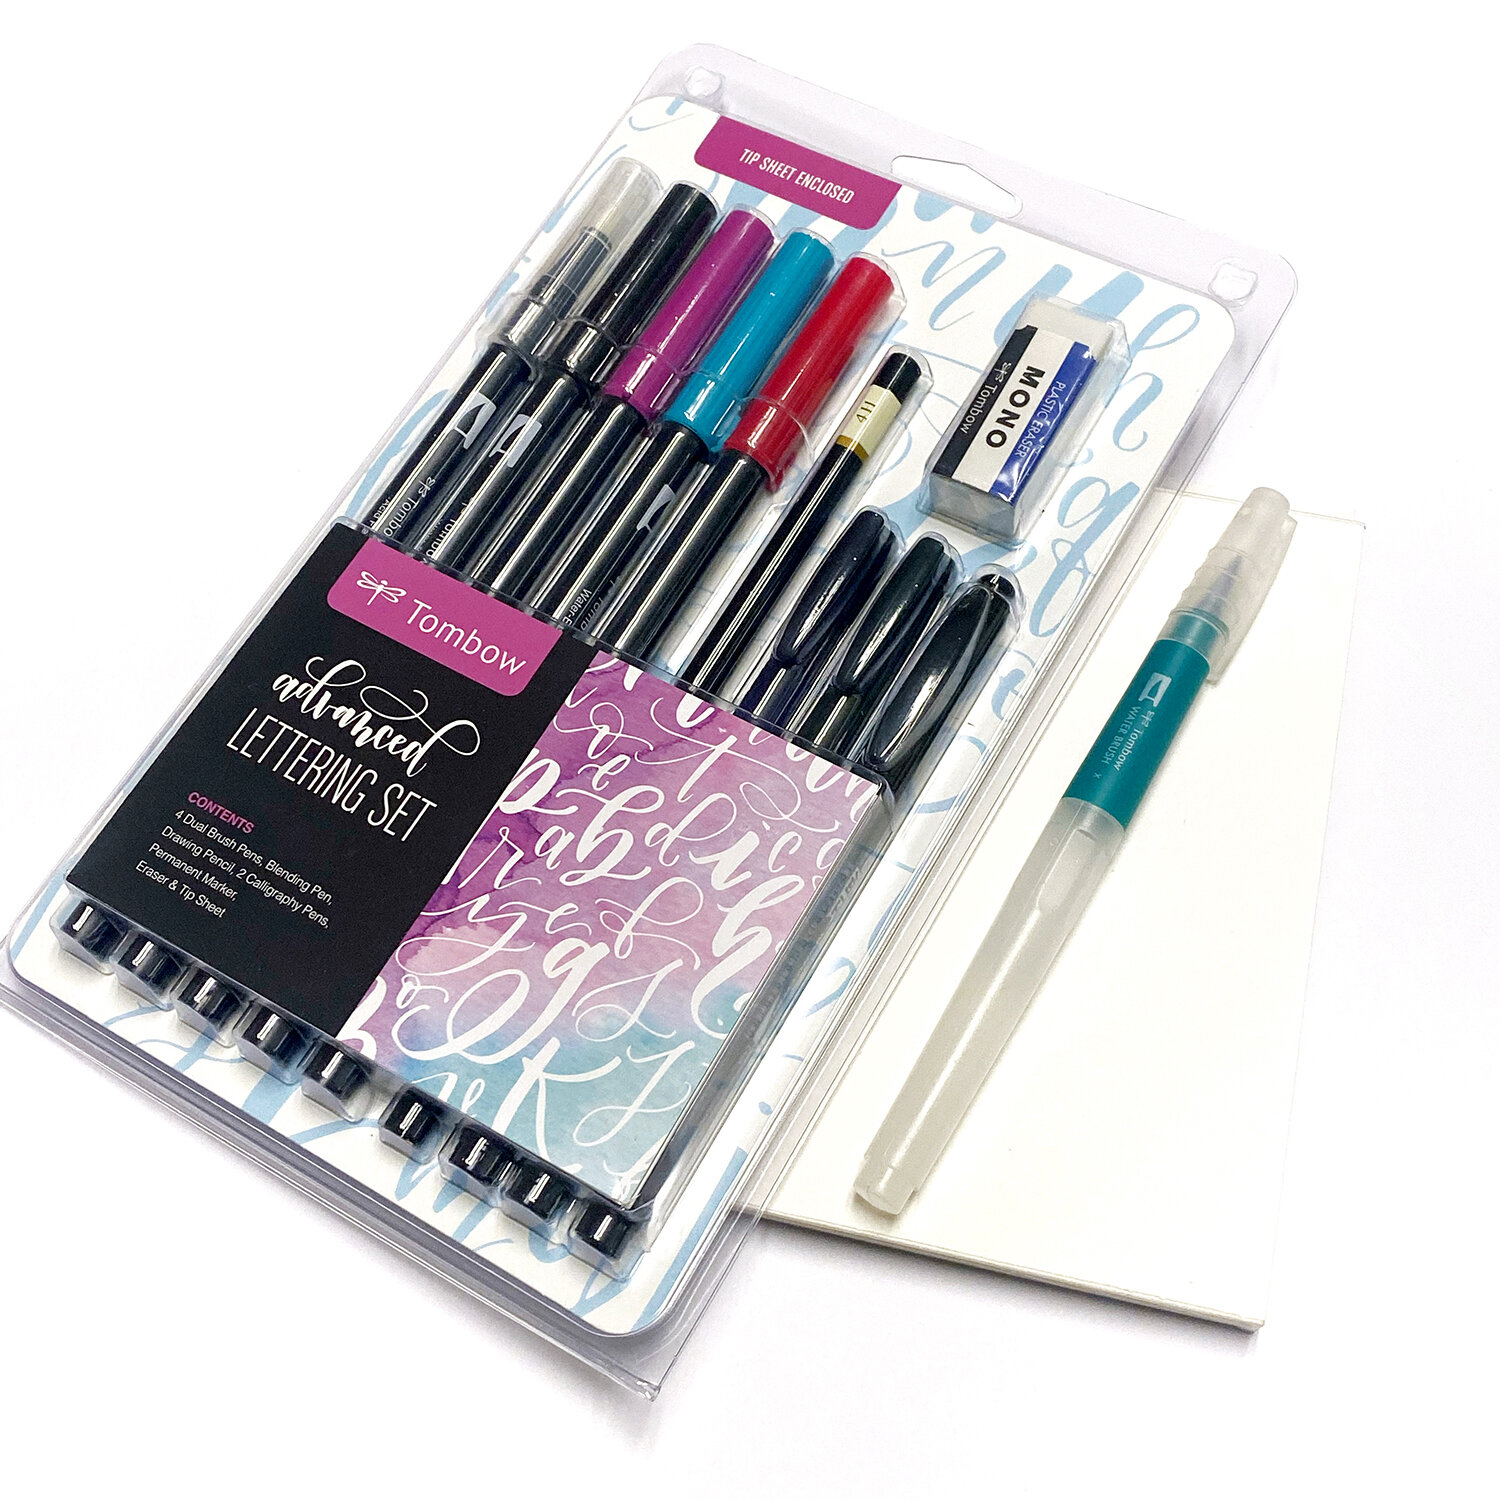
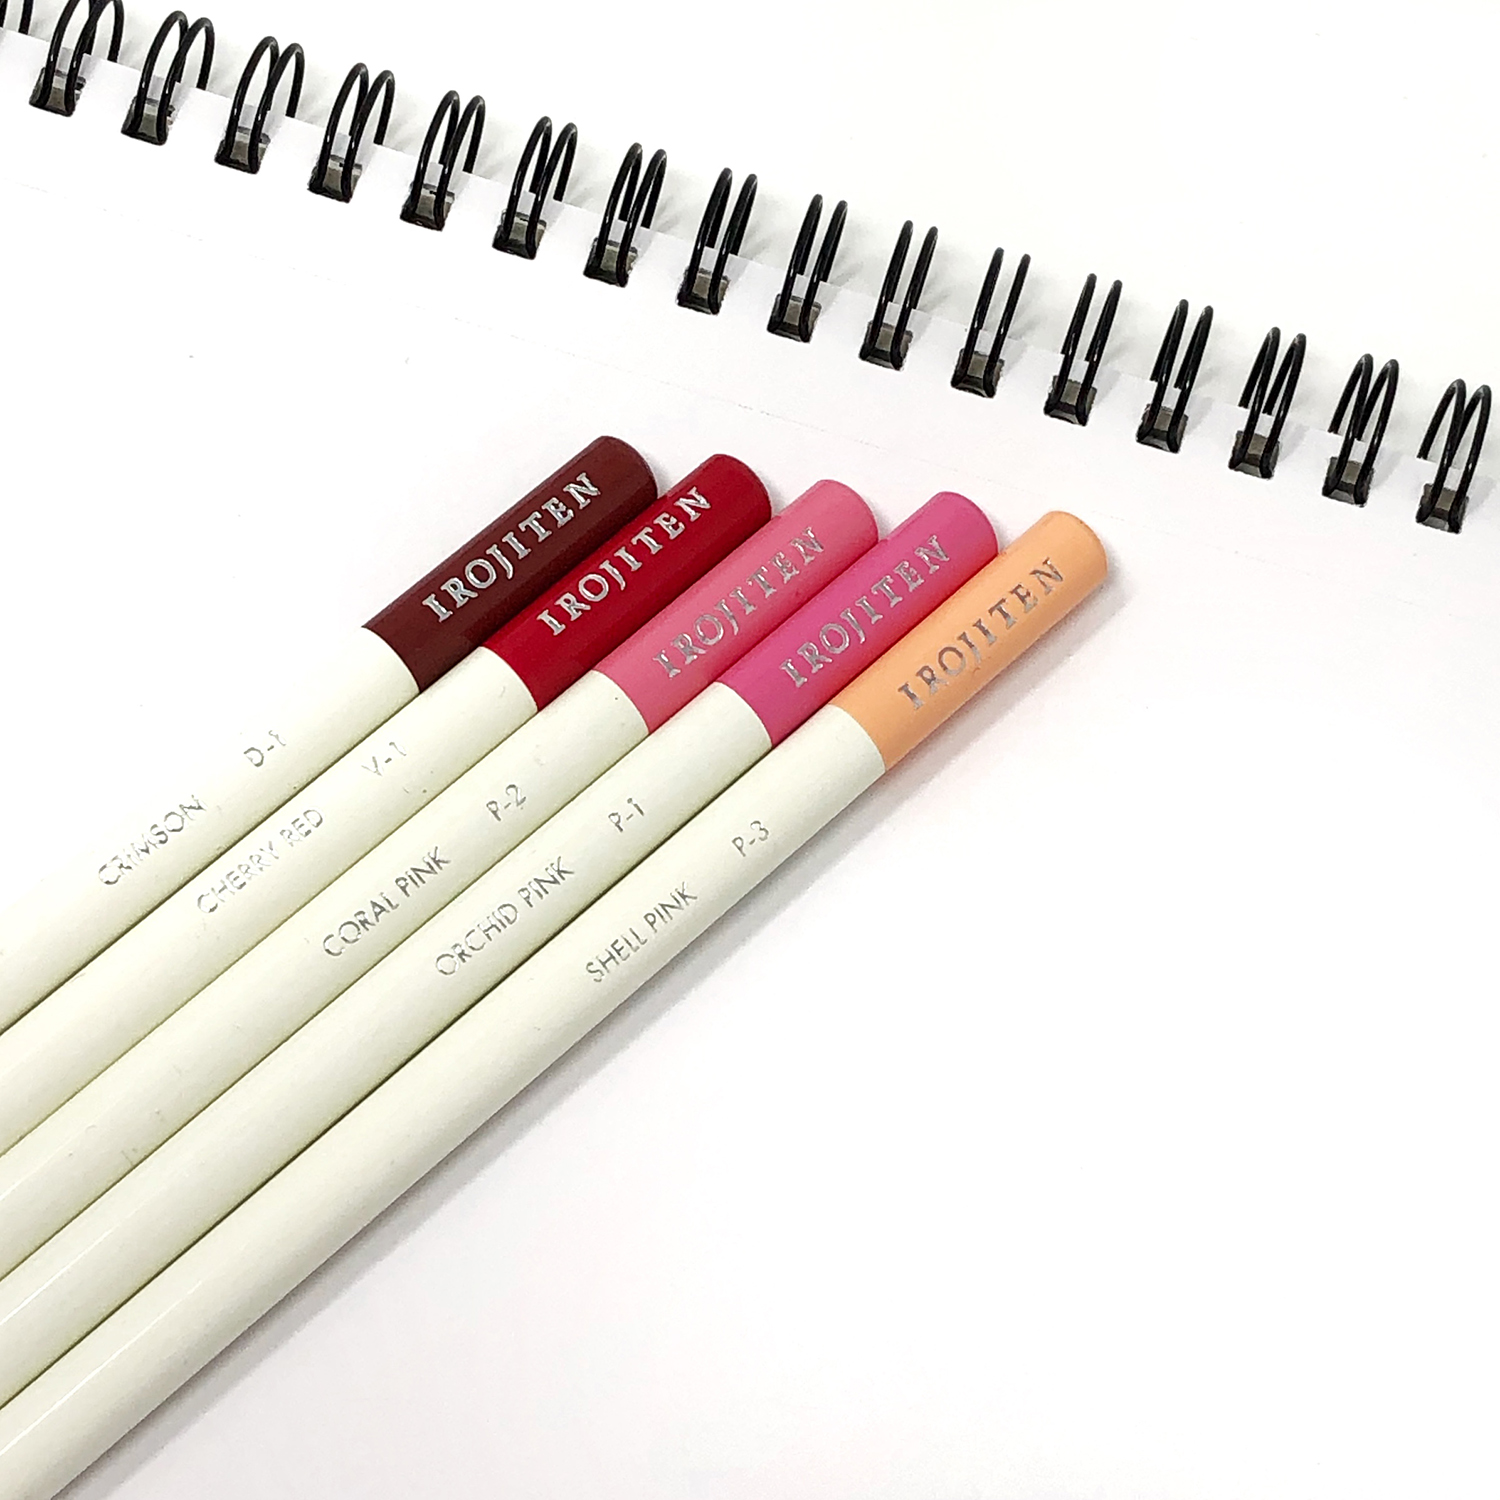
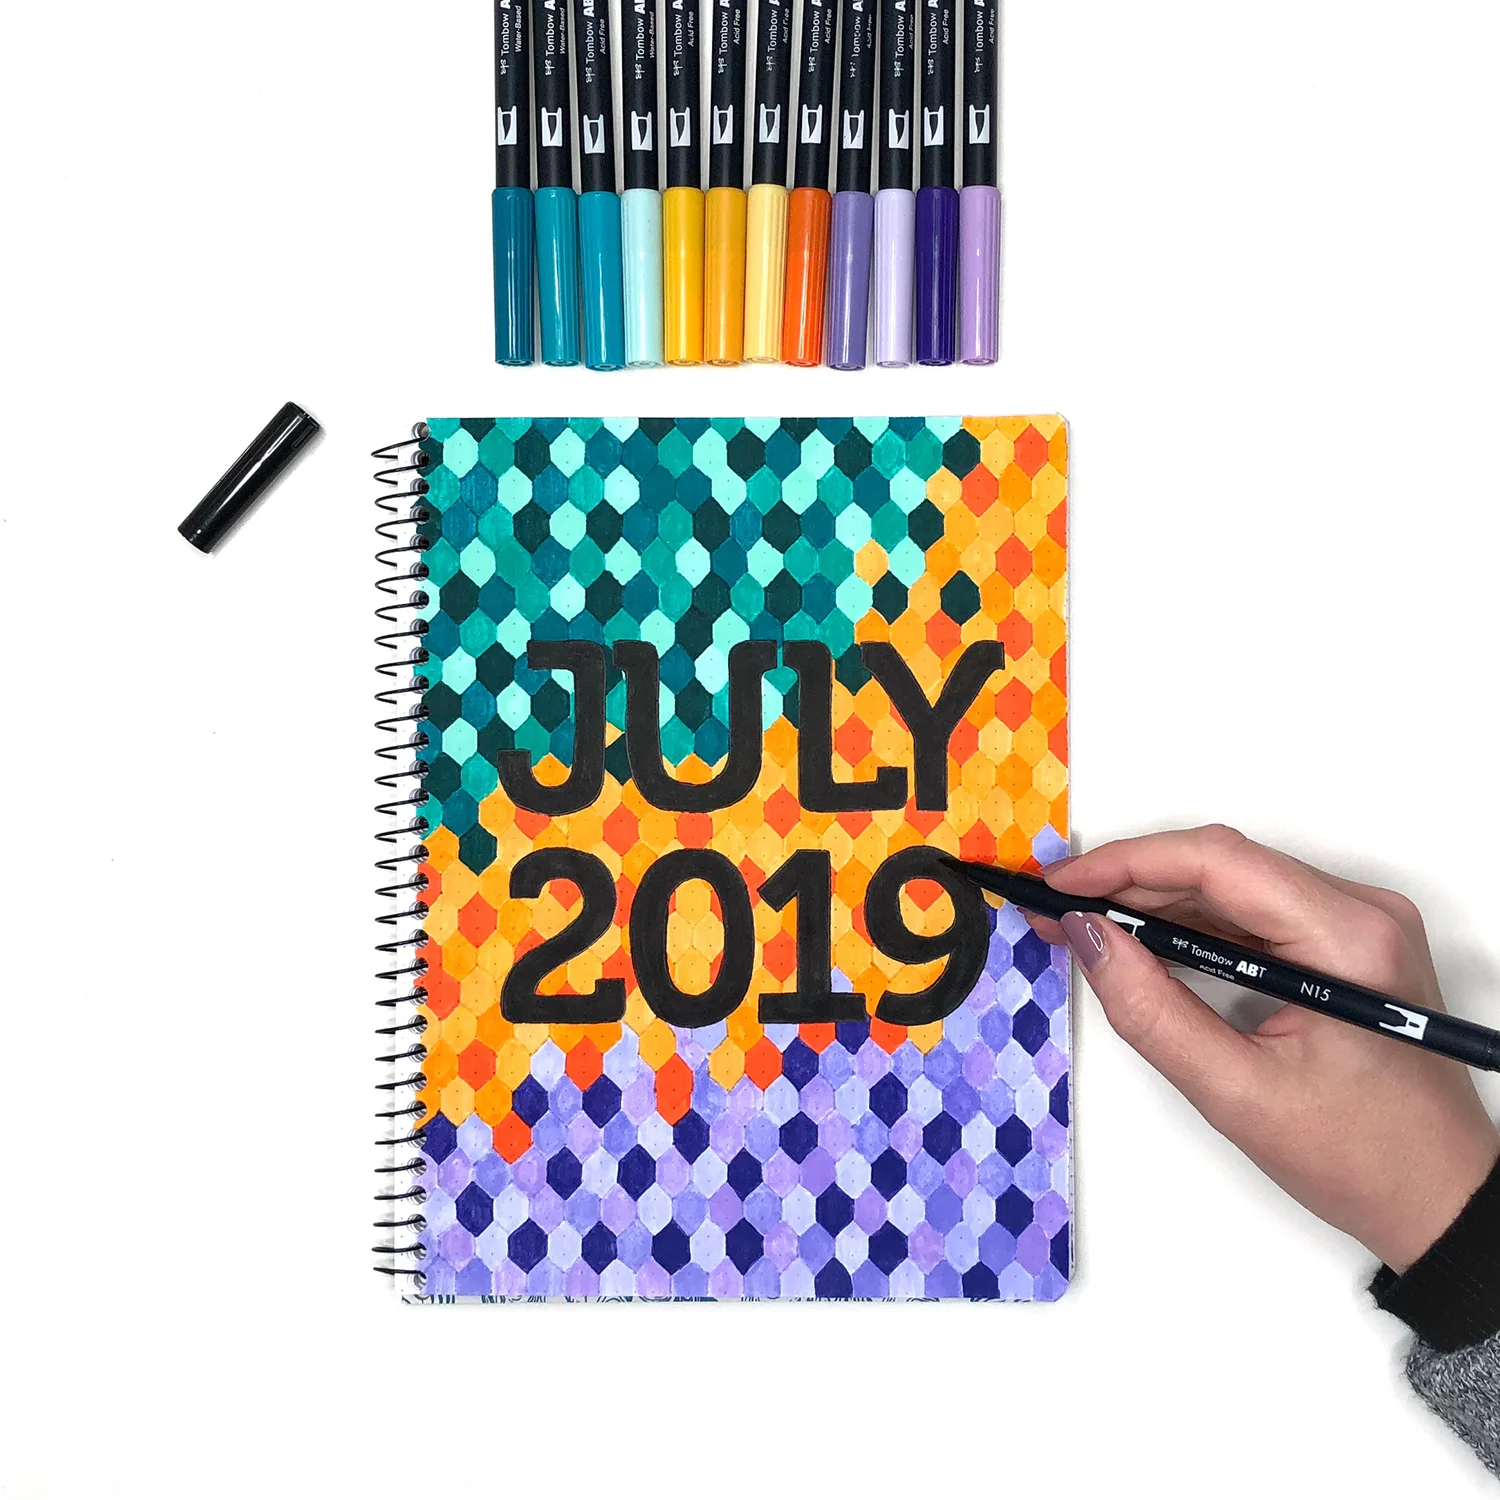
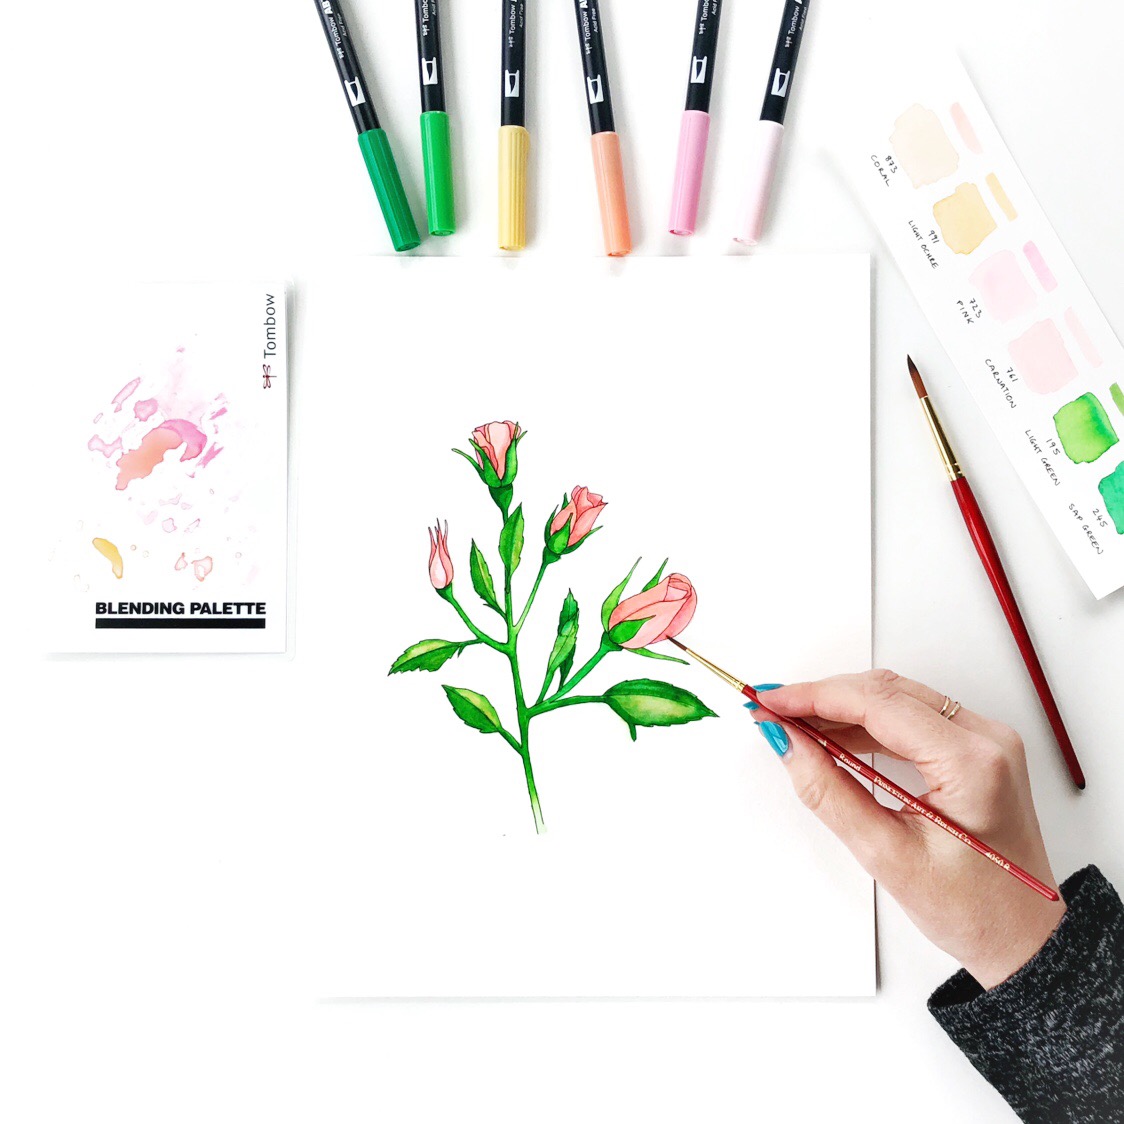
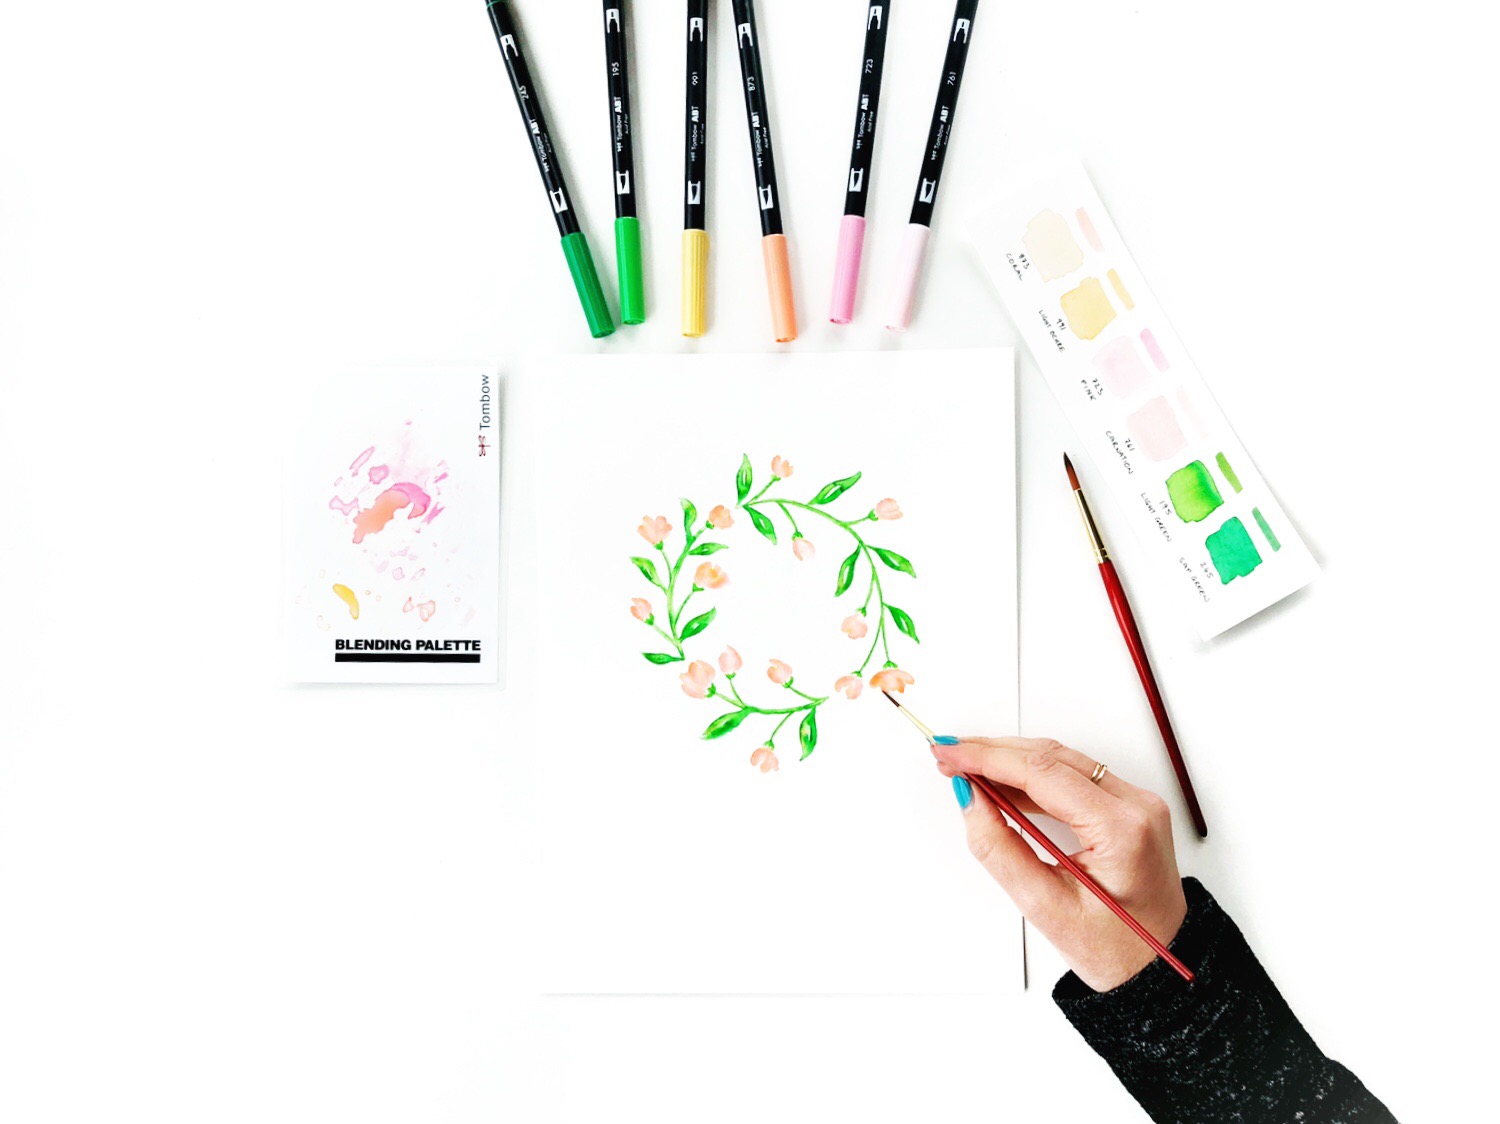
  • Markers (affiliate link)

  • Mixed Media Paper

  • Scissors or Circle Punch

  • Hole Punch

  • Book Ring

  • Black Pen

Make a Color Swatch Ring using Markers. By Jessica mack on BrownPaperBunny.

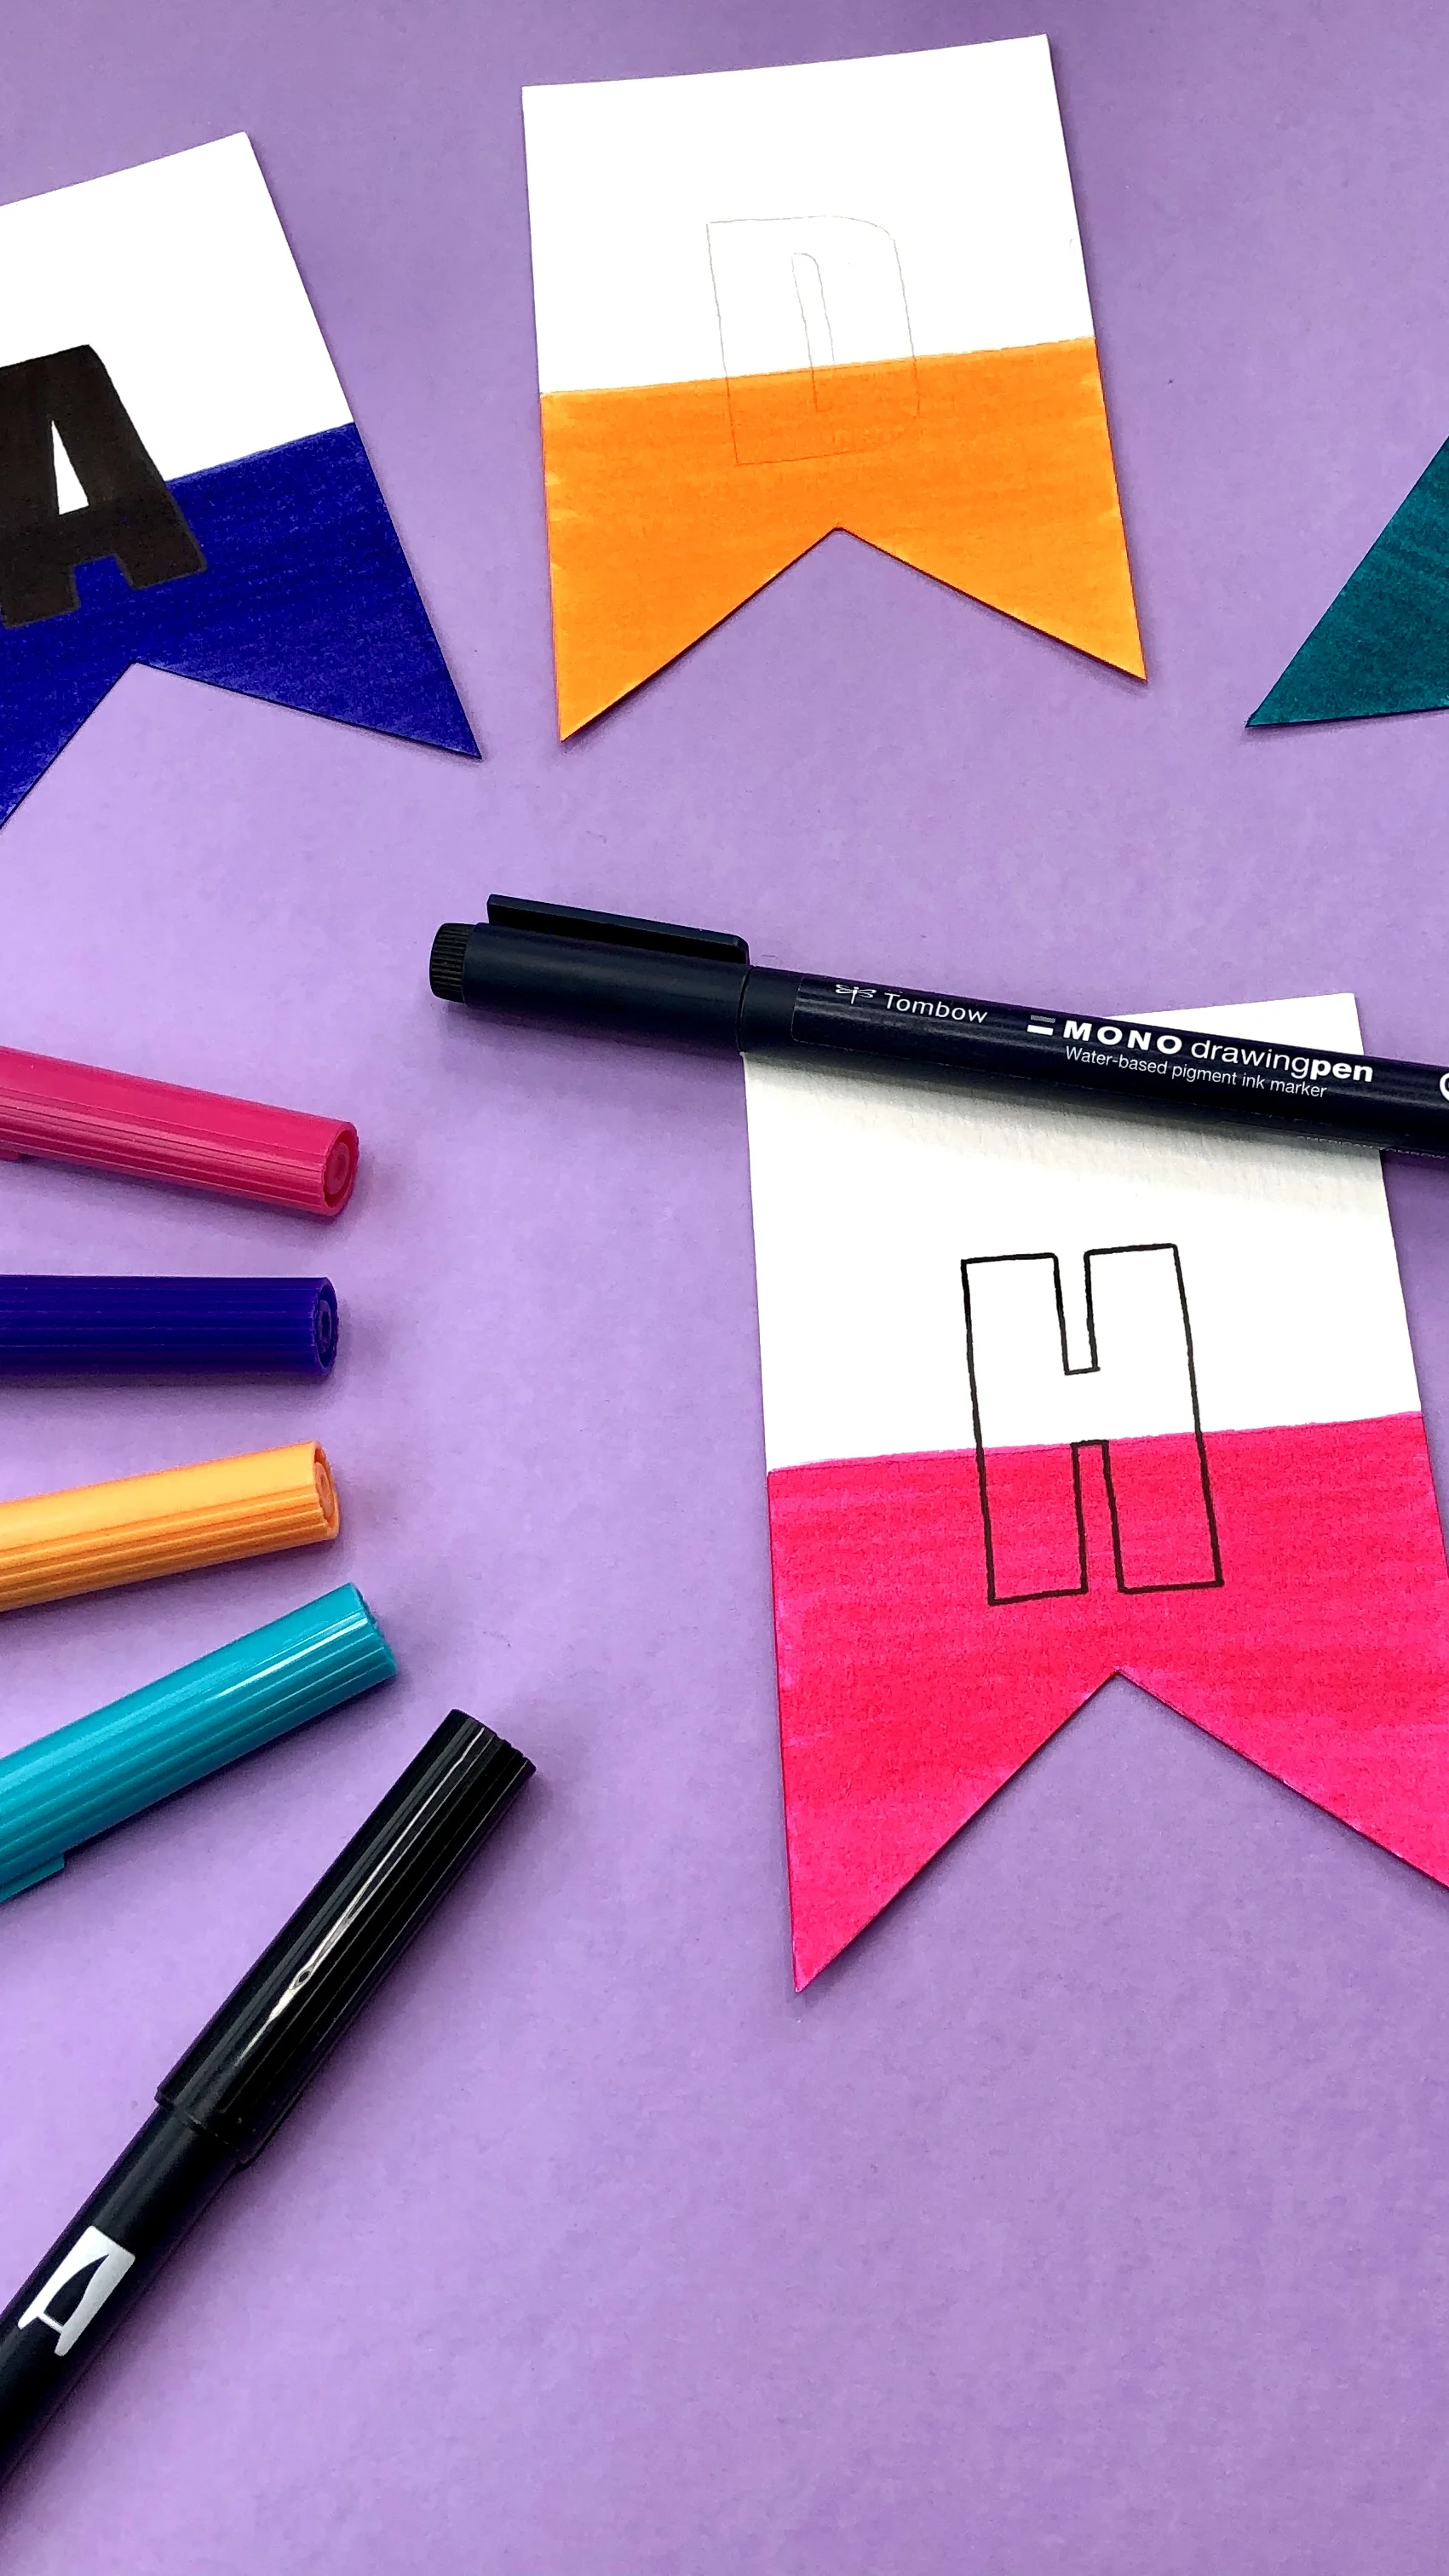
Step 1: Create Your Swatch Cards

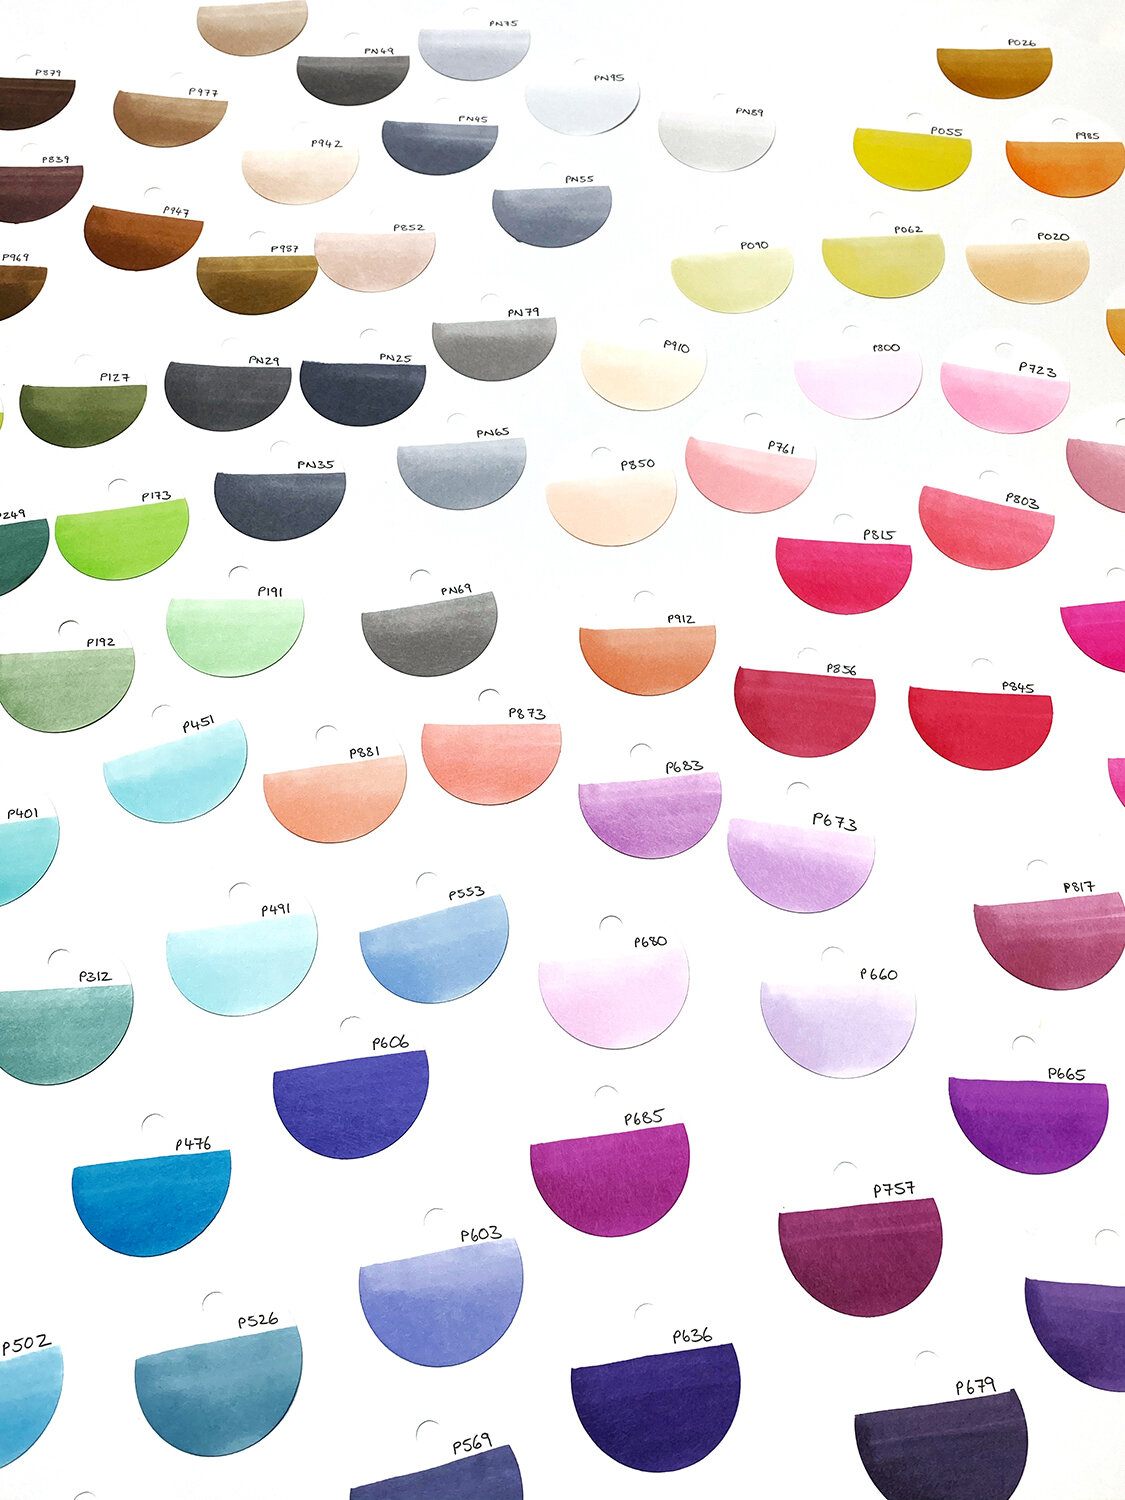
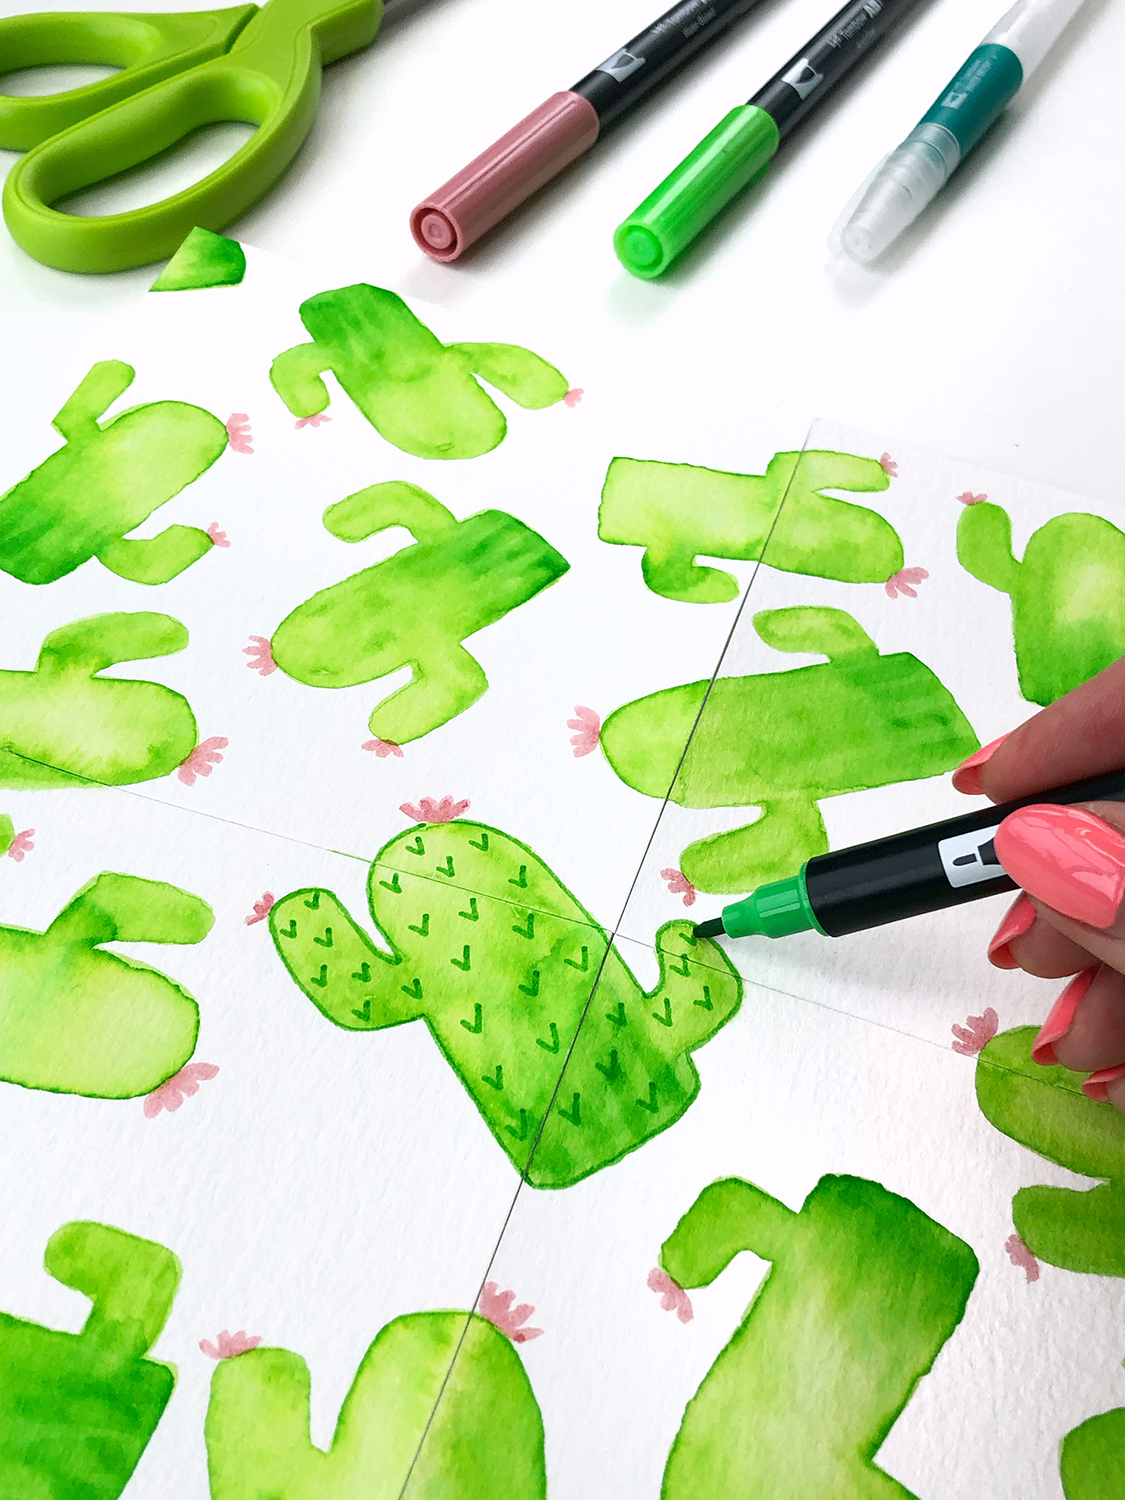
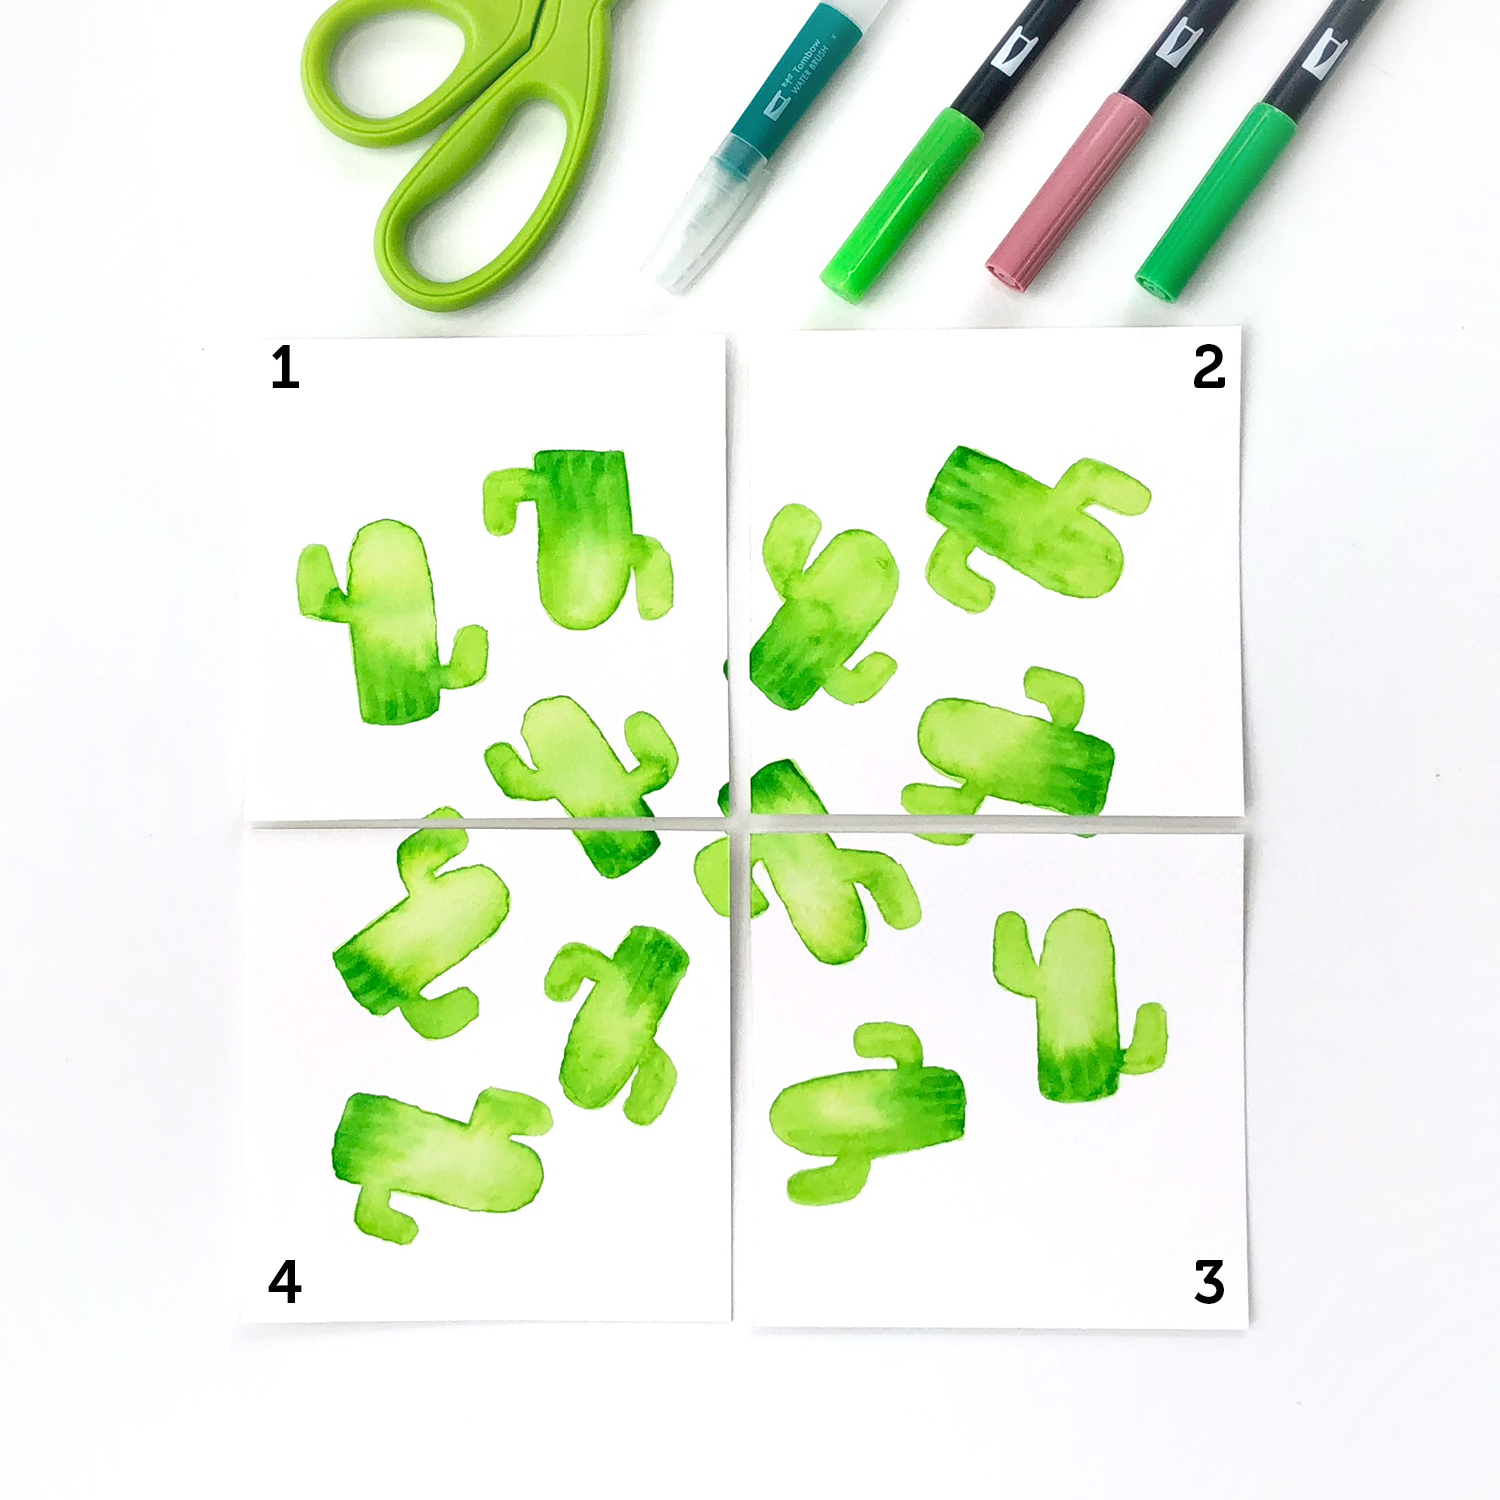
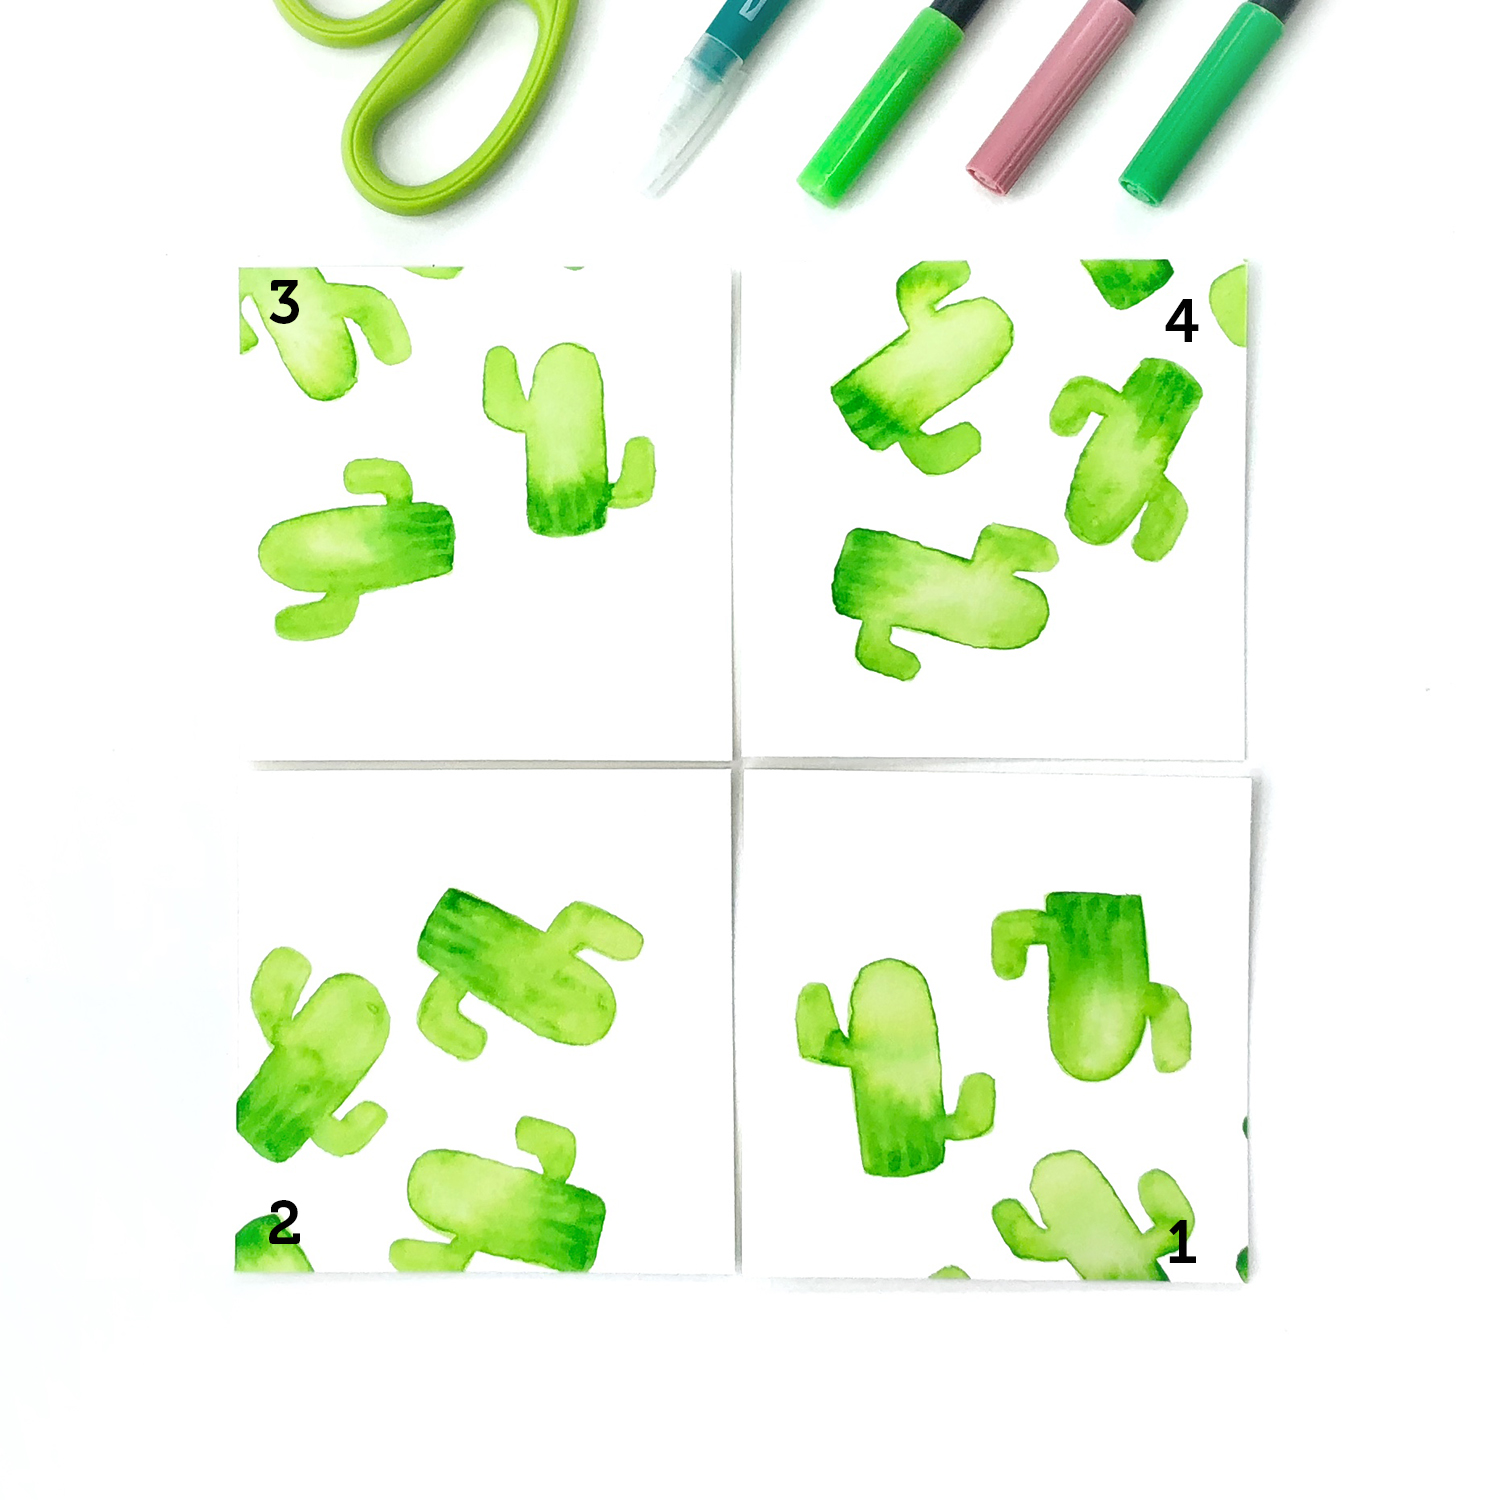
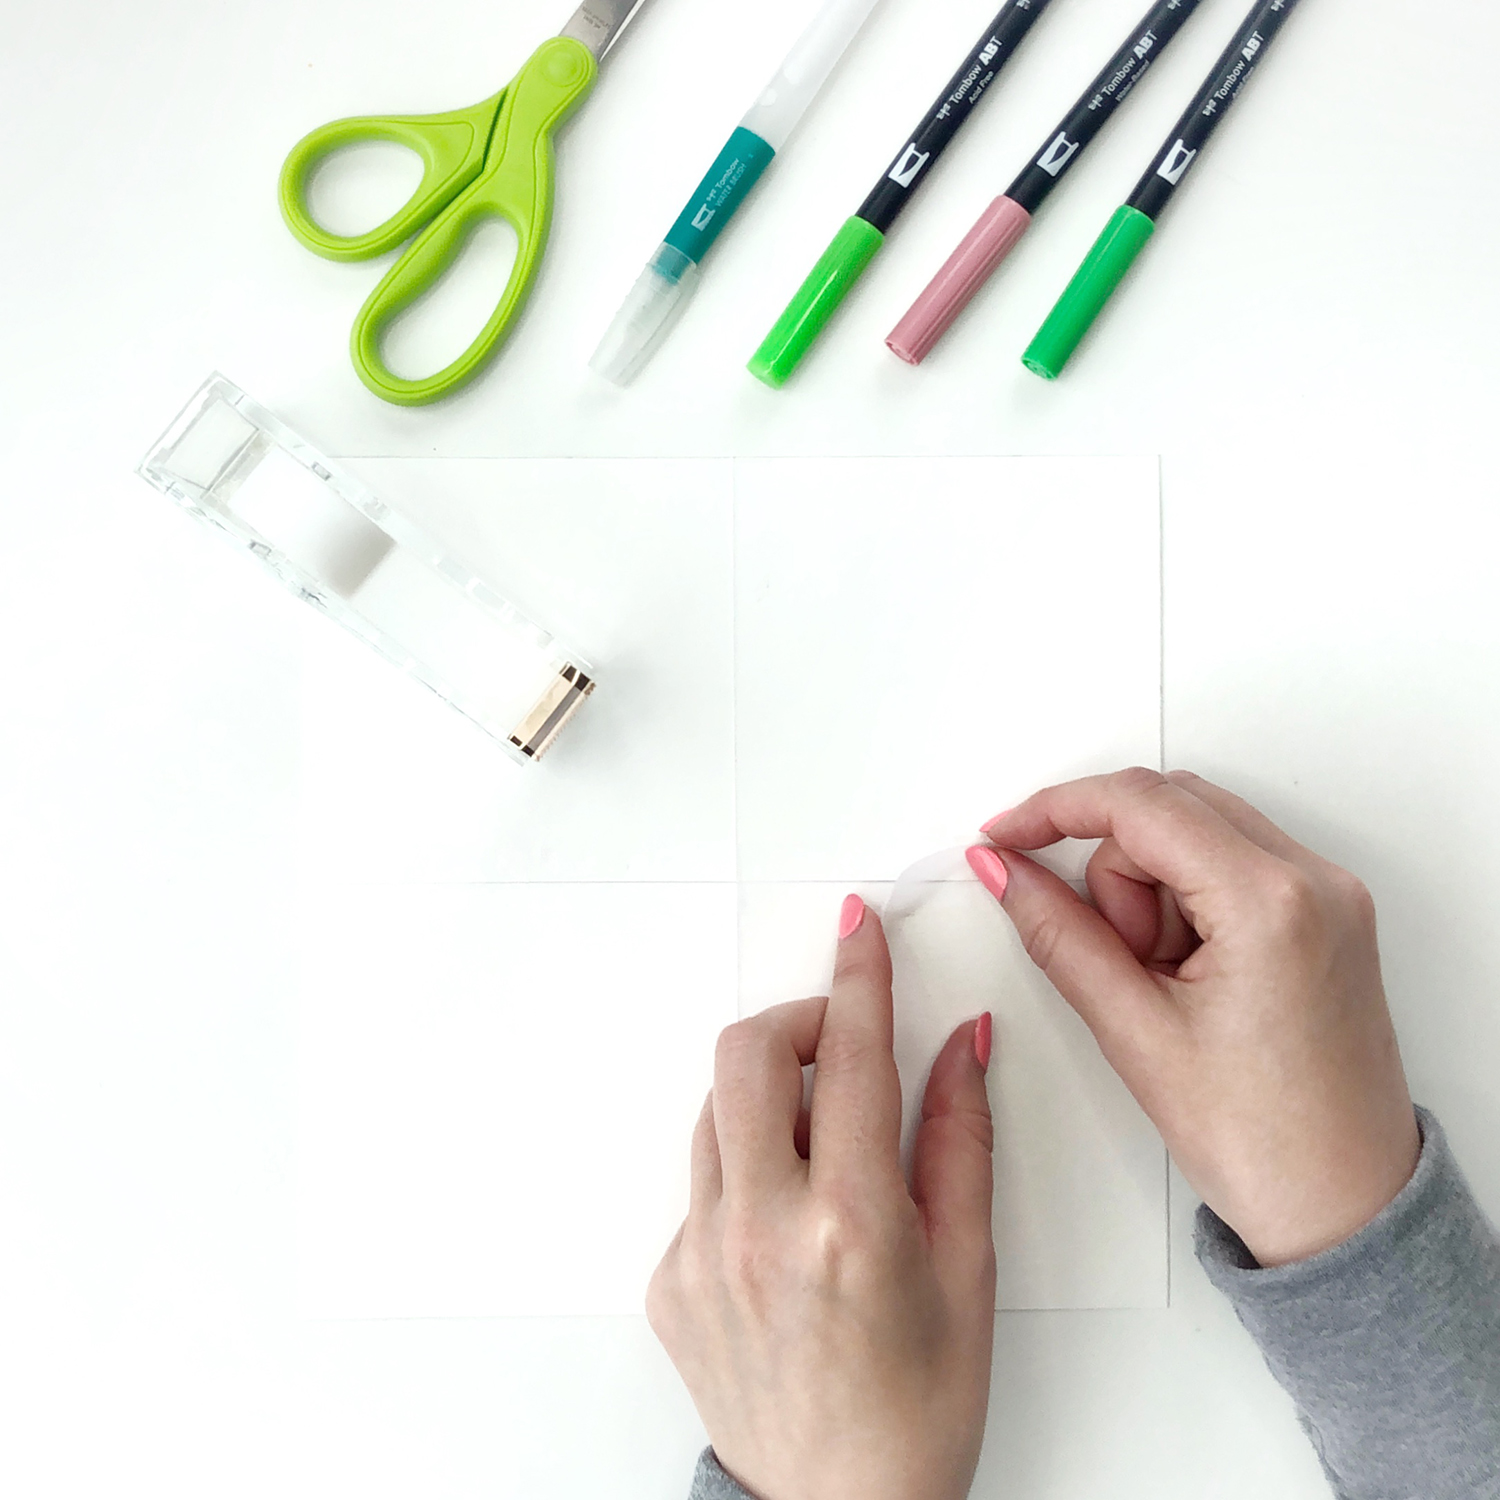
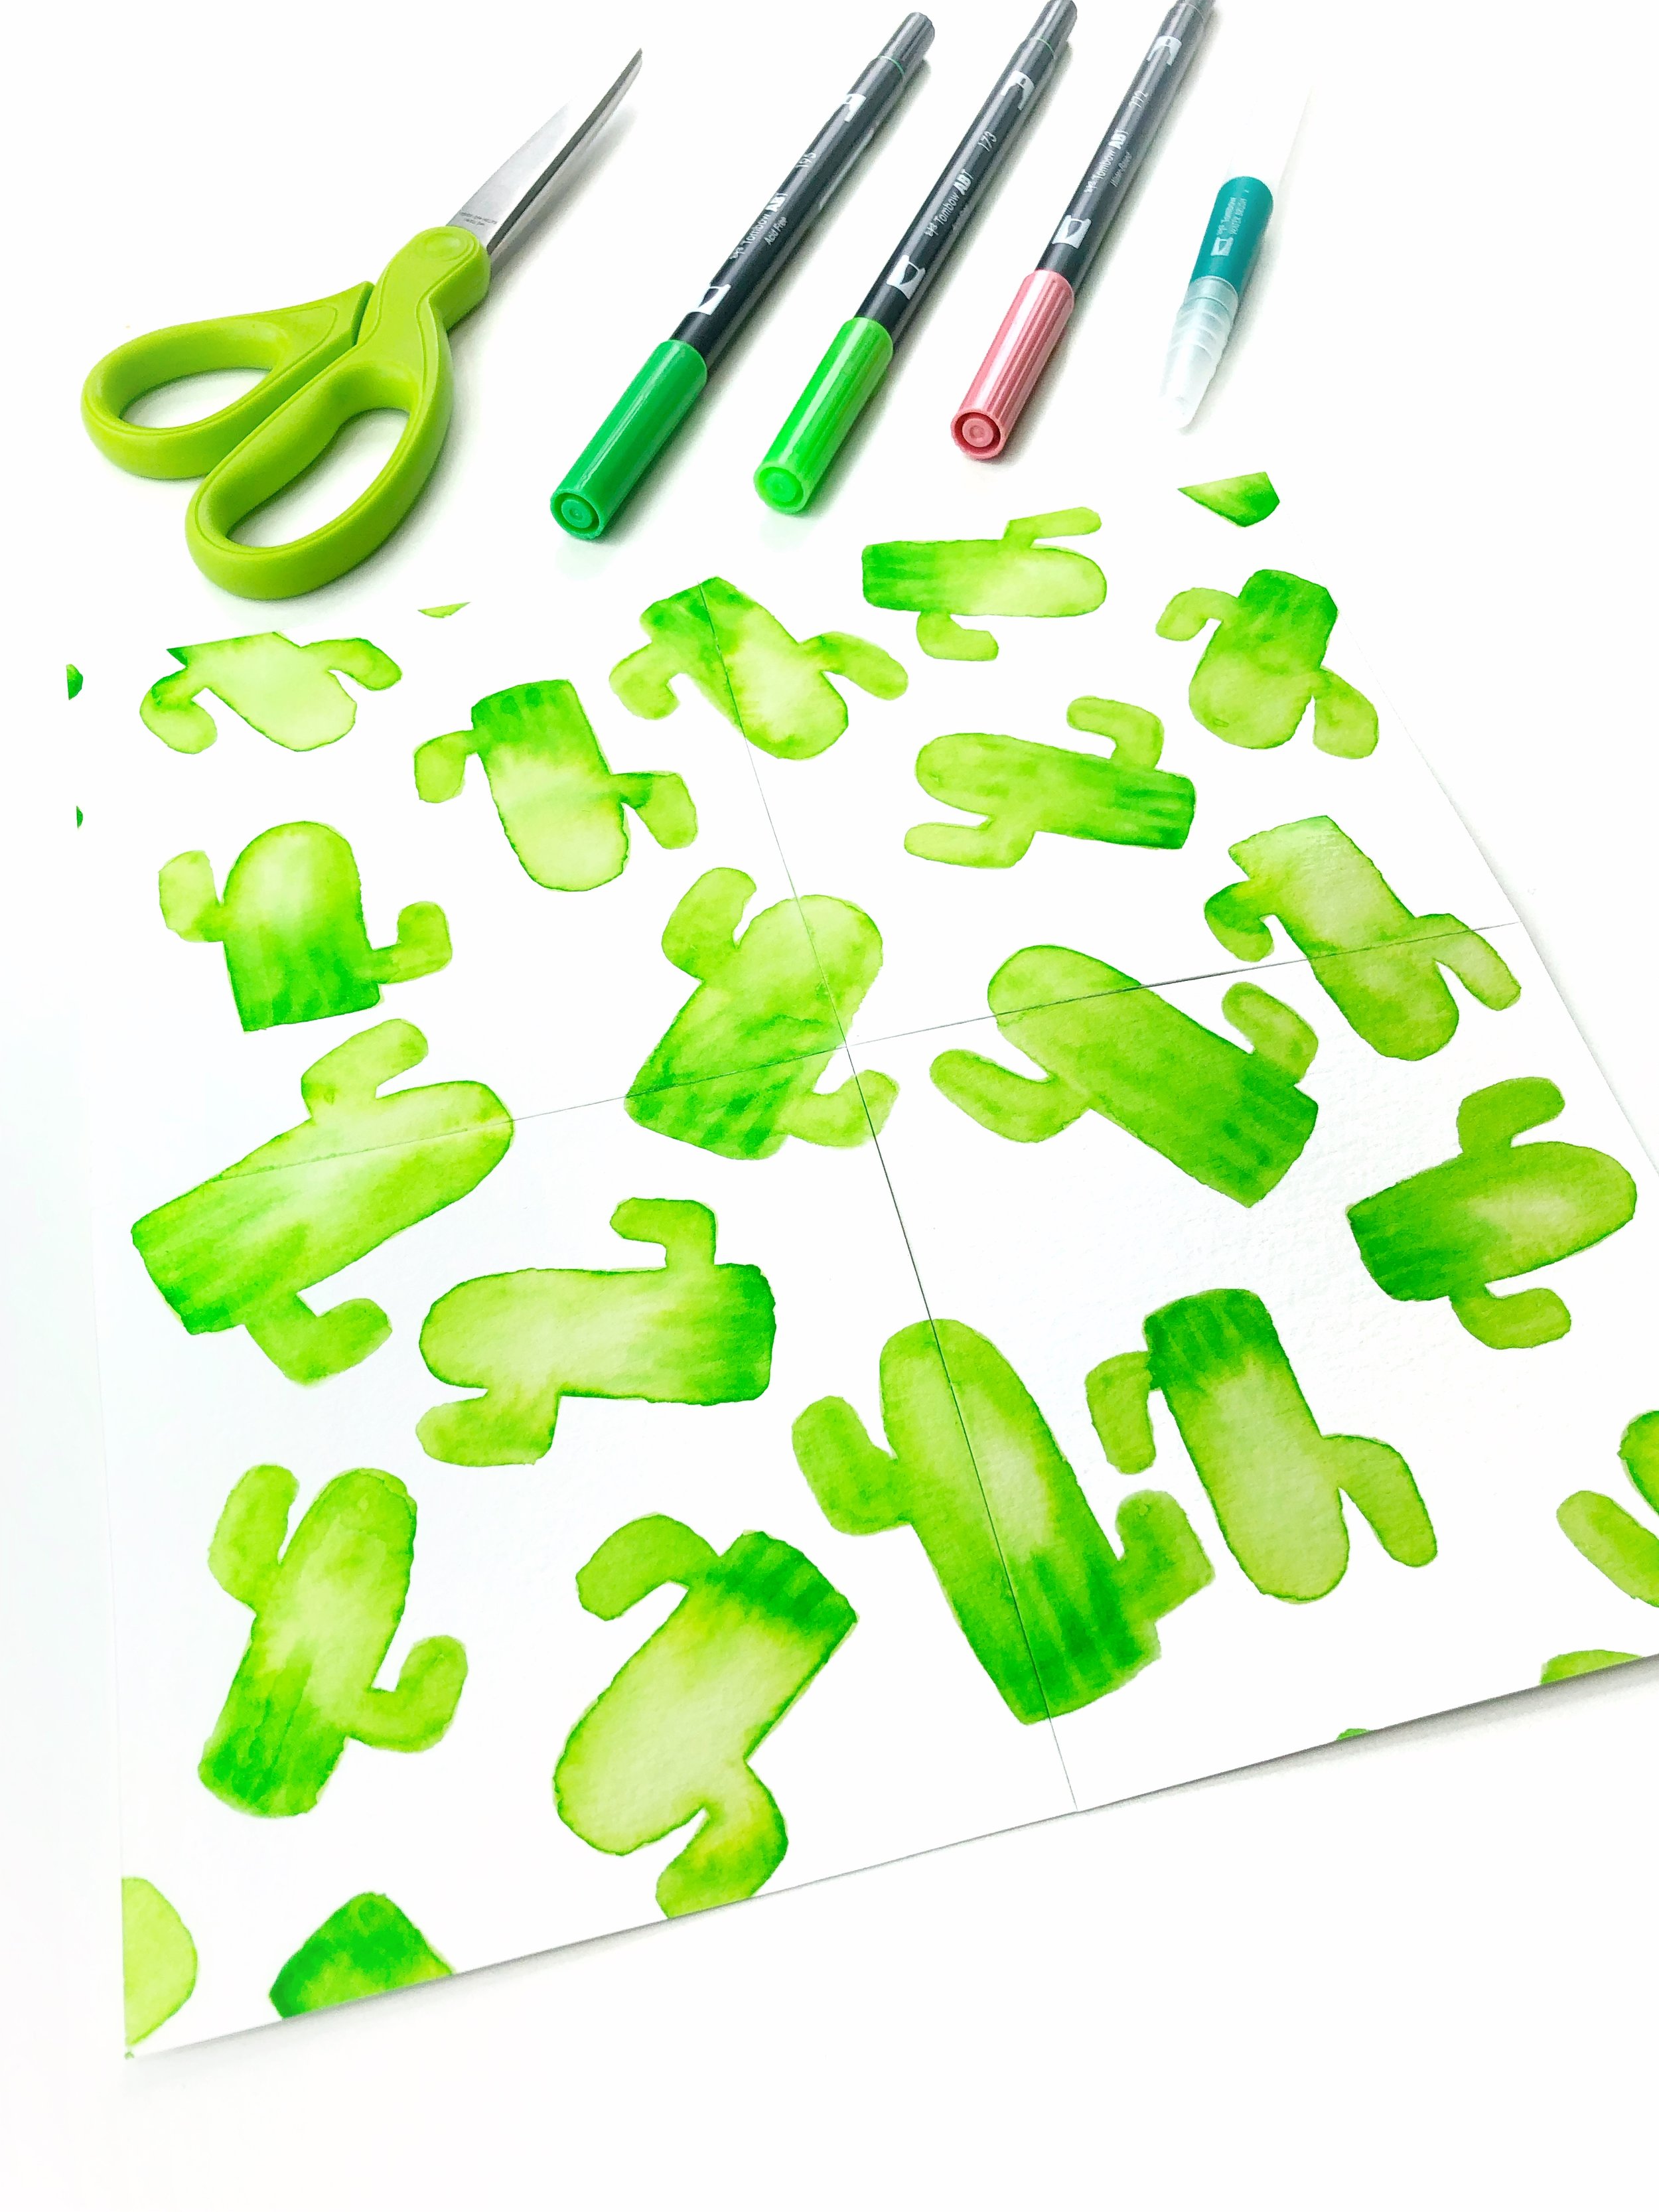
You can cut little squares, rectangles, or circles for your swatch cards. Aim for about an inch and a half wide. If you don't have a circle punch I recommend sticking to squares or rectangles just because they are easier to cut out. Once you have all your cards cut out, punch a hole in the top of each one. 

Make a Color Swatch Ring using Markers. By Jessica mack on BrownPaperBunny.

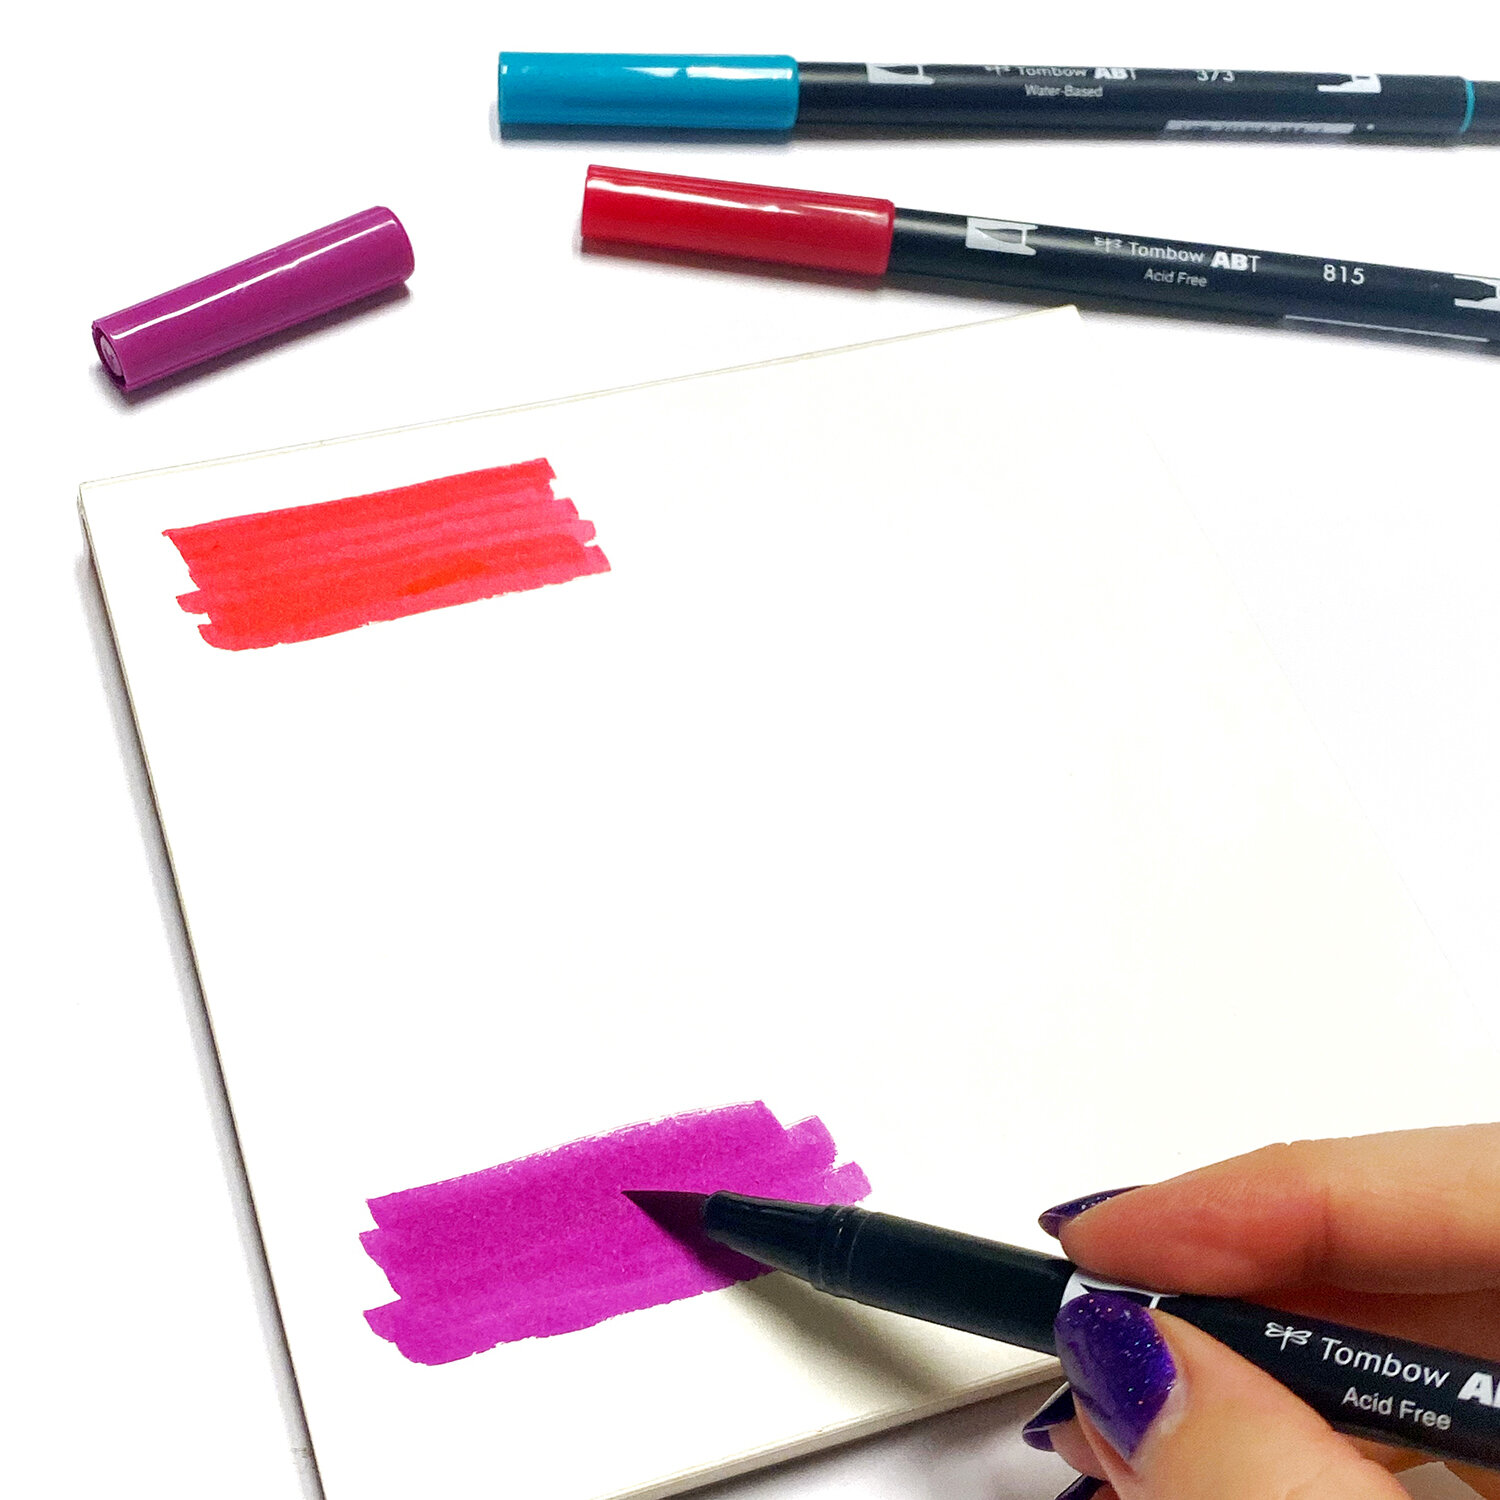
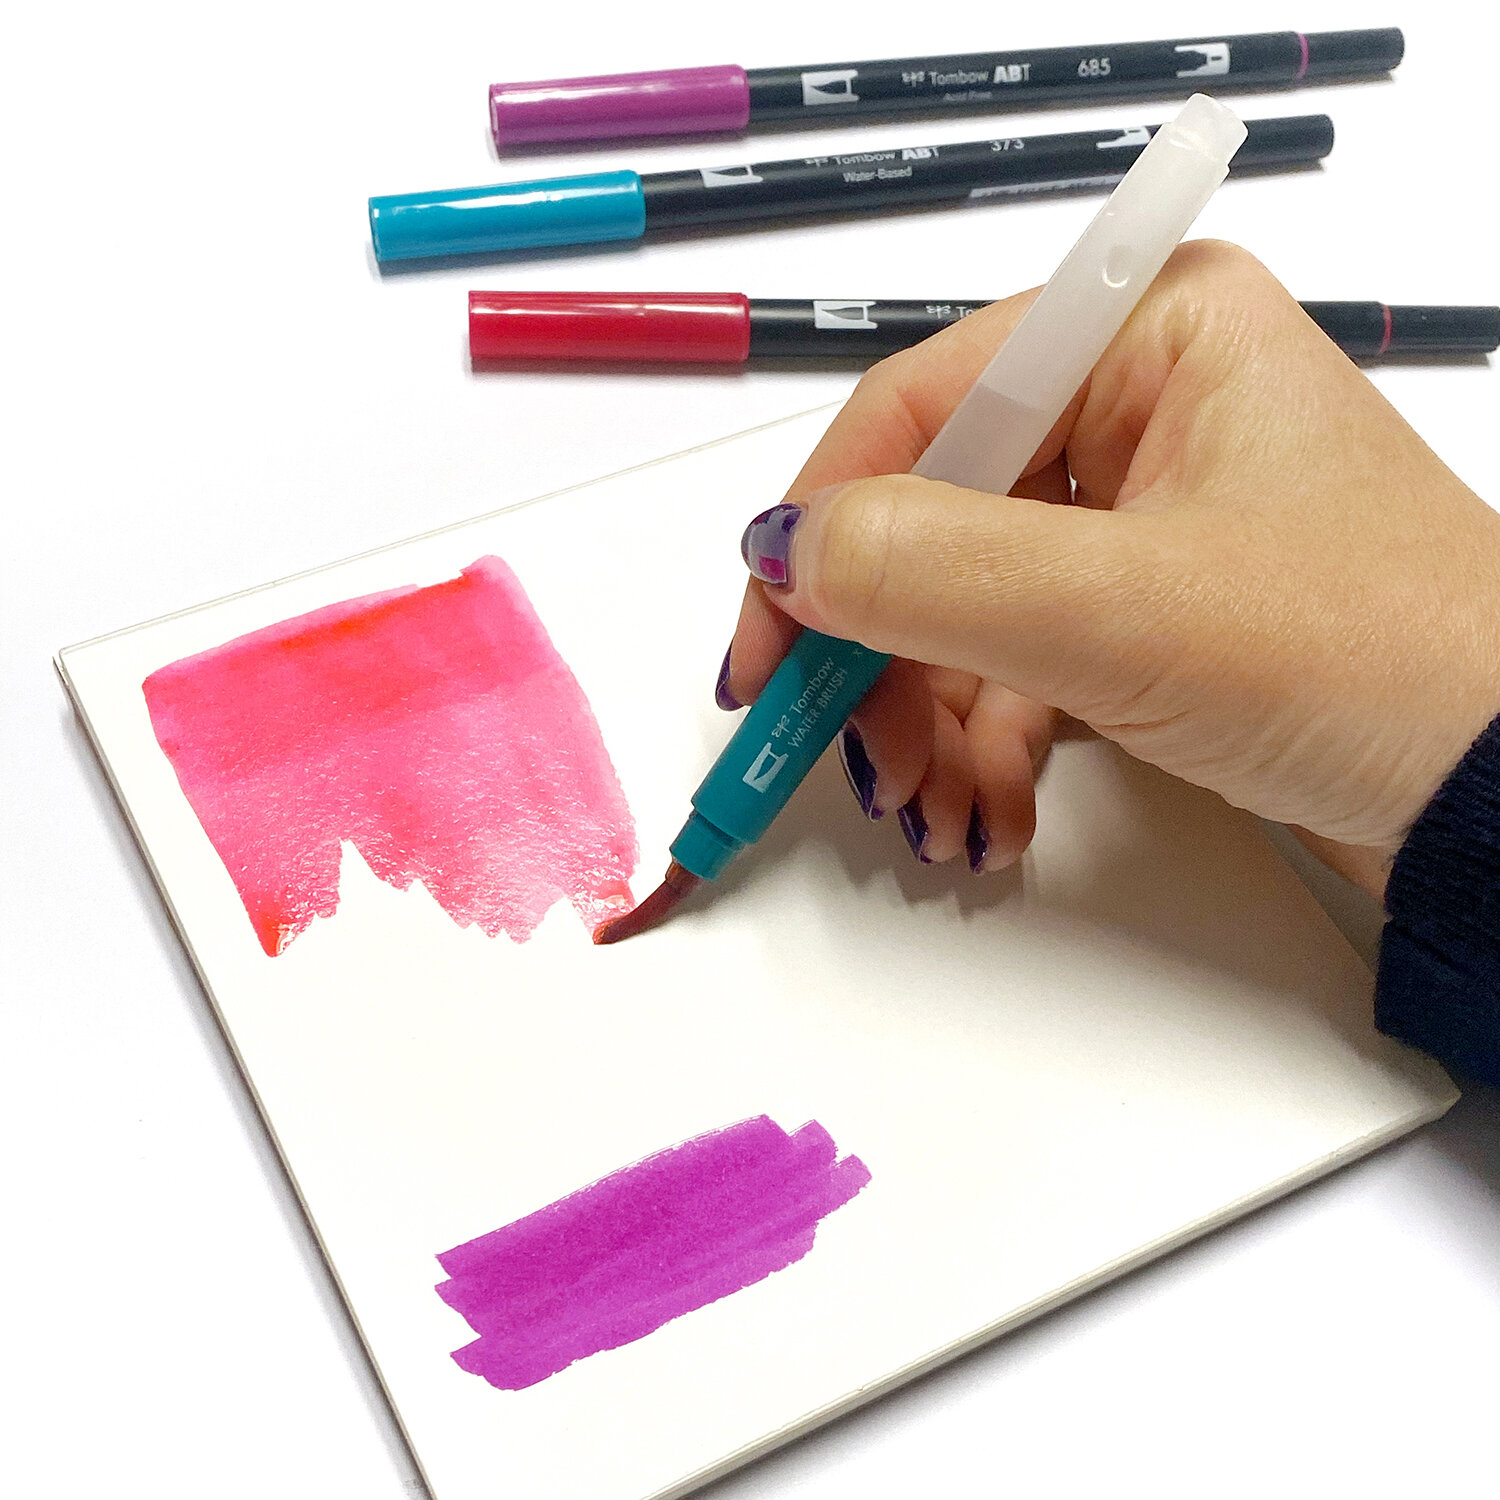
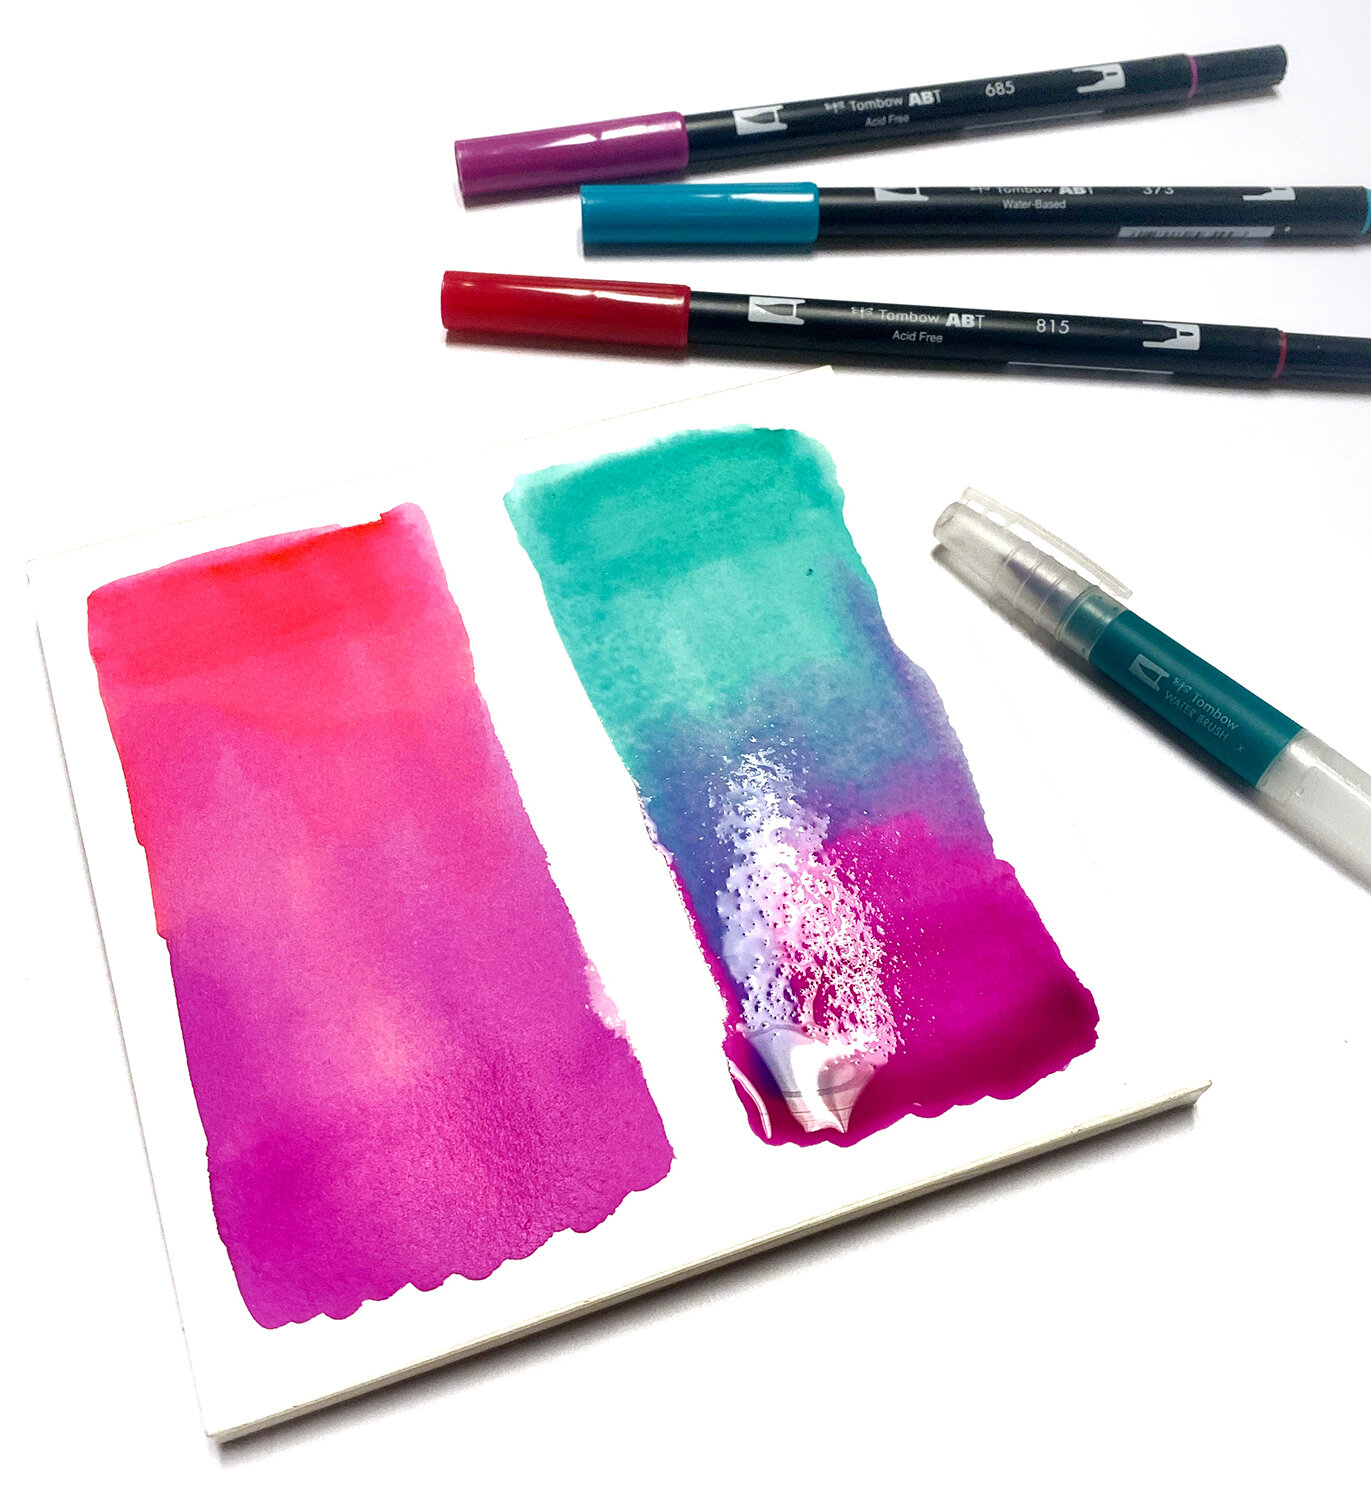
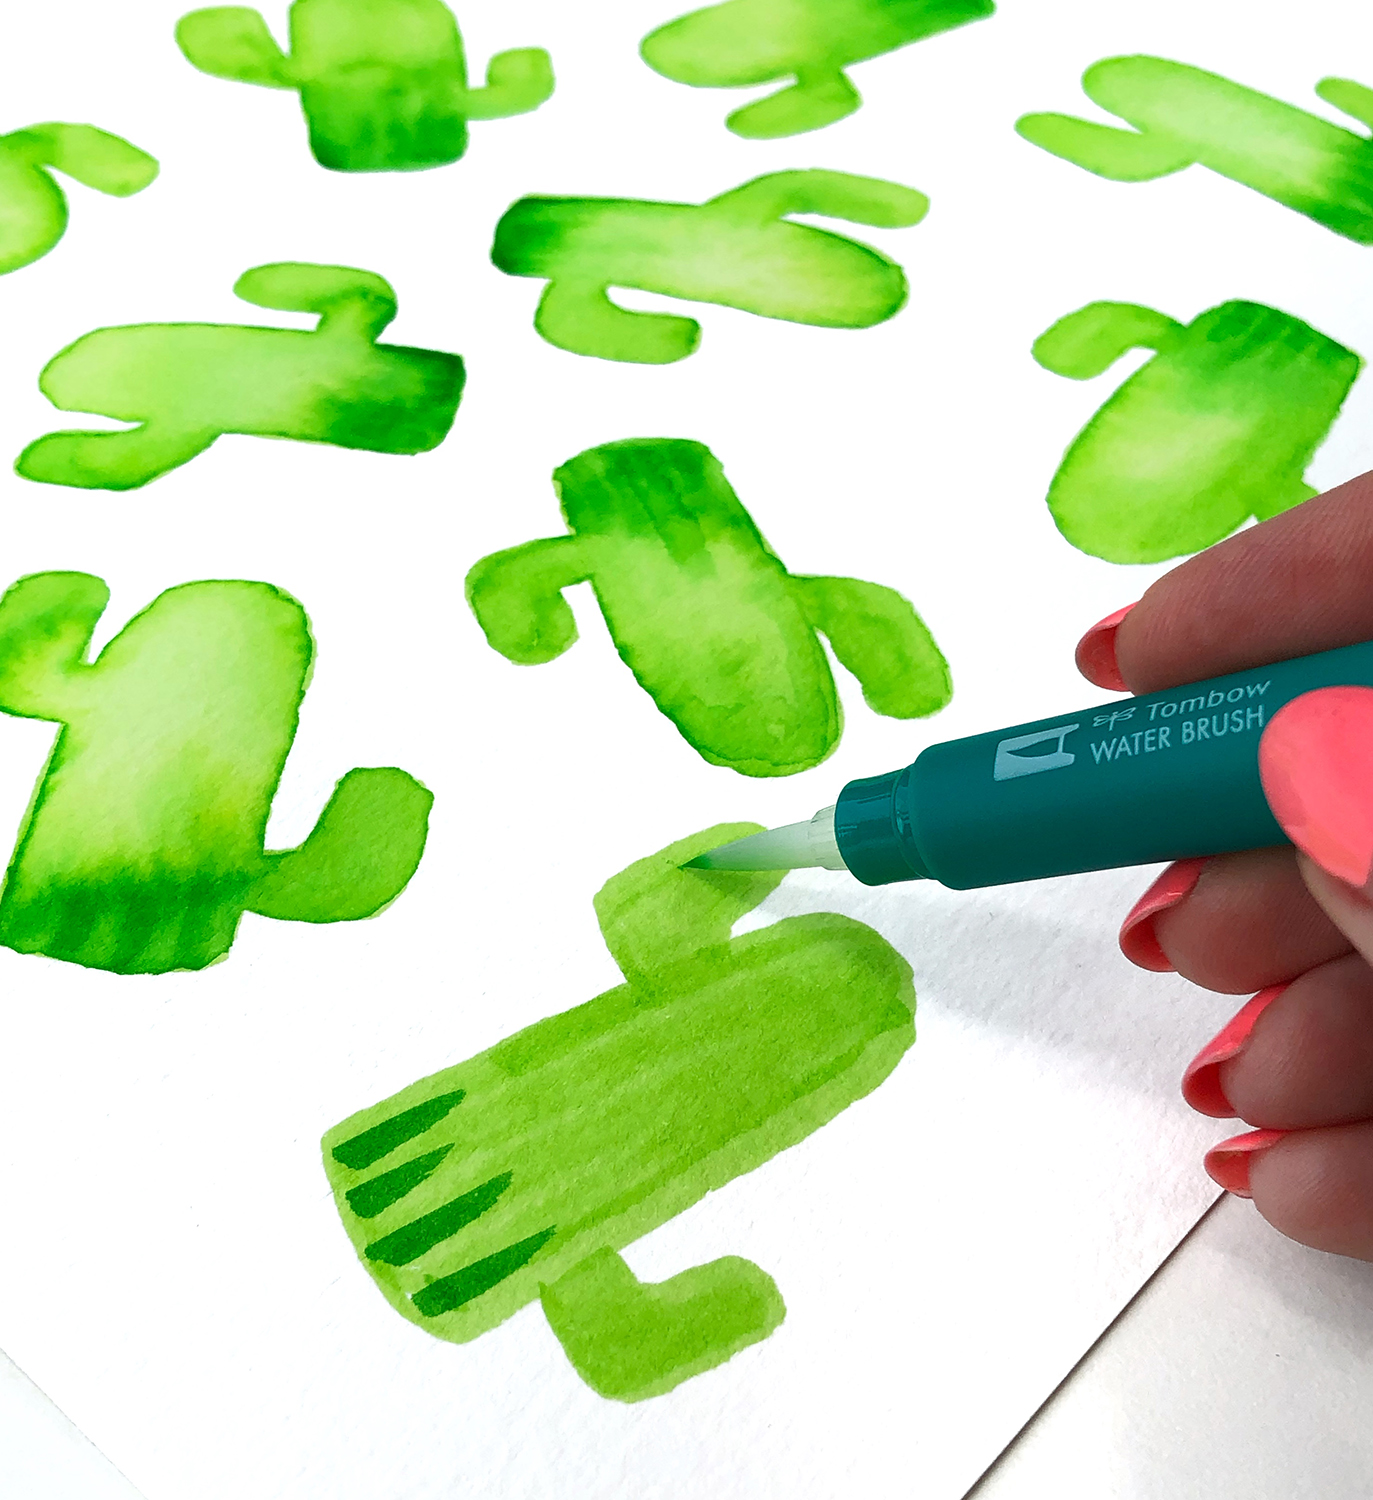
Step 2: Layer the Ink

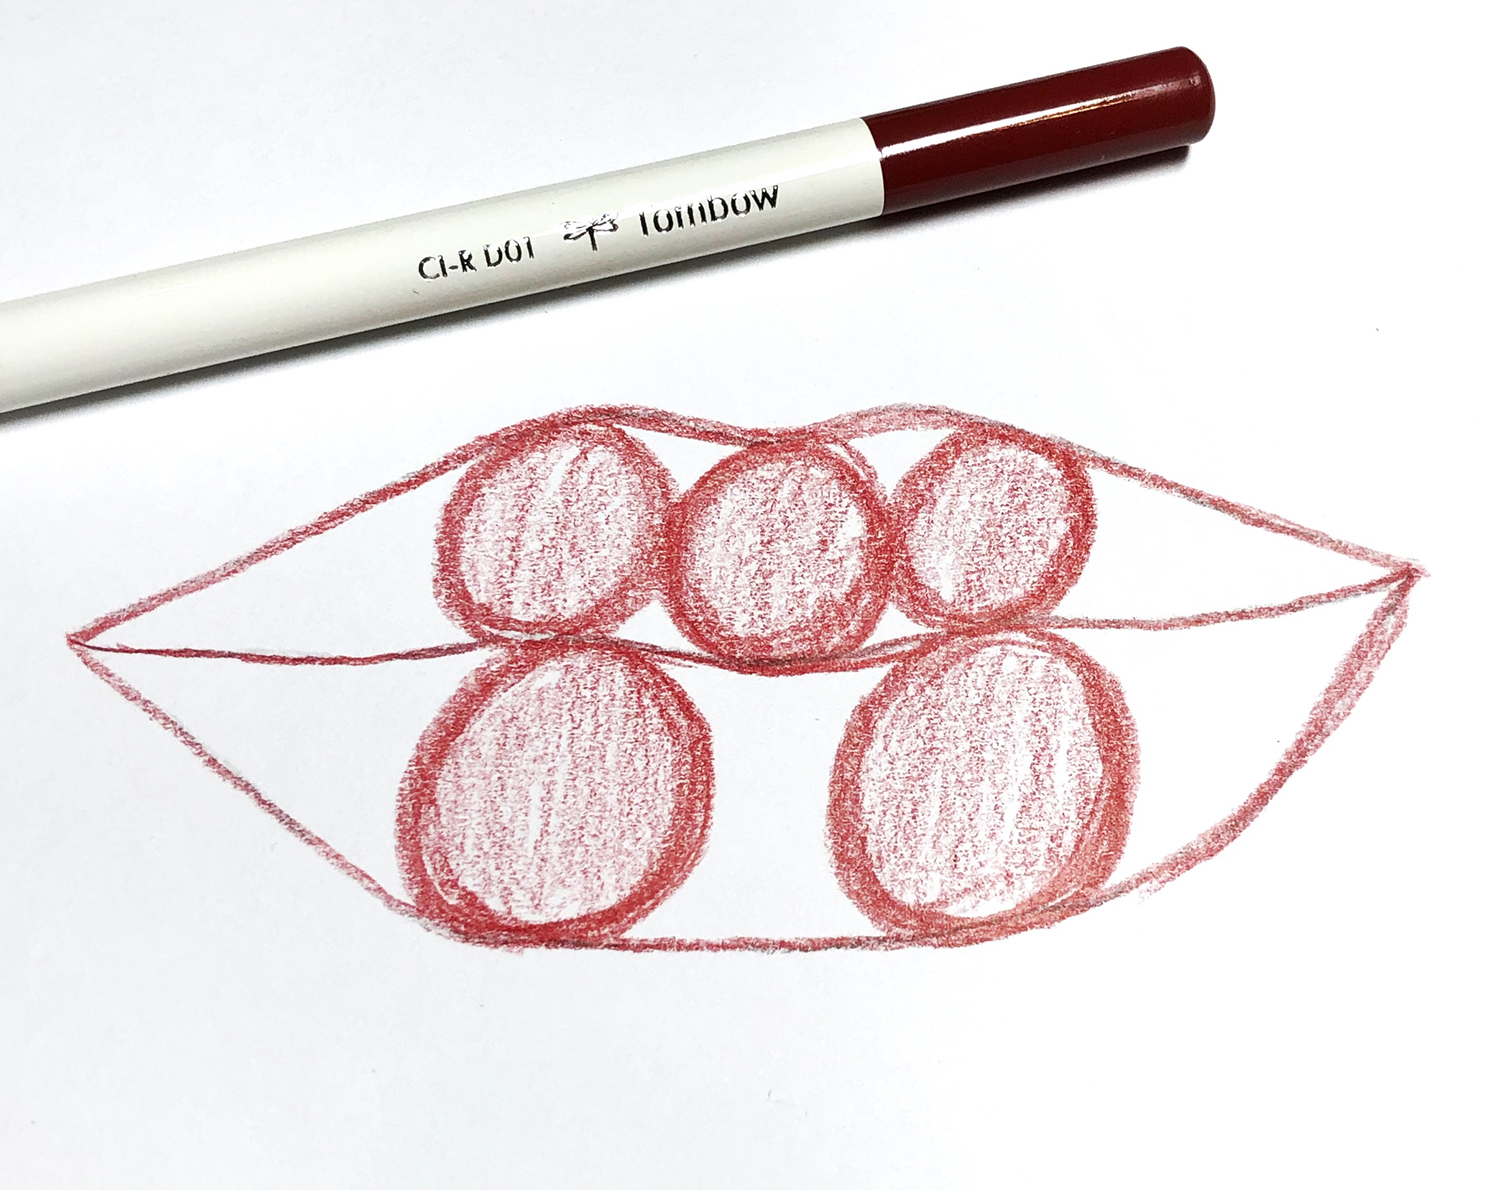
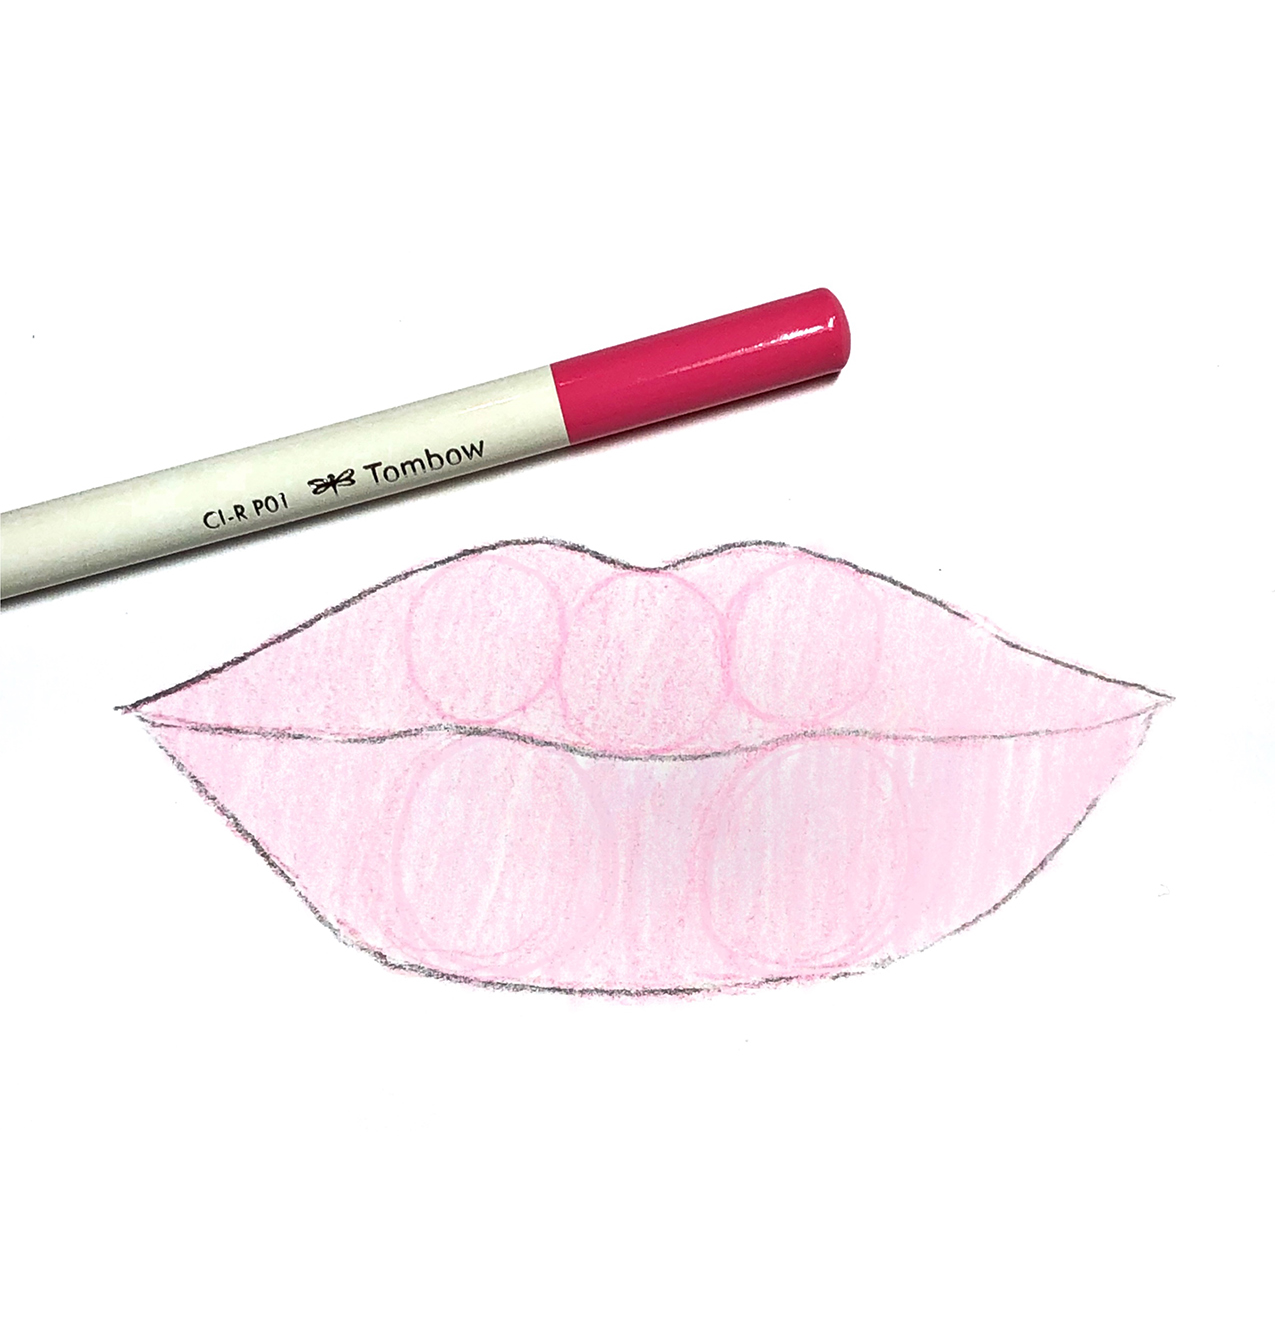
In order to have a reference of what each color looks like at its lightest and darkest I recommend drawing one layer of ink, and then going back to do a second layer roughly a third of the way down the card, then a third layer towards the bottom, so you get a gradient from light to dark.

Make a Color Swatch Ring using Markers. By Jessica mack on BrownPaperBunny.

Step 3: Label Each Color Swatch

Make sure to write the name or number of the color on each swatch so you'll be able to match it to a marker easily.

Make a Color Swatch Ring using Markers. By Jessica mack on BrownPaperBunny.

Step 4: Add to the Ring

Once all of your swatches are labeled and dry it's time to add them onto the book ring. You can add them in any order that makes sense to you. I grouped colors together from light to dark but you might like to add all warm colors together, cool colors etc. 

IMG_0579.jpg

Step 5: Pick Colors From the Color Swatch Ring

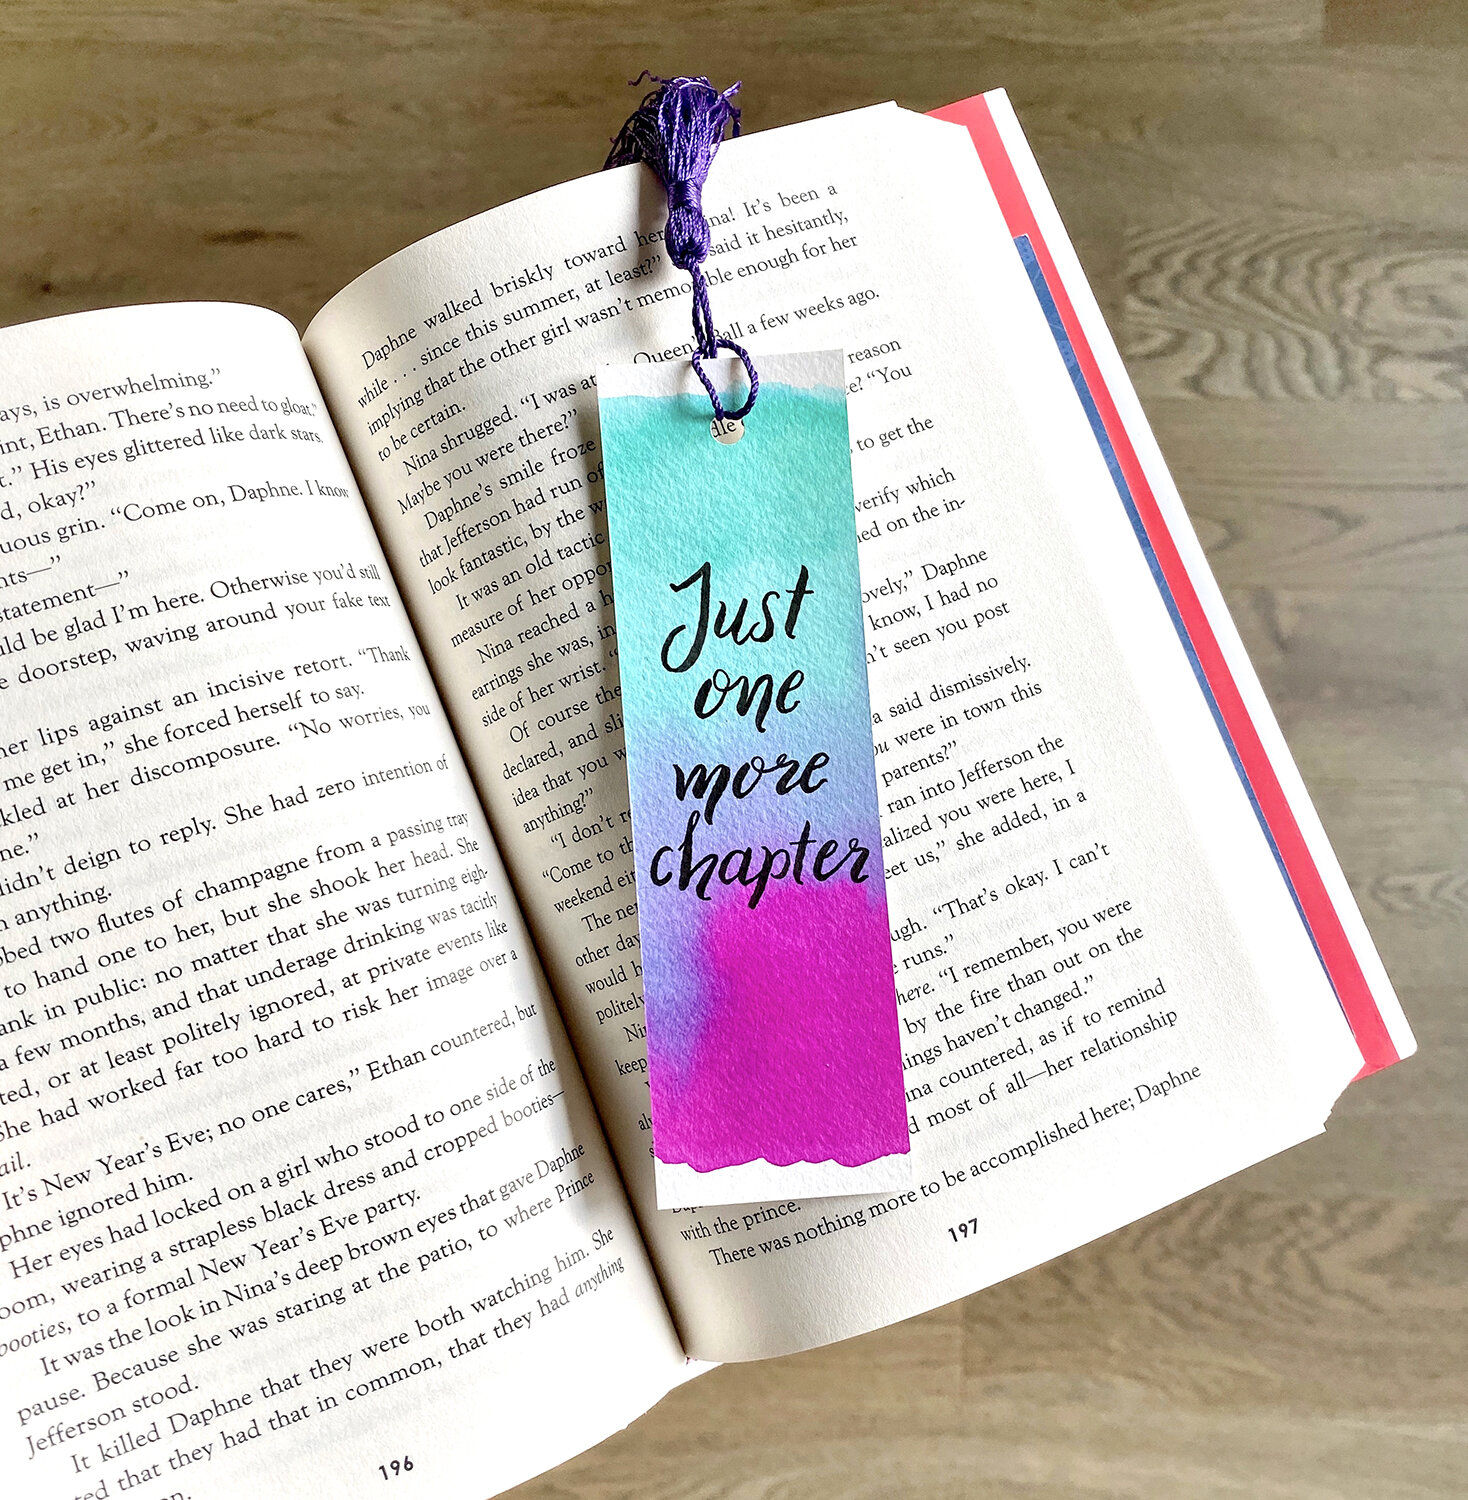
Now that you have a handy color swatch ring you can see how colors would look in a project. I recommend choosing a few, taking them off the ring and seeing how they look next to each other. Try some colors you don't use very often, experiment, and really get to know your colors, and what combinations work well.

Make a Color Swatch Ring using Markers. By Jessica mack on BrownPaperBunny.

I’d love to see what color combination you choose for your next project! Share with me by tagging @BrownPaperBunny on social media. Happy swatching!

----------

Please note: This blog post contains affiliate links, which help pay for the upkeep of this site. That being said, I will never, ever promote anything I am not 100% in love with!

In Ink, May 2019, Tutorial
7 Comments
Watercolor Thanksgiving Cards

Watercolor Thanksgiving Cards

November 14, 2019

I’m loving the new Tombow Watercolor Set, and am basically using it for everything right now, including making Thanksgiving cards.

The MONO Twin Permanent Marker has a thick and a thin bullet tip perfect for lettering or adding line work. You can add watercolor over the top of it because it’s permanent. Awesome right?!

Watercolor Thanksgiving Cards

Here’s another Thanksgiving card I created using the new Tombow Watercolor Set. I drew the black outlines with the MONO Twin Permanent Marker, then added color using the Dual Brush Pens and blended it all together with the Water Brush that is included in the set. I’m going to send these out to friends and family and tell them why I’m thankful for them.

Watercolor Thanksgiving Cards

And the video below walks you through the steps to make this Thanksgiving card, which you could also turn into a cute place card if you’re hosting this year!

You’ll need some watercolor paper, masking tape, and the new Tombow Watercolor Set.

Start by masking off an area (where you’ll add some text at the end), then mix up some color using the Dual Brush Pens, Water Brush and Blending Palette that come in the set.

Paint on some leaves, or flowers, around your masked-off area. Once the ink has dried, go back over the top with a Dual Brush Pen to create darker shapes.

Remove the tape, add a message, and voila you’ve got yourself a quick and easy Thanksgiving card.

Drop me a comment and tell me your favorite thing about Thanksgiving.

----------

Please note: This blog post contains affiliate links, which help pay for the upkeep of this site. That being said, I will never, ever promote anything I am not 100% in love with!

In Ink, May 2019, Tutorial, Watercolor, Type
10 Comments
How to Make Watercolor Bookmarks by Jessica Mack on BrownPaperBunny

How to Make Watercolor Bookmarks

November 7, 2019

Today I’m going to show you how to make watercolor bookmarks using Tombow's Advanced Lettering Set. These make really cute gifts, especially when tucked inside a new book! Here's what you'll need to get started.

Supplies:

  • Tombow Advanced Lettering Set

  • Watercolor Paper

  • Tombow Water Brush (Medium)

  • Scissors

  • Hole Punch

  • Embroidery Thread 

How to Make Watercolor Bookmarks by Jessica Mack on BrownPaperBunny

Step 1: Pick Your Colors from the Advanced Lettering Set

Use two Dual Brush Pens from your Advanced Lettering Set to draw some color onto each end of your watercolor paper. All three of the colored pens included in the set blend nicely together so experiment with different color combinations.

How to Make Watercolor Bookmarks by Jessica Mack on BrownPaperBunny

Step 2: Blend

Now use your Water Brush to start blending the colors towards each other. To keep the brush tip wet just squeeze lightly on the barrel while you're working. Once the colors are blended in the middle, set the paper aside and wait for the ink to dry.

How to Make Watercolor Bookmarks by Jessica Mack on BrownPaperBunny

Step 3: Decorate Your Bookmarks

Use the MONO Drawing Pencil that comes in the set to sketch out any pictures or words you want to decorate your bookmarks with. Then use the Dual Brush Pens, Fudenosuke Brush Pens, or MONO Twin Permanent Marker over the top. Try a book-related quote, a stack of book spines, or maybe a pattern.

How to Make Watercolor Bookmarks by Jessica Mack on BrownPaperBunny

Step 4: Add a Tassel (optional)

Cut out your bookmarks and either leave them as is, or punch a hole in the top and make a tassel from embroidery thread to add to your bookmark.

How to Make Watercolor Bookmarks by Jessica Mack on BrownPaperBunny

I’d love to see your wonderful creations so tag @BrownPaperBunny on social media. Happy reading!

----------

Please note: This blog post contains affiliate links, which help pay for the upkeep of this site. That being said, I will never, ever promote anything I am not 100% in love with.

In Ink, May 2019, Tutorial, Watercolor, Type
3 Comments
DIY Halloween Decorations with Jessica Mack of BrownPaperBunny

DIY Halloween Decorations

October 24, 2019

Today I want to show you an easy way to make DIY Halloween Decorations for your windows! These spooky bat silhouettes are easy to make but have a big impact once it's dark. Here's what you'll need to get started.

Please note: This blog post contains affiliate links, which help pay for the upkeep of this site. That being said, I will never, ever promote anything I am not 100% in love with!

Supplies:

  • Tombow MONO Adhesive Removable

  • Black Paper

  • Scissors

  • Tombow MONO Graph Mechanical Pencil

  • Bat Template (optional)

DIY Halloween Decorations with Jessica Mack of BrownPaperBunny

Step 1: Draw Bats Onto Your Paper

Using your Mono Graph Mechanical Pencil either trace around your bat template or draw bats freehand until you've filled up your sheet of black paper. If you're drawing them freehand you could vary the size and shape of your bats.

DIY Halloween Decorations with Jessica Mack of BrownPaperBunny

Step 2: Cut Out Your Bats

Use your scissors to cut out enough bats to decorate the window you have in mind. 

DIY Halloween Decorations with Jessica Mack of BrownPaperBunny

Step 3: Stick Up Your Bats

Use your MONO Adhesive Removable roller to apply adhesive to the body of your bats and the tips of each wing and then stick them to the inside of your window.

DIY Halloween Decorations with Jessica Mack of BrownPaperBunny

Then once it gets dark the bats will be silhouetted against the lights on inside the house. I'm sure you'll agree that these DIY Halloween Decorations are a scream! ;)

DIY Halloween Decorations with Jessica Mack of BrownPaperBunny

The great thing about this adhesive is that it's strong enough to hold the paper bats up, but easy enough to remove once Halloween is over, without leaving any residue on the glass. You could also stick these bats across mirrors or smooth tiles as well!

In May 2019, Tutorial
Comment
Live+Fashion+Illustration+by+Jessica+Mack

Live Fashion Illustration: How To

October 7, 2019

I’m a Denver Fashion Illustrator and I’ve been doing a lot of live fashion illustration events lately (locally and elsewhere in the US) and have been getting questions from other artists about how I prepare, what materials I take, and how long I spend on each sketch. So here’s a run-down of what I do for most events. Feel free to ask me questions in the comments if there’s something specific you’d like to know.

Before the Event

  1. Work with the client to confirm the details of the event (when, where, and what sort of event it is)

  2. Finalize the logistics (how early should you arrive, will a table, chair and good lighting be provided, should you bring your own paper or will they have paper ready with the logo of the event etc)

  3. I like to prep some paper by sketching out a few common posses in my studio ahead of time. This allows me to complete more illustrations in less time, when I’m at the event.

  4. Pack your supplies (see below for the kit I usually take)

  5. Work out what to wear (high fashion clients and boutiques expect you to look the part too)

Event Kit

Here is my basic live sketching kit for events. It pays to take a back-up of your most essential items.

  • Mechanical Pencil

  • Eraser

  • Fine Liner Pens

  • Water Soluble Markers in their own stand

  • Alcohol Markers in their own stand

  • Watercolor Palette (I prepare one with my most used skin tones and fashion colors)

  • Paint Brushes

  • Paper Towel

  • Clear clipboard to sketch on (and protect their table cloth)

  • Two Pretty Water Glasses (don’t show up with old jam jars or paint-covered containers)

  • Water Bottle

  • Business Cards

  • Completed fashion illustrations as samples

  • Sign with my logo and social media handle

  • Gold stand for my sign

  • Portable, battery-operated craft light (I added this to my kit after working two events that were so dark I had to use my phone flashlight to even see what I was drawing)

  • Sign-up sheet

  • Sunscreen, hat, and paperweights for outdoor events

Some clients like you to incorporate their brand colors into each sketch, so I spend time matching paint and markers to get as close as I can ahead of time, and bring plenty of those colors with me.

I try to fit my whole kit into one small, black tote bag. Quite often there isn’t anywhere to store your purse or bags, so try to keep your ‘stuff’ to a minimum and looking tidy.

Sketch Speed

Make sure you discuss your sketch speed with the client ahead of time. I’ve gotten my watercolor sketches down to 8-10 minutes (marker sketches are a little quicker) but there are illustrators out there with a super loose style who can sketch in under three minutes. It pays to make sure you are on the same page and there aren’t any unrealistic expectations before you get there.

Live Fashion Illustration by Jessica Mack

Things to Remember

Sign your work. You’d be amazed how easy it is to forget to do that when you’re working as fast as you can.

A sign-up sheet can help people to see where they are on the list, and let them know once your time slots have been filled. This helps to avoid you having to apologize over and over at busy events that you can’t take any more people.

Getting Paid

Don’t undercharge. You won’t be doing yourself, or other artists in the industry, any favors. And if you accept a super low rate you’ll regret it once you realize how much work actually goes into live illustration. You want this to be a mutually-beneficial and enjoyable endeavor for both you and the client.

When deciding on your rate, make sure you factor in preparation time, travel, and all the years you’ve spent learning and honing your skills.

Always ask for a non-refundable deposit up-front to help pay for any supplies and time spent preparing. Then ask for the remaining payment the day before or day of the event. Try not to wait until after the event to get paid. Once the event is over the organizer will move on to the next job and it can be harder to get payment for an event that has already passed.

Live Fashion Illustration by Jessica Mack

The Nitty Gritty

And lastly, a little word of warning. Live fashion illustration is definitely not as glamorous as it looks on Instagram. It is usually very busy and stressful, with customers crowding and bumping you (in one case I had a lady spill a whole glass of champagne down my back, and a little girl squish a cupcake onto my leg). And at one event someone’s kid ran off with $65 worth of my alcohol markers, never to be seen again. And through it all you have to remain professional, polite and charming.

In Fashion Illustration, Illustrations, Tutorial, May 2019
Comment
Haunted House Silhouette by Jessica Mack on BrownPaperBunny

Create a Haunted House Silhouette with Markers

September 22, 2019

Please note: This blog post contains affiliate links, which help pay for the upkeep of this site. That being said, I will never, ever promote anything I am not 100% in love with!

----------

Halloween is just around the corner, so today I’m going to show you how to make this spookily fun and easy haunted house silhouette which can you can use to make your own Halloween cards, window decor, party invitations etc. Here's what you'll need to get started.

Supplies:

  • Tombow Dual Brush Pens

  • Watercolor Paper

  • Tombow Water Brush

  • Tombow MONO Graph Mechanical Pencil

  • Haunted House Silhouette (or you can draw your own)

  • Tombow MONO Drawing Pens

Haunted House Silhouette by Jessica Mack on BrownPaperBunny

Step 1: Color Your Background

Use your Dual Brush Pens to color your background. I chose 603-Periwinkle ,636-Imperial Purple, 569-Jet Blue, and N15-Black but you could use oranges and yellows, or any other color combination to color your sky. Start with the lightest color in the middle and work your way out to the darkest around the edges. Your coloring doesn't have to be precise or even because you're about to blend it all together with water.

Haunted House Silhouette by Jessica Mack on BrownPaperBunny

Step 2: Blend the Ink

Starting in the middle, use your Water Brush to blend the Dual Brush Pen ink together. By starting from your lightest color and working your way outwards you'll avoid all of the colors becoming too dark as they blend.

Haunted House Silhouette by Jessica Mack on BrownPaperBunny

Step 3: Draw Your Haunted House Silhouette

Use your MONO Graph Mechanical Pencil to draw the outlines of your silhouette. You can make up your own, or download this one I've drawn for you and trace it onto your background.

Download Template
IMG_1978.jpg

Step 4: Color in the Silhouette

Using your 05 MONO Drawing Pen, draw around the outlines of your haunted house silhouette, then color it in with your N15 Dual Brush Pen. Spookily fun right?!

Pro tip: if you can still see some of the background color through the silhouette, wait for the ink to dry completely then go over it again to make it even darker.

IMG_5916.JPG

I’d love to see your haunted house silhouettes, so tag @BrownPaperBunny on social media!

In Illustrations, Ink, May 2019, Tutorial, Watercolor
4 Comments
Fall Fashion Illustration by Jessica Mack of BrownPaperBunny

Fall Fashion Illustration

September 18, 2019

Please note: This blog post contains affiliate links, which help pay for the upkeep of this site. That being said, I will never, ever promote anything I am not 100% in love with!

----------

I always feel so inspired by the crisp air and changing leaves at this time of year, so I’m using fall photos I’ve taken to build a color palette of Dual Brush Pens for a new illustration project. I like to swatch out each of the colors and see what they look like dry and blended with water.

Fall Fashion Illustration by Jessica Mack of BrownPaperBunny

Next, I want to show you my process for creating this fall fashion illustration.

After deciding on my color palette, I sketched out my design with the MONO Graph Mechanical Pencil.

Then, I used my lightest color, to create a golden backdrop for my figure, blending the Dual Brush Pen ink with my Water Brush.

Once the background color was dry I added color and shadows with my Dual Brush Pens.

The final step was adding details with a MONO Drawing Pen.

Are you as excited for sweater weather as I am? Leave me a comment and tell me your favorite thing about fall!

In Fashion Illustration, Illustrations, Ink, Tutorial, May 2019
6 Comments
How to Draw Lips with Colored Pencils by Jessica Mack on BrownPaperBunny Blog

How to Draw Lips with Colored Pencils

August 30, 2019

Please note: This blog post contains affiliate links, which help pay for the upkeep of this site. That being said, I will never, ever promote anything I am not 100% in love with!

----------

Today I’m going to show you how to draw lips with colored pencils. Once you've learned some simple tricks they're much easier to draw. Here's what you'll need to get started.

Supplies:

  • Tombow Irojiten Colored Pencils (variety of pinks, reds and browns)

  • Drawing Paper

  • Photo of Lips

How to Draw Lips with Colored Pencils by Jessica Mack on BrownPaperBunny Blog

Step 1: Find a Reference Photo

You can take a photo of yourself, a friend or family member or look up a photo online to use as a reference. Really look at the lips. Is the top lip fuller or smaller than the bottom lip, does it have a pronounced 'bow' in the middle of the top lip, or do the lips have a particular shape. The more you notice about them before you start drawing, the better your end result will be.

Step 2: Identify the Areas of Volume

I find it easiest to identify where the lips are most full and sketch those areas out using circles, then draw the lines of the lips around them. Every set of lips are different, some are fullest in the middle of the top lip, so look carefully.

How to Draw Lips with Colored Pencils by Jessica Mack on BrownPaperBunny Blog

Step 3: Lightest Shading

Now it's time to start with your lightest color and softly color in both lips. Try to make your pencil lines follow the lines on your reference photo. For example, lips rarely have lines that run horizontally, so don't color that direction. Identify any areas of reflection or shine on your reference photo and leave those the lightest. The colors I chose for these lips were Irojiten Shell Pink, Orchid Pink, Coral Pink, Cherry Red, and Crimson.

How to Draw Lips with Colored Pencils by Jessica Mack on BrownPaperBunny Blog

Step 4: Layer Color

Start adding additional colors to your lips, especially to build up darker areas where the lips meet and there is shadow, or towards the edges. Work gently and softly from your lightest colors to your darkest because you can always add more color but it's hard to go lighter.

How to Draw Lips with Colored Pencils by Jessica Mack on BrownPaperBunny Blog

Step 5: Add Your Darkest Shade

Now it's time to use your darkest color to provide some stronger contrast between the light and shade areas on your lips. And voila, you've learned how to draw lips with colored pencils! I encourage you to practice drawing all different types of lips and really looking to see how they are all unique.

How to Draw Lips with Colored Pencils by Jessica Mack on BrownPaperBunny Blog

I’d love to see your drawings, so tag @BrownPaperBunny on social media so we can see!

In Tutorial, Sketchbook, May 2019
9 Comments
Jackson Pollock Inspired Mail Art by Jessica Mack on BrownPaperBunny

Jackson Pollock Inspired Mail Art

August 14, 2019

This week we're doing projects inspired by famous artists, and I've chosen Jackson Pollock. I'm going to show you how to recreate his layers of color, using Dual Brush Pens, to make some fun Jackson Pollock inspired mail art. Here's what you'll need to get started.

Supplies:

  • Tombow Dual Brush Pens (I chose the Tropical Palette)

  • Washi Tape

  • An Envelope

  • Scrap Paper

Jackson Pollock Inspired Mail Art by Jessica Mack on BrownPaperBunny

Step 1: Tape Off the Address Area

To make sure you have a clean space to write the name and address on your envelope, mask off a rectangle using washi tape. Make sure it's sealed down, the whole way around. Then set your envelope on top of your scrap paper to protect your work surface.

Step 2: Layer Your Colors

Jackson Pollock created layered artwork by splattering paint across his canvas, which we're going to recreate with ink. So the next step in creating our Jackson Pollock inspired mail art is to begin with your lightest colors first, and work your way around, drawing straight and slightly wiggly lines from the washi tape off the edge of your envelope. Watch the video below to see how I did it.

Step 3: Remove the Washi Tape

Once your ink is dry, you can carefully peel up your washi tape to reveal a nice clean edge. You're now ready to address your envelope, add some stamps and send someone some happy mail! You're guaranteed to make someone's day a little brighter!

Jackson Pollock Inspired Mail Art by Jessica Mack on BrownPaperBunny

----------

Please note: This blog post contains affiliate links, which help pay for the upkeep of this site. That being said, I will never, ever promote anything I am not 100% in love with!

In Ink, May 2019, Pattern, Tutorial
4 Comments
Cut Out Planner Page by Jessica Mack on BrownPaperBunny

Cut Out Planner Page

August 14, 2019

Today I want to show you a fun way to create a cut-out planner page. To get started you’ll need some Tombow Dual Brush Pens, your planner (I recommend a planner or notebook with nice thick pages like Archer & Olive) and some small sharp scissors.

Cut Out Planner Page by Jessica Mack on BrownPaperBunny

The first step is to use your Dual Brush Pens to draw something along the top of your page. It could be flowers, leaves, stars, puppies...anything!

The key is to leave a space in the top corner big enough to fit a calendar or anything else you’d want to be able to access across multiple pages.

Cut Out Planner Page by Jessica Mack on BrownPaperBunny

Step two is to carefully cut out that corner section that you left blank, and cut around the top of your drawing.

To complete your cut-out planner page, add a calendar (or anything else you’d find useful to have on multiple days) to the cut out section in the top corner. Then fill in the rest of your page with days of the week, to-do lists etc. and you’re all done!

Cut Out Planner Page by Jessica Mack on BrownPaperBunny

On future days you can draw something completely different, just make sure the cut-out area lines up with the one you’ve already made.

—————

Please note: This blog post contains affiliate links, which help pay for the upkeep of this site. That being said, I will never, ever promote anything I am not 100% in love with!

In Illustrations, Ink, May 2019, Tutorial
Comment
Create a BuJo Book Tracker by Jessica Mack of BrownPaperBunny

Create a BuJo Book Tracker

July 28, 2019

Please note: This blog post contains affiliate links, which help pay for the upkeep of this site. That being said, I will never, ever promote anything I am not 100% in love with!

----------

This year I challenged myself to read more, a lot more. Setting goals and keeping track of the books I've read has really helped keep me motivated and organized. Last year I read a total of 12 books, so far this year I've read 48 and we're only half-way through! Here's how you can create a book tracker for yourself.

Supplies:

  • Tombow Dual Brush Pens

  • Notebook (mine is from Archer & Olive)

  • Tombow MONO Twin Permanent Marker

  • Tombow MONO Drawing Pens

Create a BuJo Book Tracker by Jessica Mack of BrownPaperBunny

Step 1: Draw Your Book Outlines

Add a title to the top of your notebook page, then, using the smallest tip on your MONO Twin Permanent Marker draw some book outlines underneath. Add some page lines as details. Make sure to leave three areas to write the title, author and your rating on each book. I like to draw at least one or two more blank books than I'll think I'll be able to read, to push myself a little. Tip: The MONO Twin Permanent Marker can be used under Tombow Dual Brush Pens, or watercolor and it won't bleed or smudge.

Create a BuJo Book Tracker by Jessica Mack of BrownPaperBunny

Step 2: Populate Your Book Tracker

As you finish each book, add some color to the book cover and page details with your Dual Brush pens. I'm using Dual Brush Pens from the Desert Flora palette but you can use any colors you like. The next step is to use your MONO Drawing Pens to write in the title, author and either a rating or a few words about the book.

Create a BuJo Book Tracker by Jessica Mack of BrownPaperBunny

Step 3: Read and Repeat!

Not only will your book tracker push you to read more, but months or years from now you'll be able to flip back through and be reminded of the books you've read and what you thought of them! I'd love to see your book tracker and hear about your latest great read, so tag @TombowUSA and @BrownPaperBunny on social media!

In Illustrations, Ink, May 2019, Tutorial, Type
6 Comments
public.jpeg

Art Journal Page with Markers

July 27, 2019

Please note: This blog post contains affiliate links, which help pay for the upkeep of this site. That being said, I will never, ever promote anything I am not 100% in love with!

----------

Here’s an easy way to make an art journal page with markers! Water soluble markers are vibrant and versatile and can give you a huge variety of different effects! Here's what you'll need to get started.

SUPPLIES:

  • Tombow Dual Brush Pens

  • Watercolor Paper or sketchbook

  • Tombow Water Brush

  • Fudenosuke Brush Pen (hard tip)

  • MONO Air Correction Tape

public.jpeg

Step 1: Create a Background

Scribble ink onto the page with your Dual Brush Pens, choosing colors that will blend together nicely (greens and blues, or oranges and pinks for example).

Next, use your Water Brush to blend the ink together.

Step 2: Add Background Pattern

Once the background color is dry, it’s time to add a pattern to your art journal page. Use the bullet tip of your markers to create a repeating pattern. I did scales, but you could use anything: Stars, hearts, flowers, leaves, shapes etc.

public.jpeg

Step 3: Add a Quote

The next step is to use your correction tape to create white lines for you to write on, then use your Fudenosuke Pen to add your favorite quote, or some words of your own!

public.jpeg

Do you have a favorite quote? Let me know in the comments!

In Ink, May 2019, Pattern, Tutorial, Type, Watercolor
4 Comments
How to Make a Repeat Pattern on Paper by Jessica Mack of BrownPaperBunny

How to Make a Repeat Pattern on Paper

July 15, 2019

Please note: This blog post contains affiliate links, which help pay for the upkeep of this site. That being said, I will never, ever promote anything I am not 100% in love with!

----------

Today I’m going to show you how to turn the cactus emoji into a repeat pattern on paper. The cactus emoji is one of my personal favorites, and it's so simple to draw that you'll easily be able to do it over and over to get a repeating pattern. Here's what you'll need to get started.

Supplies:

  • Tombow Dual Brush Pens

  • Watercolor Paper

  • Tombow Water Brush

  • Scissors

  • Tape

  • A Phone, Camera, or Scanner 

How to Make a Repeat Pattern on Paper by Jessica Mack of BrownPaperBunny

Step 1: Draw Your Cactus

Starting in the middle of your watercolor paper, draw cactus emojis facing in different directions. I used Dual Brush Pen 173 for the first layer, but you can use any color you like. Then use a darker color (I used 195) to draw some lines at the bottom of each cactus, before using your Tombow Water Brush to blend the ink together. Leave white space around the outside edges of the paper, we'll fill those in later.

How to Make a Repeat Pattern on Paper by Jessica Mack of BrownPaperBunny

Step 2: Cut Your Paper in Quarters

Once the ink is dry on your cactus emojis, cut your paper into four even quarters. Be sure to get the measurements exact or your repeat pattern won't work at the end. To prepare for the next step it helps to put a small number on the back of each quarter in case they get mixed up.

How to Make a Repeat Pattern on Paper by Jessica Mack of BrownPaperBunny

Step 3: Shift Each Quarter

This bit seems a bit tricky but just follow the numbers if you get confused. Move your top two quarters to the bottom, then move your left two quarters to the right side. Here's what you'll end up with. All of your cacti should be around the outsides and the middle of your paper should be blank.

How to Make a Repeat Pattern on Paper by Jessica Mack of BrownPaperBunny

Step 4: Tape Everything Back Together

Carefully turn over your drawing, making sure the quarters stay in the same order. Line up the edges and tape it back together.

How to Make a Repeat Pattern on Paper by Jessica Mack of BrownPaperBunny

Step 5: Fill in the Middle

Using the same technique as in Step 1, draw more cacti to fill in the middle space of your paper.

How to Make a Repeat Pattern on Paper by Jessica Mack of BrownPaperBunny

Step 6: Add Extra Details

This step is optional, but if you'd like to make your cacti look a little fancier, use the bullet tips on your Dual Brush Pens to add some small details. Cactus needles, flowers etc.

How to Make a Repeat Pattern on Paper by Jessica Mack of BrownPaperBunny

Step 7: Photograph or Scan

Using your phone, camera or scanner, digitize your repeat pattern tile. If you're taking a photo make sure you've got good, bright lighting. Adjust the brightness until the cut marks are minimized.

Step 8: Put it on Everything

You can frame your finished artwork, or upload the digital copy to any number of web services that will let you put it on mugs, t-shirts, throw cushions, rugs and more! Here are just a few examples I made, using Society6.

How to Make a Repeat Pattern on Paper by Jessica Mack of BrownPaperBunny

I’d love to see what you make, tag @BrownPaperBunny on social media!


In Illustrations, Ink, May 2019, Pattern, Tutorial, Watercolor
9 Comments
Paint a Watercolor Peach with markers. By Jessica Mack of BrownPaperBunny.

Paint a Watercolor Peach

June 30, 2019

Please note: This blog post contains affiliate links, which help pay for the upkeep of this site. That being said, I will never, ever promote anything I am not 100% in love with!

----------

Today I'm going to show you how to use Dual Brush Pens to paint a watercolor peach that you can use on recipe cards, greeting cards, or in your planner or art journal. Here's what you'll need to get started.

Watercolor Peach Supplies:

  • Tombow Dual Brush Pens

  • Watercolor Paper

  • Tombow Water Brush

You can choose whichever Dual Brush Colors you like, but for this project I used 772, 885, and 985 for the peach and 173 and 195 for the leaves.

Paint a Watercolor Peach with markers. By Jessica Mack of BrownPaperBunny.

Step 1: Draw Your Peach

Use your first color to draw a rough peach shape. The pink I'm using here is 772.

Paint a Watercolor Peach with markers. By Jessica Mack of BrownPaperBunny.

Step 2: Color Your Peach

Use your other colors (I'm using 985 and 885 here) to fill in the rest of your peach shape. There's no need to be precise with this stage because you're going to blend the colors together in the next step.

Paint a Watercolor Peach with markers. By Jessica Mack of BrownPaperBunny.

Step 3: Blend With Water

Use your Tombow Water Brush to blend the colors together on your watercolor peach. I like to start with the lighter color and then move over to the darker shades. Keep blending gently until you have a result you like, but don't scrub too much because the paper becomes more fragile when it's wet.

Paint a Watercolor Peach with markers. By Jessica Mack of BrownPaperBunny.

Step 4: Draw the Leaves

Use your lightest green shade to draw in a long, skinny peach leaf. Then use the water brush to go over it and blend the ink together.

Paint a Watercolor Peach with Markers. By Jessica Mack of BrownPaperBunny.

Step 5: Add Details to Your Watercolor Peach

Once your peach and leaves are dry you can add details with the bullet tip end of your Dual Brush Pens.

Paint a Watercolor Peach with Markers. By Jessica Mack of BrownPaperBunny.

Voila, you've got a fun watercolor peach which you can turn into a greeting card, use on a recipe card, in your planner etc.

Paint a Watercolor Peach with Markers. By Jessica Mack of BrownPaperBunny.
In Illustrations, Ink, May 2019, Tutorial, Watercolor
Comment
Geometric Bullet Journal Month Page by Jessica Mack on BrownPaperBunny.

Geometric Bullet Journal Month Page

June 17, 2019

Please note: This blog post contains affiliate links, which help pay for the upkeep of this site. That being said, I will never, ever promote anything I am not 100% in love with!

----------

Today I’m going to show you how to create an easy geometric bullet journal month page for July. It's a great way to mark the start of a new month in a pretty way. Here's what you'll need to get started.

Supplies:

  • Tombow Dual Brush Pens

  • Dot Grid Notebook (I'm using a Michael Roger Dot Grid Decomposition Notebook)

  • Tombow MONO Graph Mechanical Pencil

I love Michael Roger's Decomposition notebooks because they use 100% recycled post-consumer waste recycled paper and although the paper is nice and thin, Tombow Dual Brush Pens still don't bleed through to the other side, so they're the perfect companions!

Geometric Bullet Journal Month Page by Jessica Mack on BrownPaperBunny.

Step 1: Write the Month

Use your MONO Graph Mechanical Pencil to write the month (and year if you'd like) onto the page of your task journal. You can use the dot grid to help you map out where the letters should go.

Geometric Bullet Journal Month Page by Jessica Mack on BrownPaperBunny.

Step 2: Pick a Shape

The great thing about the dot grid pattern is that you can use it to easily draw out little geometric shapes. Try triangles, chevrons, rectangles etc. Geometric task journal pages look great and are super easy to make. In this example, I used the dot grid to create a squished hexagon pattern using purples, yellows, and teals.

Alternate the different shades for a bit of variety.

Geometric Bullet Journal Month Page by Jessica Mack on BrownPaperBunny.

Step 3: Add Additional Colors

Move down the page, adding new colors as you go. Experiment with working from the top down, sideways, or at an angle for a different look.

Geometric Bullet Journal Month Page by Jessica Mack on BrownPaperBunny.

Once you've finished the whole page you can either leave it there or move on to the next, optional, step.

Geometric Bullet Journal Month Page by Jessica Mack on BrownPaperBunny.

Step 4: Color in the Text (optional)

This step is optional, but if you don't want any paper showing through on the page you can go over your month with Dual Brush Pen as well.

Geometric Bullet Journal Month Page by Jessica Mack on BrownPaperBunny.
In Ink, May 2019, Tutorial, Type
1 Comment
FullSizeRender.jpg

'60s Inspired Art Journal Page

May 27, 2019

Please note: This blog post contains affiliate links, which help pay for the upkeep of this site. That being said, I will never, ever promote anything I am not 100% in love with!

----------

This week I’m creating projects with a retro vibe, so I’m going to show you how to make an art journal page that looks like a ‘60s band poster.

SUPPLIES:

  • Tombow Dual Brush Pens

  • MONO Drawing Pens

  • MONO Graph Mechanical Pencil

  • Art Journal or Sketchbook

FullSizeRender.jpg

Step 1: Draw Your Outlines

The first step is to draw (or trace) a face profile, use your own for a fun self portrait. Then fill in the whole page with wavy hair.

FullSizeRender.jpg

Step 2: Add Some Lettering

Next, use some retro lettering to write words into the hair (I wrote things that make me happy). Fill blank hair sections with doodles of hearts, and daisies.

FullSizeRender.jpg

Step 3: Add Color

Using a retro color palette it’s time to use your Dual Brush Pens to color each section of the hair and lettering. To get a watercolor look you can blend the ink in each section with a damp paintbrush. What words would you write into the hair?

FullSizeRender.jpg
FullSizeRender.jpg

Step 4: Pull Out Details

Once you’ve finished coloring your journal page, you can go over the facial features with the bullet tip of one of your Dual Brush Pens for more definition. Voila, you have a ‘60s inspired journal page!

FullSizeRender.jpg

Let me know what your favorite decade is and why in the comments! 

In Tutorial, Type, Ink, May 2019, Illustrations, Watercolor
4 Comments
Create Watercolor Flowers Using Markers by Jessica Mack of BrownPaperBunny.

Create Watercolor Flowers Using Markers

May 20, 2019

I love the look of watercolor, but I also love the portability and vibrancy of markers. So in my latest Skillshare class I’ll teach you how to create watercolor-look flowers using markers.

The class is perfect for beginners, or more experienced artists looking to try some new techniques.

I’ll walk you through the three main techniques I use with the markers, and blending with water, then for the class project you’ll create your very own floral wreath!

Create Watercolor Flowers Using Markers by Jessica Mack of BrownPaperBunny.

Tombow has been kind enough to give students of the class a 15% off all products, and if you are new to Skillshare you can get your first two months for free by using this link! I can’t wait to see what you make!

View the Class
In May 2019, Watercolor, Tutorial, Illustrations, Ink
9 Comments
Watermelon Planner Spread by Jessica Mack on BrownPaperBunny

Watermelon Planner Spread

May 20, 2019

Please note: This blog post contains affiliate links, which help pay for the upkeep of this site. That being said, I will never, ever promote anything I am not 100% in love with!

----------

I think one of the best things about summer is all the delicious fruit, especially watermelon! So I’m going to show you a super fast, watermelon layout you can use in your planner.

Supplies:

  • Tombow Dual Brush Pens 853 (Persimmon), 195 (Light Green), and N15 (Black)

  • MONO Drawing Pens

  • Ruler

  • MONO Graph Mechanical Pencil

  • Dot Grid Notebook or Planner (mine is from Archer & Olive)

Watermelon Planner Spread by Jessica Mack on BrownPaperBunny

Step 1: Section Out Your Spread

To start your watermelon planner layout divide your spread up into eight rectangles, and add Dual Brush Pen 853 (Persimmon) across the top of the first seven (for the days of the week).

Step 2: Decorate With Watermelon

Draw little slices, or halves of watermelon in a few of the corners and add some additional seeds with your MONO Drawing Pen.

Step 3: Days of the Week

Next, write the days of the week, and fill in the last rectangle with a quote, tracker, or anything else you’ll find useful during the week. Outline the days with black Dual Brush Pen and you’re ready to fill in your spread with all the fun things you’ll be doing as the weather gets warmer. You could also use any fruit you like if watermelon isn’t your thing, or experiment with fun colors. Blue strawberries, purple watermelon, or pink pineapples perhaps.

Watermelon Planner Spread by Jessica Mack on BrownPaperBunny

Do you have any fun summer plans yet? Tell me in the comments.

In Dec 2018, Ink, Tutorial
Comment
How to Draw a Cute Popsicle Character by Jessica Mack of BrownPaperBunny.

How to Draw a Cute Popsicle Character

May 20, 2019

Please note: This blog post contains affiliate links, which help pay for the upkeep of this site. That being said, I will never, ever promote anything I am not 100% in love with!

----------

The weather is getting warmer and I'm already dreaming about sunshine, BBQs and fruity popsicles. So today I'm going to show you how to draw a cute popsicle character, which makes a cute task journal decoration, fun summer greeting card, or something cute to pop into the kids' bags when you send them off to their last days of school for the year.

Supplies:

  • Tombow 1500 Series Colored Pencils

  • Tombow MONO Graph Mechanical Pencil

  • Paper

  • Tombow Dual Brush Pen Colorless Blender (optional)

  • Tombow MONO Drawing Pen

How to Draw a Cute Popsicle Character by Jessica Mack of BrownPaperBunny.

Step 1: Draw Your Outlines

Using your MONO Graph Mechanical Pencil, draw a rectangle for the main part of your popsicle and a thinner rectangle for the stick. You can use a ruler or just free-hand them both.

How to Draw a Cute Popsicle Character by Jessica Mack of BrownPaperBunny.

Step 2: Sketch the Details

Again, using your pencil, sketch rounded corners and the indents in the middle of the popsicle. Also, curve the bottom of the popsicle stick. If you want your popsicle to look a little more 3D you can add an edge on one side. Then erase any lines you no longer need. 

How to Draw a Cute Popsicle Character by Jessica Mack of BrownPaperBunny.

Step 3: First Pencil Layer

Using your lightest pink pencil, color in the popsicle shape. For even color, make soft circular motions with the pencil held at an angle, rather than straight up. Add the first layer of color for the stick in light brown.

How to Draw a Cute Popsicle Character by Jessica Mack of BrownPaperBunny.

Step 4: Blend in a Second Color

To make your popsicle a little more interesting, go over the first layer with an additional color, like a yellow or orange. Softly blend it into the first layer of color in circular motions. Do the same on the popsicle stick.

How to Draw a Cute Popsicle Character by Jessica Mack of BrownPaperBunny.

Step 5: Add Shadows

Next, use a darker pink or red to add bolder color where there would be shadows on the popsicle. I imagined the light was coming from the right, creating shadows in the indents and along the left edge. In a darker brown, add a shadow where the stick meets the popsicle.

How to Draw a Cute Popsicle Character by Jessica Mack of BrownPaperBunny.

Step 6: One More Layer

Keep blending colors into the popsicle and stick until they are as dark as you'd like them to be.

How to Draw a Cute Popsicle Character by Jessica Mack of BrownPaperBunny.

Step 7: Blending

This step is optional, but if you really want to smooth out your pencil lines and have the colors blend nicely together you can go over them softly with the Dual Brush Pen Colorless Blender.

How to Draw a Cute Popsicle Character by Jessica Mack of BrownPaperBunny.

Step 8: Some Additional Cuteness

To add a little bit of extra cuteness to your summer popsicle, trace around the lines with your MONO Drawing Pen and add little eyes and a mouth, turning it into a little character.

How to Draw a Cute Popsicle Character by Jessica Mack of BrownPaperBunny.

I’d love to see your summer drawings, so tag @BrownPaperBunny on social media!

In Dec 2018, Illustrations, Tutorial
2 Comments
Easy DIY Birthday Banner by Jessica Mack of BrownPaperBunny

DIY Birthday Banner

May 9, 2019

Please note: This blog post contains affiliate links, which help pay for the upkeep of this site. That being said, I will never, ever promote anything I am not 100% in love with!

----------

This week our little girl turns two, so to celebrate I’m going to show you how to whip up an easy birthday banner. Here’s what you’ll need to get started:

Supplies:

  • Tombow Dual Brush Pens

  • Scissors

  • Pennant shapes cut out of card

  • String

  • A pencil

  • MONO Drawing Pen (size 5)

  • A hole punch

Easy DIY Birthday Banner by Jessica Mack of BrownPaperBunny

Step 1: Add Color

The first step in creating your birthday banner is to color the bottom half of each pennant using your Dual Brush Pens. For extra color depth let each one dry fully then go over it again.

Step 2: Draw Your Letters

Next, use a pencil to draw in your letters and outline them with your MONO Drawing Pen (size 05). Then, fill in the letters with your black Dual Brush Pen.

Easy DIY Birthday Banner by Jessica Mack of BrownPaperBunny

Step 3: String up Your Banner

Once all of the ink is dry, punch holes in the top corners of each pennant and thread them onto the string. Then you’re ready to hang it!

Easy DIY Birthday Banner by Jessica Mack of BrownPaperBunny

Have you ever made your own party decorations or cards before? Let me know in the comments!

In Ink, Tutorial, Dec 2018
Comment
← Newer Posts Older Posts →

Subscribe

Sign up to receive social media tips, freebies, special promotions, and art tutorials!

Thank you!

Please click confirm in the email you were just sent!

Directory of Illustration Jessica Mack

Shop my work on Society6

Watercolor World Map by Jessica Mack of BrownPaperBunny

Follow on Instagram

For the 100 Days Project this year I’m keeping it super low pressure. I’ve got a very busy couple of months coming up and want to set myself up to be able to stick with it, while still making sure I do something creative every day. You ca

See my classes on Skillshare

Skillshare Classes by Jessica Mack

Popular Posts

Popular Posts
CRL-Horizontal-Laptop-Beige-Floral-Painting.jpg
Creative Retreat Live
Rainbow-Watercolor-Wreath-Using-Markers.JPG
Rainbow Wreath Tutorial
15 Ways to Journal by Jessica on BrownPaperBunny
15 Ways to Journal
Tombow Brush Pen Markers and Colored Pencils
Brown Paper Bunny

Privacy + Terms of Use

Shop

Watercolor with Markers Book

Classes

Art Tutorials

Art & Illustration Portfolio

About

Contact

Custom Book Print

Custom Book Mug

How to Paint Watercolor Flowers Using Markers

Free Fashion Croquis

Start an Art Journal

6 Easy Flowers to Draw with Tombow Markers

Make Your Own Watercolor Bookmarks