• Book
    • Watercolor with Brush Pens
    • Watercolor Flowers Using Markers
    • Paint a Watercolor Galaxy Butterfly with Markers
    • Paint Watercolor Galaxy Bookmarks using Markers
    • Timelapse Video for Artists
  • Shop
  • Society6 Store
  • Blog
  • Portfolio
  • About
  • Contact
Menu

Brown Paper Bunny Studio

Art & Fashion Illustration
  • Book
  • Classes
    • Watercolor with Brush Pens
    • Watercolor Flowers Using Markers
    • Paint a Watercolor Galaxy Butterfly with Markers
    • Paint Watercolor Galaxy Bookmarks using Markers
    • Timelapse Video for Artists
  • Shop
  • Society6 Store
  • Blog
  • Portfolio
  • About
  • Contact
How to Make Your Own Art Journal by Jessica Mack of BrownPaperBunny

How to Make Your Own Art Journal

May 1, 2018

Please note: This blog post contains affiliate links, which help pay for the upkeep of this site. That being said, I will never, ever promote anything I am not 100% in love with!

----------

This week I'm going to show you how to create your own mini art journal from scratch. There are lots of reasons to make your own journal: you get exactly the size, number of pages, and type of paper you want. Plus the book itself can be a work of art, and can save you some money too! I was inspired by my fellow design teammate Katie Smith, who makes beautiful hand-bound art journals AND is a big fan of Bob Ross!

Here's what you'll need to get started...

Supplies:

  • Paper (I'm using 140 lb watercolor paper but you can use any paper you like)
  • Cardboard for the cover
  • Large needle
  • Strong nylon thread
  • Bone folder
  • Ruler
  • Pencil
  • Scissors

Supplies to decorate your journal: (I used the following Tombow products, but you can use whatever you like)

  • MONO Drawing Pens
  • Dual Brush Pens
  • MONO Aqua Liquid Glue
  • Irojiten Colored Pencils
  • MONO Permanent + Adhesive
  • MONO Air Correction Tape
How to Make Your Own Art Journal by Jessica Mack of BrownPaperBunny

Step 1: Prepare Your Art Journal Pages

The first step is to cut your paper and journal cover to the size you want (if they aren't already), then you're going to score a line down the middle of each page and the cover using your ruler and bone folder. This helps the paper fold neatly and evenly, especially if you're using thick watercolor paper or cardboard. If you don't have a bone folder you can use anything pointy but not sharp (the back of a butter knife for example).

Along the center of one of your pages measure out where you're going to put your five holes, starting with the middle hole and working outwards. You could put more holes if you're making a large book, just make sure you always use an odd number.

If your paper is thick you'll want to pre punch the holes using a bookbinders awl, a large needle, or even a metal kitchen skewer. Punch the holes on one page then use it as a template for the rest. Stack all of your prepared pages together inside the cover and you're ready for Step 2!

How to Make Your Own Art Journal by Jessica Mack of BrownPaperBunny

Step 2: Stitch Your Pages Together

To stitch your pages together using a saddle stitch, thread your needle but don't tie a knot in the end. Start on the inside of your art journal pushing the needle through the center hole. Leave yourself a thread 'tail' about three inches long. You can either go left or right but sew your way through all of the holes until you get to one of the edges, then turn around and sew through the holes to the opposite edge.

Once you get to the second edge, sew your way back until your needle and your tail are on the inside of your art journal.

Tie the two ends together with a secure knot and trim the ends off. Here's a quick video showing all of the steps.

Step 3: Decorate Your Art Journal

Now that your journal is sewn together you're ready to decorate it. Taking my inspiration from Katie, I filled my journal with lots of color, and quotes from Bob Ross. You could use your journal for anything: drawing your dreams, everything you ate that day, things you see on a walk, lists of your favorite things, a book of maps, poems, pictures of cats...the list is endless!

On a lot of the pages I created a background using Dual Brush Pens and a wet paintbrush, then used collage and MONO Drawing Pens over the top. The video below shows a time-lapse of some of my pages coming together, and you can see all of the finished pages at the end.

I'd love to see some of your art journal pages, tag @BrownPaperBunny on social media so I can take a look! And in the comments tell me your favorite thing to journal about!

How to Make Your Own Art Journal by Jessica Mack of BrownPaperBunny
In Aug 2017, Ink, Sketchbook, Tutorial, Watercolor
13 Comments
How to Draw an Anemone Flower by Jessica Mack from BrownPaperBunny

How To Draw An Anemone Flower

April 19, 2018

Please note: This blog post contains affiliate links, which help pay for the upkeep of this site. That being said, I will never, ever promote anything I am not 100% in love with!

----------

With Earth Day coming up I thought I’d show you how to draw one of my favorite flowers, the anemone. They’re super simple to draw, come in a rainbow of colors and look great on cards, in your planner, or as wall art!

Here’s what you’ll need to get started.

Supplies:

  • Pencil (My favorite is the Tombow MONO Drawing Pencil)

  • Tombow MONO Knock Eraser

  • Tombow Dual Brush Pens

  • Paper (I’m using Strathmore Heavyweight Mixed Media paper)

  • Tombow Blending Palette

  • Paintbrush

  • Tombow MONO Drawing Pen (optional: for line work)

How to Draw an Anemone Flower by Jessica Mack from BrownPaperBunny

Step 1: Drawing the Anemone Shape

There are really only four simple steps for drawing an anemone flower. Start with a circle, then leaving a gap, draw small oval shapes and connect them to the center circle with thin lines. This will be the flower’s stamen. Next work your way around the center, drawing the petals. It helps to move the paper as you go, so the petal you’re drawing is always right in front of you. Don’t worry if the shapes are a little wonky, real flower petals are never exactly the same!

I’m drawing mine in ink so you can see the lines, but I recommend drawing your initial flower shape using light pencil lines.

How to Draw an Anemone Flower by Jessica Mack from BrownPaperBunny

Step 2: Adding Color to Your Anemone

I love using the Tombow Dual Brush Pens as watercolor, especially when adding color to flowers. A great way to do this is by using the Blending Palette. Draw some ink directly onto the blending palette then use a wet paintbrush to transfer the ink to your paper.

Anemones come in so many different colors that you can really have fun with this step. Try creating a rainbow bouquet, or perhaps a line of them in different shades of the same color.

How to Draw an Anemone Flower by Jessica Mack from BrownPaperBunny

If you use anemones in your own project I'd love to see! Tag @BrownPaperBunny on social media.

In Aug 2017, Illustrations, Ink, Tutorial, Watercolor
16 Comments
How to Make a Pinata Card by Jessica Mack of BrownPaperBunny

How to Make a Piñata Card

April 12, 2018

Please note: This blog post contains affiliate links, which help pay for the upkeep of this site. That being said, I will never, ever promote anything I am not 100% in love with!

----------

When I have time, I like to make my own birthday cards, and wanted to show you one of my favorites to make. It's great for other celebrations too, and you can choose whatever colors you want! 

Supplies:

  • Small strips of crêpe paper, with fringe cut into one edge

  • Tombow MONO Adhesive

  • A blank card with a piñata outline

  • A stick-on googly eye is optional but adds some extra fun
How to Make a Pinata Card by Jessica Mack of BrownPaperBunny

Step 1: Draw Your Outline

After you’ve gathered the supplies for your card, draw a piñata outline onto the blank card. Do yours in pencil — I've only done mine in black ink so you can see it better. 

Step 2: Stick on the Crêpe Paper

Fill the piñata outline with MONO Adhesive, being careful to stay within the lines. Then stick just the top (un-fringed side) of the crêpe paper to the adhesive. Start at the bottom and work upwards, overlapping each layer.

How to Make a Pinata Card by Jessica Mack of BrownPaperBunny

Step 3: Clean Up

Once you’ve stuck down each layer of fringed crêpe paper, trim any pieces that go outside the lines. You can also lightly ruffle the fringed paper to make it stand out a little more.

Step 4: Finishing Touches

Stick on your googly eye if you have one, and you can also add little pieces of leftover paper to the card like miniature confetti, or draw in some confetti using your TwinTone Markers, and voila it’s ready to be sent!

If you make your own I'd love to see! Tag @BrownPaperBunny on social media!

In Aug 2017, Tutorial
15 Comments
Make Your Own Cute Colored Pencil Cards for Spring, by Jessica Mack of BrownPaperBunny

Cute Colored Pencil Cards

April 2, 2018

Please note: This blog post contains affiliate links, which help pay for the upkeep of this site. That being said, I will never, ever promote anything I am not 100% in love with!

----------

Today I'm going to show you how to make these cute colored pencil cards, which you can use to spread the springtime love to all your friends and family!

If you haven't used the Tombow Irojiten colored pencils before let me introduce you to them. They come in three dictionaries, sorted by tonal value, so each volume is already perfectly matched. This makes choosing a color palette super easy, and the little pencil boxes are about the cutest things you'll ever see!

Here's what you'll need to get started.

Supplies:

  • Paper
  • Scissors
  • Tombow MONO Dots Adhesive
  • A blank card
  • Tombow Irojiten Colored Pencil Dictionary

I'm using the Woodlands Dictionary, Volume 4: Pale Tone II. With color names like Rose Pink, Apricot, Spring Green, and Hyacinth Blue they're perfect for this spring project! 

Make Your Own Cute Colored Pencil Cards for Spring, by Jessica Mack of BrownPaperBunny

Step 1: Draw Your Flowers

Draw some simple flower shapes using your Irojitan pencils. Make sure to draw some stems curving to the left and some to the right so you'll have a well-rounded bouquet when you put them all together at the end. 

Make Your Own Cute Colored Pencil Cards for Spring, by Jessica Mack of BrownPaperBunny

Step 2: Cut Out Your Bouquet

Cut out all the flowers you drew in the last step. You can either cut right on the edge of the color, or leave a little white space like I've done. I also drew a little bow to tie them all together.

Make Your Own Cute Colored Pencil Cards for Spring, by Jessica Mack of BrownPaperBunny

Step 3: Gather Your Bouquet

Once all of your flowers are cut out, start gathering them together until you have an arrangement you like. 

Make Your Own Cute Colored Pencil Cards for Spring, by Jessica Mack of BrownPaperBunny

Step 4: Stick Your Flowers Onto The Card

Now it's time to stick the flowers onto your card. I'm using the MONO Dots Adhesive because it's repositionable for a little while, before setting to a permanent bond. So you can move your flowers around and get them in just the right spot.

I also gave my card a little color using Tombow Dual Brush Pens. If you'd like to learn more about the technique I used, take a look at this post.

Make Your Own Cute Colored Pencil Cards for Spring, by Jessica Mack of BrownPaperBunny

These little springtime bouquets would also work well in your art journal, planner, or just about anywhere you need a pop of floral color!

If you make your own I'd love to see, tag @BrownPaperBunny on social media!

In Aug 2017, Tutorial, Watercolor
1 Comment
3 Tips for Using Colored Pencils by Jessica Mack of BrownPaperBunny

3 Tips for Using Colored Pencils

March 30, 2018

Please note: This blog post contains affiliate links, which help pay for the upkeep of this site. That being said, I will never, ever promote anything I am not 100% in love with!

----------

Whether you're using colored pencil for original artwork or using them on adult coloring books, here are three tips that will help you create richer, more vibrant colored pencil work. 

This first tip was taught to me by Marie Browning, and I’ve been using it ever since! Whip out your Tombow Dual Brush Pen Colorless Blender and use it on top of your colored pencil. This will ‘burnish’ it and help work the color into the paper for a more even look, with less of the white showing through. 

3 Tips for Using Colored Pencils by Jessica Mack of BrownPaperBunny

Here's a closer look. The petal at the bottom of the picture is just colored pencil. The other petals have been burnished with the colorless blender.

3 Tips for Using Colored Pencils by Jessica Mack of BrownPaperBunny

My next tip uses Tombow’s new 1500 Colored Pencils with Tombow Dual Brush Pens. Put down an even base layer of color using the Dual Brush Pens, and once the ink is dry use a darker shade of colored pencil over the top to add depth and texture. 

3 Tips for Using Colored Pencils by Jessica Mack of BrownPaperBunny

Ok, here's my last tip for using colored pencils. To add more depth and interest to your colored pencil work try layering different colors over each other and blending them together on the paper. Here I used three different shades of purple, two cool tones and one warm to blend and add more interest than using a single color.

3 Tips for Using Colored Pencils by Jessica Mack of BrownPaperBunny

If you use any of these tips in your own colored pencil work I'd love to see! Tag @BrownPaperBunny on social media! 

In Tutorial, Aug 2017
18 Comments
Modern découpage card project from Jessica Mack of BrownPaperBunny

Modern Découpage

March 19, 2018

Please note: This blog post contains affiliate links, which help pay for the upkeep of this site. That being said, I will never, ever promote anything I am not 100% in love with!

----------

Découpage dates back as far as the 12th Century, but really made a comeback in the '90s.

Remember all those boxes and chairs covered in angels, antique roses, and butterflies? Well the '90s can keep all that, I'm here to show you a modern twist on this old technique.

You'll need some paper (thin gift wrap, tissue paper, or even marker paper works well), scissors or a shape punch, Tombow MONO Aqua Liquid Glue, an old paintbrush, some Tombow Dual Brush Pens (if you want to color some of your own paper), and something you want to decorate (a card, gift box, notebook cover etc. - today I'm making some cards). 

Modern découpage card project from Jessica Mack of BrownPaperBunny

First, cut or punch out your shapes (hexagons or triangles work well) from your gift wrap or paper you've decorated yourself and arrange them on the object you're going to decorate. Once you're happy with the layout, start gluing the paper down with your Tombow MONO Aqua Liquid Glue.

Modern découpage card project from Jessica Mack of BrownPaperBunny

The last step is to cover your whole design with Tombow MONO Aqua Liquid Glue and smooth it out with a paintbrush. Let everything dry and then, if you need to, trim any paper that is overhanging the edges, and you're finished!

Modern découpage card project from Jessica Mack of BrownPaperBunny

If you make some découpage projects of your own I'd love to see them! Tag @BrownPaperBunny on social media! 

In Aug 2017, Pattern, Tutorial
Comment
Watercolor easter eggs using Tombow Dual Brush Pens by Jessica Mack of BrownPaperBunny

3 Watercolor-Look Easter Egg Decorating Techniques

March 19, 2018

Please note: This blog post contains affiliate links, which help pay for the upkeep of this site. That being said, I will never, ever promote anything I am not 100% in love with!

----------

Hello! I'm a little obsessed with pastels, as we approach Easter, so I'm going to show you three watercolor-look easter egg decorating techniques using your Tombow Dual Brush Pens! Each technique is super easy and loads of fun!

Here's what you'll need to get started:

Supplies

  • Tombow Dual Brush Pens (Pastel 10-Pack)
  • Eggs (white ones will work best)
  • Water
  • Paintbrush
  • Tombow Blending Palette
  • Egg carton
Watercolor easter eggs using Tombow Dual Brush Pens by Jessica Mack of BrownPaperBunny

Technique 1: Watercolor Streaks

For this first technique start by adding some ink from the Dual Brush Pen to your Blending Palette, then use a wet paintbrush to transfer the ink from the palette to your egg. Use lots of water and let the ink drip down the egg. This is where the egg carton comes in handy, to help you decorate one side at a time without getting your fingers too messy. Start with the lightest colors first, letting them dry a little before adding the next color.

Watercolor easter eggs using Tombow Dual Brush Pens by Jessica Mack of BrownPaperBunny

Technique 2: Drawing Directly on the Eggs

This one is super easy! You're going to use your Dual Brush Pens to draw directly onto the eggs. Pick an easy-to-replicate shape like a flower or polka dots and repeat all over each egg. The trick to giving them a watercolor look is to start with the lightest colors first and make sure you overlap the shapes slightly so you get some color blending and transparency like you would with watercolor paint.

Watercolor easter eggs using Tombow Dual Brush Pens by Jessica Mack of BrownPaperBunny

Technique 3: Wetting the Eggs

The last technique involves drawing directly onto the eggs like you did in technique 2, but this time we're going to use a wet paintbrush to blend the ink directly on the egg for a more watery look. Super easy!

Watercolor easter eggs using Tombow Dual Brush Pens by Jessica Mack of BrownPaperBunny

If you make some eggs of your own I'd love to see them! Tag @BrownPaperBunny on social media.

**Please note: Do not eat these eggs after decorating them. These are for decorative purposes only.

In Aug 2017, Ink, Tutorial, Watercolor
Comment
Easy to Make Crepe Paper Flowers by Jessica Mack of BrownPaperBunny

Easy-to-Make Crepe Paper Flowers

March 10, 2018

This month is National Craft Month, and it's almost Spring, so I've been having some fun making crepe paper flowers. They're super easy to make and look great in a cute vase, as a wall hanging, wired together as a flower crown, or individual flower fascinator.

Here's what you'll need to get started.

Supplies:

  • Tombow MONO Multi XL Liquid Glue
  • Crepe Paper
  • Tombow Xtreme Adhesive Tabs
  • Thin green floral wire
  • Scissors
Easy to Make Crepe Paper Flowers by Jessica Mack of BrownPaperBunny

Step 1: Paper Flower Petals

For each of the flowers you want to make you'll need to cut out three sizes of petals. I used seven small petals, 10 medium, and 10 large. Feel free to cut them out a little imperfectly to give a more organic feel to your flowers, and if your scissors are nice and sharp you can layer the crepe paper and cut out a lot of them at once which will save time! Keep your scraps, because we're going to use them in the next step.

Once you've cut out all your petals gently stretch the middle of each one so it forms a slightly cupped shape.

Easy to Make Crepe Paper Flowers by Jessica Mack of BrownPaperBunny

Step 2: Flower Bud

Wad up some of your scraps around the end of a piece of your floral wire, and wrap a small square of crepe paper around all of it to form the bud of your flower. I put a little dab of MONO Multi XL Liquid Glue inside the bud to hold it all together, and it helps to bend a small hook into the end of your wire so it can't be easily pulled out.

Easy to Make Crepe Paper Flowers by Jessica Mack of BrownPaperBunny

Step 3: Building Your Flower

Place a small dab of MONO Multi XL Liquid Glue on the base of your first small petal and stick it to the base of your flower bud. Work your way around with all of the small petals, overlapping them slightly. Do the same with the medium and large flower petals until you've glued them all on. As you're making your flowers you may want to leave some of them at the small petal stage so you have a variety of sizes and 'openness' of your blooms.

Easy to Make Crepe Paper Flowers by Jessica Mack of BrownPaperBunny

Step 4: Leaves

Now it's time to add some greenery! Cut out some leaf shapes from your crepe paper and stretch them slightly like you did with the petals. I add at least two leaves to every flower I create.

Easy to Make Crepe Paper Flowers by Jessica Mack of BrownPaperBunny

Use your Tombow Xtreme Adhesive Tabs to stick the leaves to the base of your flower. Because the leaves don't have the same level of support as the overlapping petals I find the tabs help to keep them firmly in place.

Easy to Make Crepe Paper Flowers by Jessica Mack of BrownPaperBunny

And there you have it, easy-to-make crepe paper flowers you can use for all sorts of beautiful projects! If you make some of your own tag @BrownPaperBunny on social media so I can admire them!

In Aug 2017, Tutorial
Comment
Easy Ways to Create Mail Art by Jessica Mack of BrownPaperBunny

3 Mail Art Techniques

March 4, 2018

Please note: This blog post contains affiliate links, which help pay for the upkeep of this site. That being said, I will never, ever promote anything I am not 100% in love with!

----------

One of my favorite creative hobbies is mail art, AND one of my 2018 resolutions is to send more snail mail, so I’m going to walk you through three easy-to-create types of mail art.

The first technique is decorating the envelope with patterns or doodles. You’ll need some blank envelopes, Tombow MONO Drawing Pens, Dual Brush Pens, a ruler, MONO Eraser and pencil (if you’re like me and have trouble writing in a straight line without guides). 

Easy Ways to Create Mail Art by Jessica Mack of BrownPaperBunny

This technique focuses more on fun lettering and a little less on envelope decoration (although you could always combine the two for that extra WOW factor). Make the name of the recipient really stand out and have some fun with your lettering! Just make sure the address is still legible. The supplies you’ll need are blank envelopes, your Tombow Dual Brush Pens, MONO Drawing Pens, pencil, eraser, and a ruler.

Easy Ways to Create Mail Art by Jessica Mack of BrownPaperBunny

And now for my all-time favorite mail art technique. This one has the name and address of the recipient inside a drawing. This fun balloon design would be great with a birthday card, and click through on the Instagram post below to see how to use the Tombow Dual Brush Pens to create a watercolor-look umbrella design. For this technique you’ll need thick envelopes, a paint-brush, jar of water, Tombow Blending Palette, MONO Drawing Pens, pencil, eraser, and of course Dual Brush Pens in your favorite colors. Will you be creating any mail art in 2018?

Easy Ways to Create Mail Art by Jessica Mack of BrownPaperBunny

A post shared by Jessica 🎨 Fashion Illustration (@brownpaperbunny) on Jan 29, 2018 at 7:31pm PST

In Aug 2017, Illustrations, Ink, Tutorial, Type, Watercolor
21 Comments
How to Create Watercolor Flowers with Tombow Dual Brush Pens by Jessica Mack of BrownPaperBunny

How to Create Watercolor Flowers with Markers

March 4, 2018

Please note: This blog post contains affiliate links, which help pay for the upkeep of this site. That being said, I will never, ever promote anything I am not 100% in love with!

----------

One of my favorite things is painting and drawing flowers, and one of the easiest ways to do it is by using water-soluble markers such as Tombow Dual Brush Pens! So here are my top three tips for creating watercolor-look flowers with your markers. 

Supplies: 

  • Thick watercolor paper (preferably 140 lb / 300 g or in a block to prevent warping)

  • Tombow Dual Brush Pens in your favorite colors

  • Blending Palette

  • Jar of Water

  • Paintbrush

You can use my affiliate code ‘bpbunny15’ for 15% off all Tombow products.

How to Create Watercolor Flowers with Tombow Dual Brush Pens by Jessica Mack of BrownPaperBunny

Tip 1:

Stay as loose as possible. The unpredictable nature of watercolor is part of its charm, so embrace the flow, drips, and color bleeds. Basically, don’t try to paint too perfectly or control it too much! 

How to Create Watercolor Flowers with Tombow Dual Brush Pens by Jessica Mack of BrownPaperBunny

Click through to see the video.

A post shared by Jessica 🎨 Fashion Illustration (@brownpaperbunny) on Feb 28, 2018 at 12:22pm PST

Tip 2: 

Use more than one color or shade for more interesting flowers. If you’re using mostly pinks, throw in a tiny bit of orange or yellow, or different shades of the same color for variation. And always start with the lightest color first (allowing layers to dry in-between) that way you’ll keep everything from bleeding together completely, and you can have some light color show through the gaps when you put the darker colors on last.

How to Create Watercolor Flowers with Tombow Dual Brush Pens by Jessica Mack of BrownPaperBunny

Click through to see the video.

A post shared by Jessica 🎨 Fashion Illustration (@brownpaperbunny) on Mar 1, 2018 at 12:02pm PST

Tip 3: 

For a softer, more watery look scribble Tombow ink onto your Blending Palette and then use a wet paintbrush to transfer the ink to the paper. But for a more vibrant and saturated look draw with the Dual Brush Pens directly onto the watercolor paper and then use your paintbrush to wet the ink there.

How to Create Watercolor Flowers with Tombow Dual Brush Pens by Jessica Mack of BrownPaperBunny

Click through to see the video.

A post shared by Jessica 🎨 Fashion Illustration (@brownpaperbunny) on Mar 2, 2018 at 6:53pm PST

If you’re new here, I’m Jessica — a watercolor artist and fashion illustrator from Australia (but now living in Seattle, Washington). I’d love to connect on social media, come say hi on Instagram, Facebook or Twitter @BrownPaperBunny! 

You might like to check out my new book: Watercolor with Markers

Watercolor with Markers by Jessica Mack

You might also like these blog posts:

Featured
CRL-Horizontal-Laptop-Beige-Floral-Painting.jpg
Creative Retreat Live
Rainbow-Watercolor-Wreath-Using-Markers.JPG
Rainbow Wreath Tutorial
JessicaMack-Mothers-Day-Art-8.jpg
Make Your Own Mother's Day Art
Galaxy-Butterfly-1.jpg
Watercolor Galaxy Butterfly
In Aug 2017, Illustrations, Ink, Tutorial, Watercolor
21 Comments
How to Draw Pretty Patterns in Your Planner by Jessica Mack of BrownPaperBunny

How to Draw Pretty Planner Patterns

March 4, 2018

Can you believe we're so far through 2018 already?! It is definitely time to get organized, so pull out your 2018 planner and I'll show you how to create pretty patterns to liven up the pages and make it easier to distinguish one week from the next.

Supplies:

  • Tombow TwinTone Marker Set, 12-Pack Pastel
  • Tombow MONO Drawing Pen, 3-Pack
  • Your favorite planner or bullet journal

I love the TwinTone Markers and MONO Drawing Pens because they don't bleed through the super-thin pages of my planner, and by having the option to create a variety of line thicknesses you can add beautiful variation to your patterns!

How to Draw Pretty Patterns in Your Planner by Jessica Mack of BrownPaperBunny

My planner has a fairly boring header section so that's where I'm going to put my pattern on each page. You can do all of the pages at the start of the year, or do each one as you get to it. Either way the patterns will help you to quickly find the page you're looking for and make each one different to the last.

How to Draw Pretty Patterns in Your Planner by Jessica Mack of BrownPaperBunny

Start by using the TwinTone Markers to create patterns out of simple shapes. If you're stuck for pattern ideas, look around you. Household and office items make great pattern inspiration. Use the leaves on your fikas, the lipstick in your handbag, or even fruit from the kitchen!

How to Draw Pretty Patterns in Your Planner by Jessica Mack of BrownPaperBunny

You can create some of the patterns in color, and some in black and white using just the MONO Drawing Pens. Try varying the shapes and lines by using the 01, 03, and 05 sized pens.

How to Draw Pretty Patterns in Your Planner by Jessica Mack of BrownPaperBunny

Then, why not combine the two, laying down color with the TwinTone Markers, and adding detail and lines with the MONO Drawing Pens.

How to Draw Pretty Patterns in Your Planner by Jessica Mack of BrownPaperBunny

You can watch a little flip through of some finished pages over on the Tombow Blog. I'd love to see your patterns, tag @BrownPaperBunny on social media so I can see!

In Aug 2017, Illustrations, Ink, Pattern, Tutorial
Comment
Easy to Make Ultra Violet Nursery Wall Art by Jessica Mack of BrownPaperBunny

Easy-to-Make Ultra Violet Nursery Art

March 4, 2018

Today I've got a little tutorial to show you how to easily incorporate the 2018 Pantone Color of the Year, Ultra Violet, into your nursery or children's room. These easy-to-make nursery art pieces look great framed, and will only take you a few minutes to put together.

Here are the supplies you'll need to get started.

Supplies:

  • Watercolor paper
  • Tombow Dual Brush Pens in numbers 606-Violet, and 603-Periwinkle for accents.
  • A white paint pen, or if you want black lines use your N-15 Black Tombow Dual Brush Pen
  • Tombow MONO Glue Pen
  • Plastic freezer bag, or other large piece of plastic
  • Paper towel
  • Water Spray Mister
  • Scissors
  • Frames
Easy to Make Ultra Violet Nursery Wall Art by Jessica Mack of BrownPaperBunny

Now let's get started!

Step 1:

I used the MONO Glue Pen to draw some stars and other little details onto my watercolor paper. Once the glue dries it acts like a resist and will keep that area of the paper free from color.

Easy to Make Ultra Violet Nursery Wall Art by Jessica Mack of BrownPaperBunny

Step 2:

Scribble some ink from your Dual Brush Pens onto your freezer bag. I added a few dots of Dual Brush Pen 528-Navy Blue for interest but that's entirely optional.

Easy to Make Ultra Violet Nursery Wall Art by Jessica Mack of BrownPaperBunny

Step 3:

User your spray mister to wet the freezer bag and ink. It pays to put some paper towel underneath in case any of the water or ink jumps off the bag unintentionally.

Easy to Make Ultra Violet Nursery Wall Art by Jessica Mack of BrownPaperBunny

Step 4:

Place your watercolor paper down onto the bag and press the back in circular motions to make sure the ink covers the whole front of the paper. Carefully lift the paper from the bag, and place it (ink-side up) on some spare paper towel to dry.

Easy to Make Ultra Violet Nursery Wall Art by Jessica Mack of BrownPaperBunny

Step 5:

Draw your designs onto the dried watercolor paper. You can draw or write whatever you'd like. I chose an outline of Washington State with 'Home Sweet Home', a Kawaii cacti, and the words 'Twinkle Twinkle Little Star' surrounded by stars. You can also cut the paper into fun shapes to make them a little different. This is where I used the 603-Periwinkle Dual Brush Pen to outline the letters and help them stand out a little more.

Easy to Make Ultra Violet Nursery Wall Art by Jessica Mack of BrownPaperBunny
Nursery-Jessica-Mack-8.jpg

And you're done! Frame those babies and add a little Ultra Violet color to your walls!

I'd love to see what you create, tag @BrownPaperBunny on social media to show me.

In Aug 2017, Illustrations, Ink, Tutorial, Watercolor, Type
Comment
How to Make a Paper Halloween Lantern

How to Make a Halloween Lantern

October 6, 2017

Please note: This blog post contains affiliate links, which help pay for the upkeep of this site. That being said, I will never, ever promote anything I am not 100% in love with!

----------

Tombow sent me a few goodies and challenged me to come up with a fun project. I decided to make some paper Halloween lanterns! These look great on a window sill at night, or as Halloween-themed table decorations. You could make them as big or small as you like!

Supplies

Here's what you'll need to get started: 

  • Tombow Dual Brush Pens (a dark and a light shade of the same color)
  • Tombow Colorless Blender
  • Mono Twin Permanent Marker
  • Tombow Xtreme Adhesive
  • Mono Permanent Adhesive+
  • Pencil
  • Black card
  • Thick tracing paper (mine was 115 gsm)
  • Scissors
  • Craft knife
  • Metal ruler
  • Cutting mat
  • Battery-operated candle
 
Supplies for making a paper Halloween lantern with Tombow Dual Brush Pens
 

Steps

Watch the video to get a quick overview, and then follow the steps below to make your lantern!

  1. Draw your template in pencil onto black card (I used black construction paper and it was a little flimsy, so go for something thicker). You'll want four matching rectangles or squares, with the sides touching, and four smaller windows (which will be cut out). You can also cut-out some decorations on the top of your lantern. I opted for creepy trees, but you could cut out pumpkins, bats, ghosts etc!
     
  2. Cut out your top decorative shapes.
     
  3. Use your craft knife, metal ruler, and cutting mat to carefully cut the windows out of each of your sides. Note: It helps to 'score' the creases where you'll fold each side, to give you a cleaner edge. I used a bone folder, but you could use the dull side of a butter knife etc.
     
  4. On your tracing paper, use your pencil to lightly draw squares or rectangles that are slightly larger than the 'windows' you cut out of your black card. 
     
  5. Color over the top third of your shapes on your tracing paper with your darkest Tombow Dual Brush Pen, then use the lighter shade 'pull' that color down the rest of the shape. Finish by blending the bottom third with the colorless blender to get a nice gradient, like a twilight sky. The reason Tombow Dual Brush Pens are great for this, is they are water soluble and blendable, which enables you to get these soft gradients!
     
  6. Use your Mono Twin Permanent Marker to draw your silhouettes over your sky gradient. I went with bats, but you could do witches on broomsticks, pumpkins, ghosts etc!
     
  7. Cut out your tracing paper rectangles. 
     
  8. Use your Tombow Xtreme Adhesive to stick the tracing paper shapes over the window cutouts on your black card. This adhesive is permanent and will really keep your 'window panes' in place!
     
  9. I used the Mono Permanent Adhesive+ to stick the end sides of my black card together to form my lantern. Being smaller I was able to get onto that small edge more easily.
     
  10. Put your lantern over a flameless / battery-operated candle and you're ready to display your little lantern! Note: please don't use real candles with your paper lantern, that's a recipe for disaster!
     

Are you making any Halloween crafts this year? Leave me a comment and let me know!

In Aug 2017, Ink, Tutorial
15 Comments
How to Draw Dahlias with Tombow Dual Brush Pens By BrownPaperBunny

6 Easy Flowers to Draw with Tombow Markers

August 26, 2017

Please note: This blog post contains affiliate links, which help pay for the upkeep of this site. That being said, I will never, ever promote anything I am not 100% in love with!

I often find myself drawing flowers in my planner or notebooks to brighten up the margins, so I wanted to show you five of my favorite, super easy stylized flowers to draw using Tombow Dual Brush Pens. 

1. Tulips

Using the brush end of the markers I start with a lighter color to draw two main petals at the front and one peeking over from the back, then I use a slightly darker shade to color the petals in, leaving some space for the first color to show through in between petals.

Next I draw a simple stem and leaves, making use of the brush tip to vary the size of the line by applying more pressure as I draw the leaf.

I then use an even darker shade of both pink and green to add some simple lines as detail. Watch the video below to see it all come together.

2. Sunflowers

I start with a light shade of yellow, and using the brush end I create the first layer of petals. Then, using a slightly darker shade of yellow create more petals in the spaces of the first layer. Next comes a simple stem and a leaf or two, before adding short black dashes to create the seeds in the middle. Watch the video below to see it come together.

3. Poppies

These super stylized versions of Poppies are really easy! You start with a lighter shade of orange, drawing a circle in the middle. Then go around it with a darker orange or a red. Next I draw wavy stems and fuzzy bulbs, before adding a few black dots in the middle. Watch the video below to see the process.

4. Lavender

Lavender flowers are particularly great for brightening up the margins of your planner without taking up too much space! I start with a wavy stem in a blue-green-grey color, then add oval petals down each side, gradually increasing in size. I use a darker shade of purple or blue to give some definition to the bottom of the petals. Voila, super easy! Watch the video below to see.


5. Dandelions

Are Dandelions actually flowers? I'm not really sure. But they're super fun to draw! I start with a light blue, or purple, drawing spokes all the way around the center. Then I do the same thing with a slightly darker shade. Simple, slightly-curved stem, add a little more color to the center, and you're done! Watch the video below to see the steps.


6. Dahlias

Dahlias are some of my favorite flowers. All those little petals, and the colors...oh my! I start with the darkest shade in the center, drawing little curved triangles. Then switch to a slightly lighter shade and keep adding petals. Switch to a lighter shade again and repeat as many times as you like. A simple stem and some little stalks and you're done! Watch the video below to watch it come together.


BONUS FLOWERS:

I was having so much fun I ended up drawing a couple of extras! If you end up drawing some of these flowers I'd love to see! Leave me a link in a comment, or tag @BrownPaperBunny on social media!

7. Cacti Flowers

So technically you're drawing the whole cactus here, but they're pretty fun to draw, and really easy, so why not! You can either start with a cute pot, or draw the cactus as if it was in the ground. Then add a couple of green blobs and upside-down tear shapes and you've got your base layer. Next, add some little flowers on some of the cacti branches. Next use a darker shade to give some definition to your cacti and you can draw in little spikes (I draw them as tiny 'V' shapes). Use a darker shade to also define your pot and your flowers and you're finished! Watch the video below to see how I drew mine.

8. Billy Buttons

As a kid we had Billy Buttons growing all over the place on our farm, and I used to think they were called 'Belly Buttons' — which to a little kid is just about the funniest thing you can imagine!

These are super easy to draw. You start with a pale yellow circle, then use a slightly darker yellow to give some definition along one edge. Some straight stalks, and a few dark brown or black dots and that's all there is to it. They look really cute on a yellow-themed planner page though! Watch the video below to see how easy it is.

9. Asters

I draw these little flowers all the time and I think they most resemble Aster Flowers. They only take a few seconds to draw, and you could make them in any color!

Start by drawing thin petals strokes outwards from the center, all the way around. Then add a simple stalk a cute curvy leaf or two and you're finished! Watch the video below to see how I drew these.

If you’re new here, I’m Jessica — a watercolor artist and fashion illustrator from Australia (but now living in Seattle, Washington). I’d love to connect on social media, come say hi on Instagram, Facebook or Twitter @BrownPaperBunny! 

You might also like these blog posts:

Featured
CRL-Horizontal-Laptop-Beige-Floral-Painting.jpg
Creative Retreat Live
Rainbow-Watercolor-Wreath-Using-Markers.JPG
Rainbow Wreath Tutorial
15 Ways to Journal by Jessica on BrownPaperBunny
15 Ways to Journal
In March 2017, Tutorial, Ink, Illustrations
19 Comments
How to make a magnetic planner bookmark By BrownPaperBunny

How to Make a Magnetic Bookmark

August 24, 2017

Please note: This blog post contains affiliate links, which help pay for the upkeep of this site. That being said, I will never, ever promote anything I am not 100% in love with!

I'm getting RIGHT into the whole planner thing. I guess I've always been a notebook kind of gal, but lately I've combined my bullet journals with pretty planners full of color, ink, and stickers!

This week I made myself a magnetic bookmark so I could easily turn to the current date in my planner, and it was so fun and so easy that I thought I'd show you how I did it!

 
How to make a magnetic planner bookmark By BrownPaperBunny
 

Supplies

  • Scrap of watercolor paper or card
  • Ruler
  • Scissors or cutting tool
  • Bone folder (optional)
  • Tombow Dual Brush Pens in your favorite colors
  • Tombow Mono Drawing Pen (I like Size 01)
  • Tombow XL Liquid Glue
  • Plastic sheet (overhead projector sheet, or sandwich bag etc)
  • Old fridge magnet or Stick-On Magnetic Craft Dots or Magnetic Tape

Steps

1. Cut a rectangle double the size you want your finished bookmark

You're going to fold it in half once you're finished decorating the watercolor paper or cardstock, so measure and cut it out at double the size you want the finished product. I made my rectangle about 1 inch wide and 2 inches long.

 
How to make magnetic planner bookmark By BrownPaperBunny
 

2. Make a crease down the middle of your rectangle

Because watercolor paper or cardstock is fairly thick, it helps to make a crease so that when you fold it in half the paper doesn't split or bend unevenly. You can use the back of a butter knife if you don't have a bone folder.

 
How to make magnetic planner bookmark By BrownPaperBunny
 

3. Lay your plastic on top of your rectangle

You don't have to lay your plastic sheet or sandwich bag on top of your rectangle, but I like to see the size of the paper I'm coloring so I can get the ink roughly in the right spot.

 
How to make magnetic planner bookmark By BrownPaperBunny
 

4. Color on the plastic with your Tombow Dual Brush Pens

Pick a couple of your favorite Tombow Dual Brush Pen colors, that go nicely together, and color right onto the plastic.

 
How to make magnetic planner bookmark By BrownPaperBunny
 

5. Wet the ink

I like to spray a little water using a craft mister, but you could just as easily drop a few droplets of water onto the plastic with a paintbrush or your fingers.

 
How to make magnetic planner bookmark By BrownPaperBunny
 

6. Turn the wet side onto your paper

Carefully turn the plastic over and press it down onto your watercolor paper or cardstock and smush the color together to get a nice watercolor effect.

 
How to make magnetic planner bookmark By BrownPaperBunny
 

7. Fold in half

Once your paper is dry (I used a hair-dryer to speed it along) fold it in half along the line you scored / creased at the begining.

 
How to make magnetic planner bookmark By BrownPaperBunny
 

8. Trim the edges

This step is optional, but I think it adds a special touch to cut the open side into a point or use a corner rounding punch etc.

 
How to make magnetic planner bookmark By BrownPaperBunny
 

9. Glue your magnets to your paper

Glue or stick your magnets to the inside (non colored side) of your paper. If you're using glue, I like Tombow Mono Aqua Liquid Glue or Multi XL Liquid Glue.

 
How to make magnetic planner bookmark By BrownPaperBunny
 
 
How to make magnetic planner bookmark By BrownPaperBunny
 

10. Decorate your bookmark

This step is optional too, but I decorated both sides of my finished bookmark using the Tombow Mono Drawing Pen (size 01), which draws and writes really smoothly, even over thick paper. I did polka dots on one side and stripes on the other, just to mix it up.

 
How to make magnetic planner bookmark By BrownPaperBunny
 

And you're finished!

 
How to make magnetic planner bookmark By BrownPaperBunny
 

If you'd like to watch all of the steps together, check out the short time-lapse video below.


If you'd like to learn how to make and edit time-lapse videos on your phone, click the button below!

Learn More
In Ink, Tutorial, Watercolor, March 2017
2 Comments
Make Your Own Watercolor Planner Dashboard with BrownPaperBunny

DIY Planner Dashboard Using Tombow Dual Brush Pens

August 17, 2017

Please note: This blog post contains affiliate links, which help pay for the upkeep of this site. That being said, I will never, ever promote anything I am not 100% in love with!

You can make this watercolor-look planner dashboard in around five minutes, it's super easy! It's a great way to divide up your planner, add a new section, or store your sticky-notes or washi tape!

Supplies

  • Tombow Dual Brush Pens in your favorite colors
  • An image printed onto watercolor paper. You can use this one that I created, or draw your own.
  • A ruler
  • Cutting knife or scissors
  • Corner punch — optional
  • Water spray brush (or you can drip water from a paintbrush or your fingers)
  • Plastic cover for your page — optional (you can use one you already have in your planner, or make one from an transparent overhead projector sheet, or other thin plastic sheet)
  • Plastic freezer or sandwich bag (or the other half of your transparent sheet)
  • Hole punch or some way to insert the dashboard into your planner
  • A planner to put it into! My favorite right now is the MAMBI Mini Happy Planner
DIY Planner Dashboard Supplies by BrownPaperBunny

Steps

Here are the steps I used to make this watercolor-look planner dashboard. Watch the video below to see each step in action!

  1. Print or draw your image onto your watercolor paper. I used Canson paper. And here is the image I used if you'd like to download it for yourself.
  2. Trim your paper and plastic cover (if you aren't using a pre-made one) to the size of your planner.
  3. Draw on your freezer bag or plastic sheet using the Tombow Dual Brush Pens. They're water soluble so you can blend them really nicely with water!
  4. Drip or spray water onto the plastic bag or sheet you just colored on, then carefully turn it over onto your watercolor paper.
  5. Press the plastic down onto the paper to make the colors run together and give you the watercolor effect.
  6. Remove the plastic and wipe it off for future use.
  7. Let your paper air-dry, or speed up the process with a hairdryer on low.
  8. Punch holes in your paper and plastic cover (being careful not to tear it if it's thin) and insert into your planner!
  9. You can now put your sticky-notes and pieces of your favorite washi tape on your plastic cover for easy access.

If you'd like to learn how to make time-lapse videos of your own art, check out my online class.

Learn More

Make Your Own Printable Watercolor Planner Dashboard Insert with BrownPaperBunny
Printable Watercolor Fashion Illustration Planner Dashboard Insert by BrownPaperBunny

Leave me a comment and let me know if you can think of other uses for this watercolor-look technique! And if you make your own planner dashboard, tag @BrownPaperBunny on social media so I can see!

In Fashion Illustration, Illustrations, Ink, March 2017, Tutorial, Watercolor
Comment
How to Partner with Brands

How to Get Brand Sponsorships and Paid Work

August 11, 2017

Please note: This blog post contains affiliate links, which help pay for the upkeep of this site. That being said, I will never, ever promote anything I am not 100% in love with!

I get a lot of questions about how to get paid work with brands, social media sponsorships, and get invited to join ambassador programs. I've worked on both sides of the fence now (putting together influencer campaigns for brands, and now as an artist creating content) so I thought I'd share some tips on how to get the attention of your favorite brands.

1. Create Content for Free

I know, I know, you don't want to make stuff for free when you're trying to earn a living. But, you've got to show people what you can do before you can expect them to hire you. Think of it as building portfolio pieces specifically aimed at them.

Most of the brands I work with reach out to me after seeing my content on social media. And the best way to get their attention is to show them that you can do something unique and awesome with their products.

So far, I've had more brands reach out to me about my time-lapse videos than anything else I've done. You can learn how to create professional time-lapse videos using only your phone, in my new online class here.

A couple of content ideas include: filming an unboxing of their product, creating a tutorial, showing their products being used in a new way, incorporating them into your artwork etc.

2. Tag Brands

Whatever you do, please, please, please don't tag brands (or individuals) in social media posts that aren't relevant to them. There is nothing that will get you blacklisted and blocked faster!

But, if you are doing something awesome using their products and it is something you know they'll want to see, then absolutely give them a shoutout in the caption, and tag them in the image or video where you can.

To give you an example, I was really loving my new Tombow markers a few months ago so I started tagging them in my posts. Most people who use Tombow Dual Brush Pens are hand-lettering artists, so seeing their products used to create fashion illustrations really caught their eye. They asked if they could share some of my content, naturally I said yes (they have significantly more followers on their accounts than I do), then shortly afterwards they invited me to be a senior ambassador for the brand.

Learn how to use @tombowusa markers like watercolor — on the blog today http://bit.ly/watercolormarker That's how I colored Day 11 of #inktoberff (blouse) 🐰

A post shared by Jessica Mack 🎨 Colorado Artist (@brownpaperbunny) on Oct 11, 2016 at 8:18pm PDT

I have a similar story for Starbucks. They saw me creating artwork on their holiday red-cups and paid me to create content for their holiday commercial! And it was the same for a paid campaign I did with Famous Footwear, getting free tickets to multiple fashion shows and events, getting paid for live sketching at stores and so many other opportunities that have come my way! 

3. Make Sure They Can Use Your Work

This doesn't just mean giving them permission to use it, but try to put yourself in the brand's shoes and think about what they are looking for. Don't use other brand's products in your shot (certainly not products from a competitor, and don't show anyone else's logo). You might have created a killer video that they'd love to share, but they won't be able to use it if you had a competitor's product on your desk the whole way through.

Brands have all sorts of legal requirements they have to adhere to, so the easier you make it for them, the more they'll enjoy working with you.

Use the correct product name in your caption. If you aren't sure, look it up on their website. For example, I love using Tombow Fudenosuke Hard Tip Brush Pens, but it's an easy name to misspell, so I look it up often and always double check that I have it correct!

4. Be Professional

This point is two-fold. Answer correspondence quickly and professionally, and if you say you're going to do something for a brand by a certain date, DO IT. They might have a whole campaign that has been planned out for months, and you delivering content late could have very big consequences for them!

And the second part is to know your obligations and requirements as an influencer. There are very strict FTC guidelines on how you share content, and what you need to disclose. You definitely don't want to get fined for doing the wrong thing! And just to be clear, adding #spon to the end of a sponsored post does NOT cover you!

5. Create High-Quality Content

Make sure your photos and videos are top notch. Even if you're taking all of your photos and filming all of your videos on your phone (like I do), there is no excuse for poor lighting, crooked shots, etc. If you'd like to learn how to create and edit professional time-lapse videos on your phone, check out my new class. The video below was completely filmed and edited on an iPhone. 

A post shared by Jessica Mack 🎨 Colorado Artist (@brownpaperbunny) on Feb 28, 2017 at 6:14am PST

So, what sort of brand work can you expect to get?

Here's a list of just some of the partnerships I've done with brands recently, click on the links to see specific examples:

  • Paid work created specifically for a brand's campaign. (Commercials, print ads, social media, etc).

  • Paid to re-use content I had already created.

  • Paid to create artwork live at an event or in-store.

  • Sharing my content to their social media and/or website and providing a shout-out pointing back to my social media accounts or website. 

  • Social Media take-overs (for a day, or sometimes a week)

  • Collaborating on the creation of a new product.

  • Free products for me to use.

  • Free products to give to my followers through a contest or give-away.

  • Discount coupons.

  • Invitation to a brand's affiliate program, where I earn money for promoting their products.

  • Tickets to events, shows, back-stage tours, and conferences.

  • Introductions to other brands, for additional collaborations and projects. 

As I mentioned earlier in this post, my time-lapse art videos attract more attention and have brought me more paid work than anything else I've done. Learn how to make time-lapse videos of your own artwork, using your phone!

Learn More
In March 2017, Social Media Tips, Tutorial
2 Comments
How to Make Time-Lapse Videos of Your Art with BrownPaperBunny

How to Create Time-Lapse Videos of Your Art

August 10, 2017

I've been busy creating some new illustrations this week, and filming time-lapse videos of the process. You see, I get asked all the time how I create and edit my time-lapse art videos, so I created a step-by-step class to show you how to make your own! And the best bit is that you can do it all on your phone, oh, and you can finish the whole class in less than 30 minutes!

I contribute the majority of my growth on Instagram to time-lapse videos. While Instagram rarely promotes my photos to the discover feed, my time-lapse videos end up there all the time. This means that instead of a shelf-life of around 24-hours, my video posts end up bringing in new likes and followers for months after I post them!  

Most recently the super simple video below (which I created in about three minutes while listening to a speaker at a conference) has been viewed over 2.4 Million times and brought me over 5,000 new followers in less than a month!

A post shared by Jessica Mack 🎨 Colorado Artist (@brownpaperbunny) on Jul 2, 2017 at 6:05pm PDT

The editing part is really easy too. Check out the example video below. In about one minute I brightened it, got rid of the dark corners, edited out the shots where I leaned across my work or was using my hairdryer to dry the paint, and added in some side angle footage! AND I did it all on my iPhone! 

If you're interested in checking out the class, click the button below!

Learn More

Leave me a comment and let me know if you ever film videos of your process. 

In Fashion Illustration, Illustrations, Tutorial, Social Media Tips, March 2017
15 Comments
National Scrapbook Day by BrownPaperBunny

National Scrapbook Day: Part 1

May 1, 2017

Hi guys! National Scrapbook Day is coming up on May 6, and Tombow (this is an affiliate link, because I love their products, and proudly rep them) sent me this amazing pack of goodies to play with!

I've never done much scrapbooking before, which is odd given how much I love pretty paper, so I decided to make a mini scrapbook of baby Amélie's first month. Here's part one, the cover — stay tuned for my next post showing you how I put the pages together, and bound the whole book together!

First, I started by making the covers, using pretty pink polka-dot paper (try saying that five times fast). 

National Scrapbook Day by BrownPaperBunny

Then I cut a square out of the front cover, and glued in a picture of baby Amélie. Then I played around writing her name a few different ways until I got one I was happy with, and cut it out. 

National Scrapbook Day by BrownPaperBunny

Next I cut out some strips of cute arrow paper with gold foil and made a frame around her photo, and stuck everything down using the Tombow glue (which is acid free and photo safe). I found a cute black and white polka-dot paper that complemented the cover and I used that on the reverse side.

National Scrapbook Day by BrownPaperBunny

Here's a video of the steps I used to create the cover. Next post I'll show you the inside pages!

Are you planning any projects for National Scrapbook Day? Leave me a comment and let me know!

Here's a list of all the vendors all these fun goodies came from. (Please note, that while I didn't get paid to write this post I did get these delicious goodies for free — lucky me!)

  • Diecuts with a View
  • Paper House
  • Kelly Klapstein for Emerald Creek craft Supplies
  • Graphic 45
  • Amy Tangerine
  • Papercakes by Serena Bee
In March 2017, Tutorial
9 Comments
#StepForward with Famous Footwear and BrownPaperBunny

#StepForward

March 23, 2017

Thank you to Famous Footwear for kindly sponsoring this post. This post also contains affiliate links, which help pay for the upkeep of this site. That being said, I will never, ever promote anything I am not 100% in love with!

I've never told my story publicly. It's hard for me to talk about things this personal. But when Famous Footwear asked me to be part of their #StepForward campaign I decided it was time. I hope that my story will show other women that there is always opportunity to change your path, no matter how old you are, how broke, or how scared.

Growing up with a single mom, and very little money, I watched her struggle to give my sister and I every opportunity — even if it meant paying for ballet class with handfuls of change, or hitchhiking to get into town when the car was broken down. Of course she never let us know how tight money was or how often she went without to provide for us. 

I am so incredibly thankful for her, and the childhood I had. I was loved, and it made me independent, ambitious, and determined to make my own way in the world and always have enough money to support myself comfortably. 

So I got myself to college, paying my way by working 40+ hours a week at a local supermarket while studying full-time, got good grades, took internships, and found myself a corporate job before I'd even graduated. I wasn't taking any chances. 

For almost 17 years I worked my way up through corporate life at big defense contractors, management consulting and legal firms, then moved into consumer electronics and the tech industry. I saved, I went back to school and got my Masters while working full time, then another degree, then another. I never stopped learning, working, saving. There were jobs where I traveled for seven months of the year, jobs where I worked over 100 hours a week for months on end, and certainly times where I slept in the office when there were deadlines to be met. I shared houses with lots of other (sometimes horrible) people to keep my rent low so I could pay off all my school debts, I never bought anything I couldn't pay for in cash, and I started side hustles along the way. I did wedding photography on weekends, joined dance troupes and performed at events, and worked the 9pm to 4am shift at cocktail bars so I could still get up in time for my day job.

In my mid thirties I'd consider myself pretty successful, and say 'I'd made it'. I was running a department for a billion dollar consumer brand, and killing it. I was married to the love of my life, living in a big house, driving a BMW, and had no debt. But something had started to change, and I wasn't really very happy.

I'd only begun exploring my creativity a couple of years before, and I was finding more and more joy not only in painting and illustrating but in being a part of the creative community. I found myself getting an almost physical itch if I hadn't had time to make anything in a few days, and the achievements in my corporate life seemed less and less important to me. I daydreamed about being an artist and illustrator full time, but something inside screamed at me that I had to earn lots of money or I'd find myself back in my childhood, scrounging for change in the back of the sofa. I was too scared to take my dream seriously. 

Then our lives changed overnight. The company that both my husband and I worked for (and had just been promoted at) downsized in a big, and very unexpected way. The whole executive team was gone in one hit, almost everyone at a Director level and above was marched out without any notice, hand-over, or chance to say good-bye. Our whole world was turned upside down in a day. We went from having VERY good salaries to being a zero-income family.

My husband, who was on a work visa, sponsored by the company, had to go back to Australia immediately, while I stayed behind wondering how to sell everything we owned, the house we'd just bought, our cars, to pack up our lives and go back to Australia. We'd moved countries for this company, we'd given up our lives, friends, family, and worked tirelessly for them for years. I just kept thinking, how could they do this to us?

To top it off we'd just found out I was eight weeks pregnant with our first baby. I'll never know if it was biology or all the stress and heartbreak from that time, but I miscarried. It completely devastated me. 

Since the day we met, my husband and I had never been apart for more than a week or two, so the months that we had to spend on other sides of the world was horrible. We were having trouble seeing a way forward, but we never stopped trying, brainstorming, coming up with alternate plans and ideas. Then a close friend here in the US stepped in and sponsored my husband's visa to come and work for his company. It was a fraction of the money we had been used to, and I still wasn't working, but it was something. I was getting my husband back. 

For the next few months I worked hard to build up my own consulting business from home, while my husband commuted from Colorado to San Diego every second week for work. I was just so done with working in the corporate world and having to report to short-sighted people with no vision, who didn't share my drive, or appreciated how much work their teams put in to make them look good. I started crafting the life I wanted. Fewer clients, cutting our living experiences so I could work less hours and have more opportunities to work with people I really wanted to help ... other creatives. I wanted to use my years of experience to help other people like me make a living being creative, on their own terms.  

Miraculously we got pregnant again. But instead of feeling joy, we were scared. Would we miscarry again? How would we support our family on our reduced income? But we made the conscious decision to just keep stepping forward and figuring it out as we go. Because despite our life being at its 'messiest' we're moving in a much more positive direction, and taking more control of our lives rather than letting our bosses, corporate aspirations, or outside forces dictate where we go next. 

These days I'm working from home as a Social Media Consultant and Artist, and loving the freedom it affords me. Without all the distractions of an office, I get a whole day's worth of work done before lunch, and have more time to create, and help others. Our baby girl is due within the next two weeks, and we're working on getting my husband residency. As hard as this time has been it has really opened my eyes to new possibilities, and somewhere along the way I've given myself permission to be me, without any apologies. It has been freeing, and I've never been happier.

So to me, Stepping Forward means never giving up. Some days they're only small steps, some days huge, but you've got to keep moving in the direction that will help you create the life you want. Everyone's journey is different and you've got to find the pace and direction that works for you. Don't be afraid to make a change, or to pursue your dreams even if they feel unattainable right now. Just start moving towards them. 

As part as the #StepForward campaign I've done a lot of thinking about my journey and just how grateful I am. If I can even inspire one other woman to take a step towards her own dreams, I'll be supremely happy.

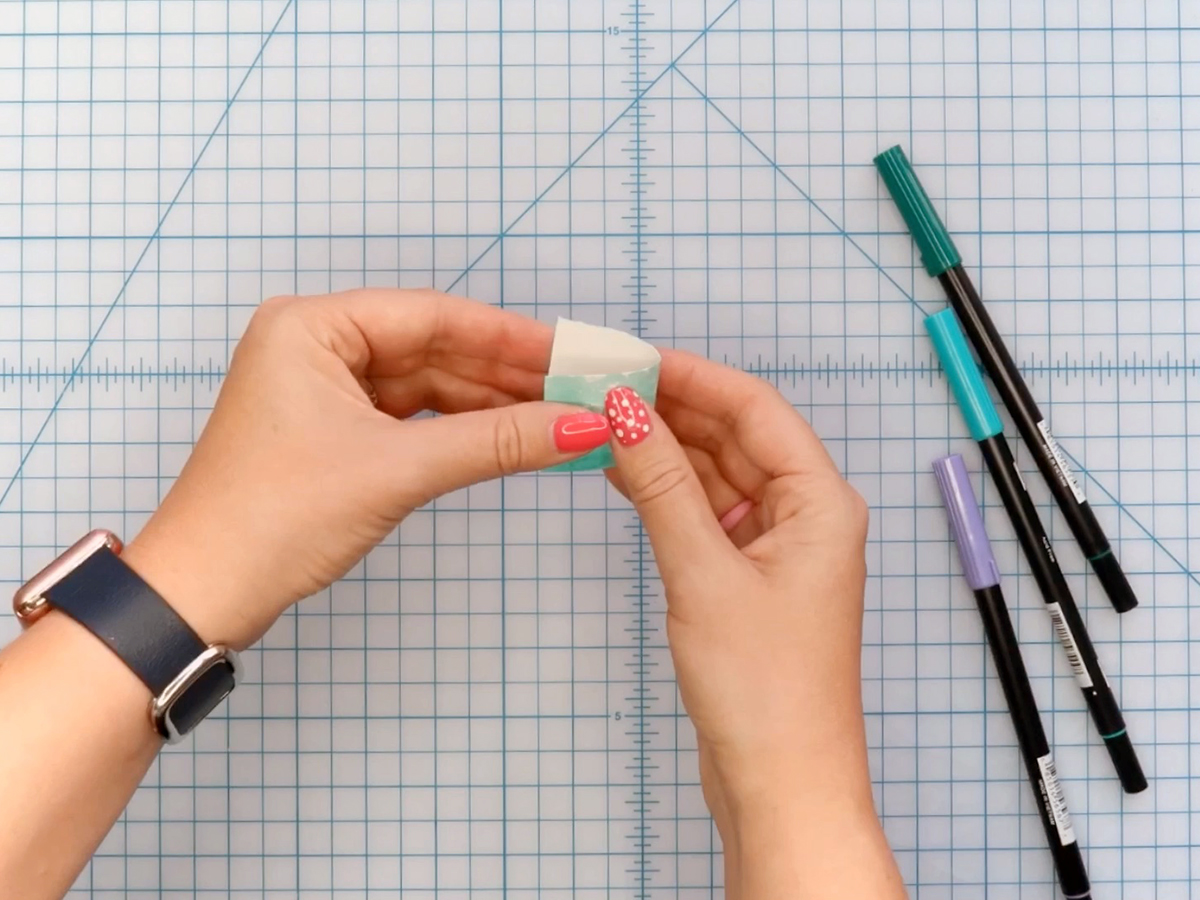
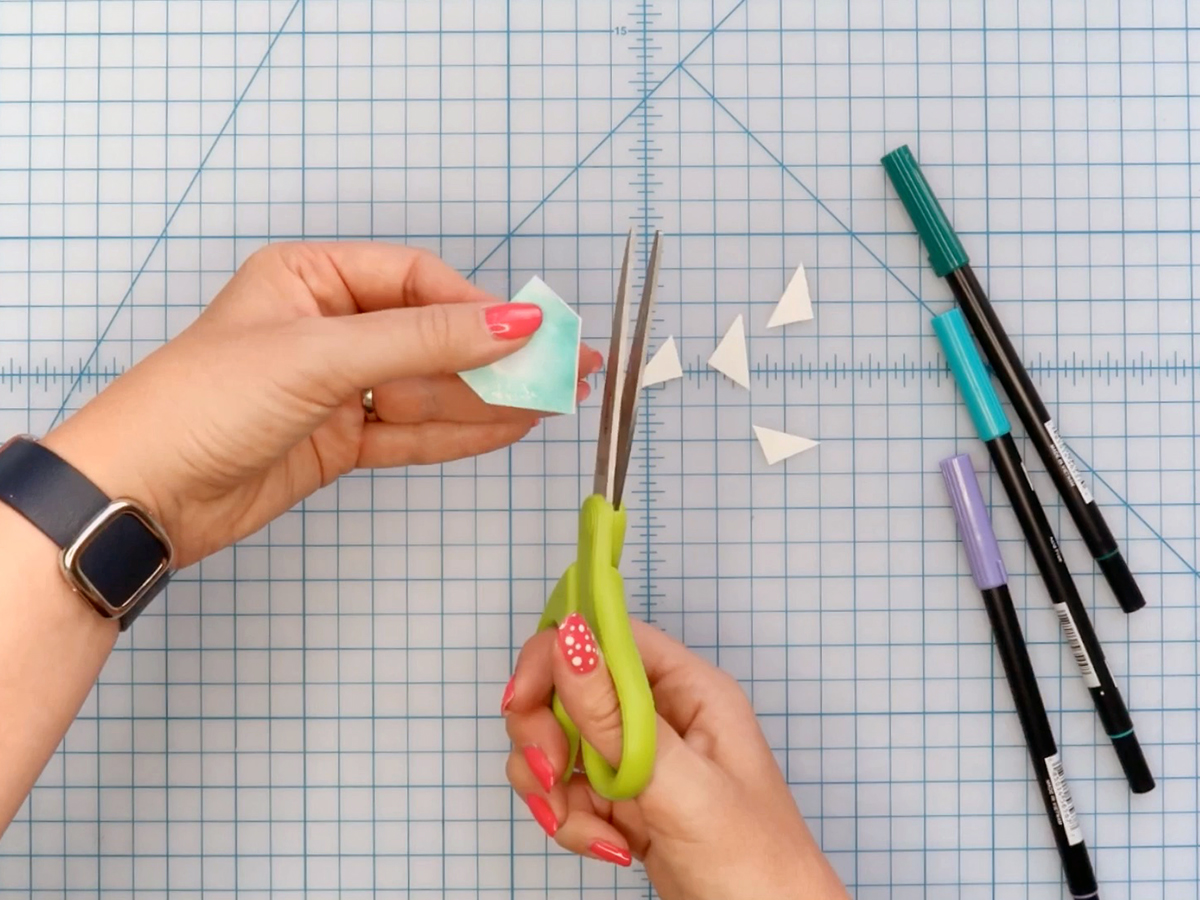
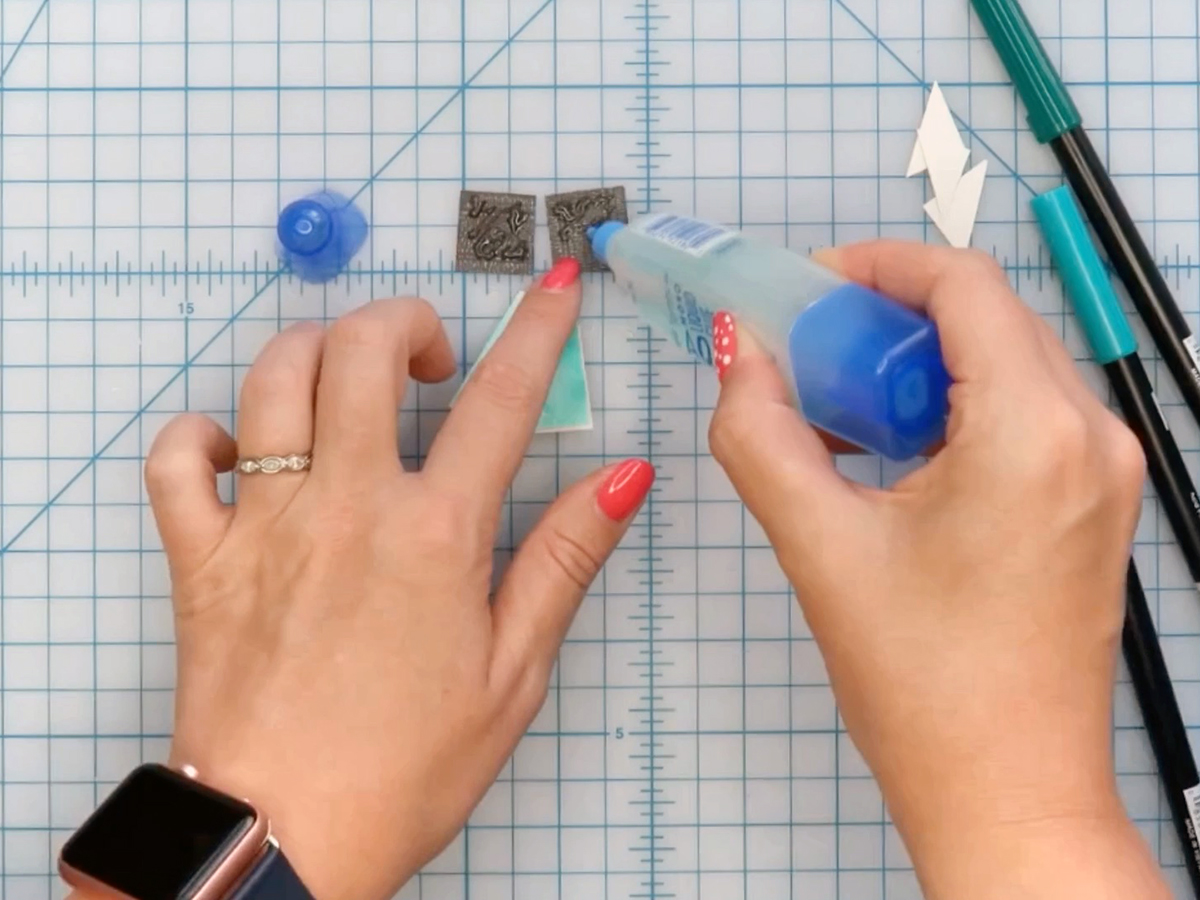
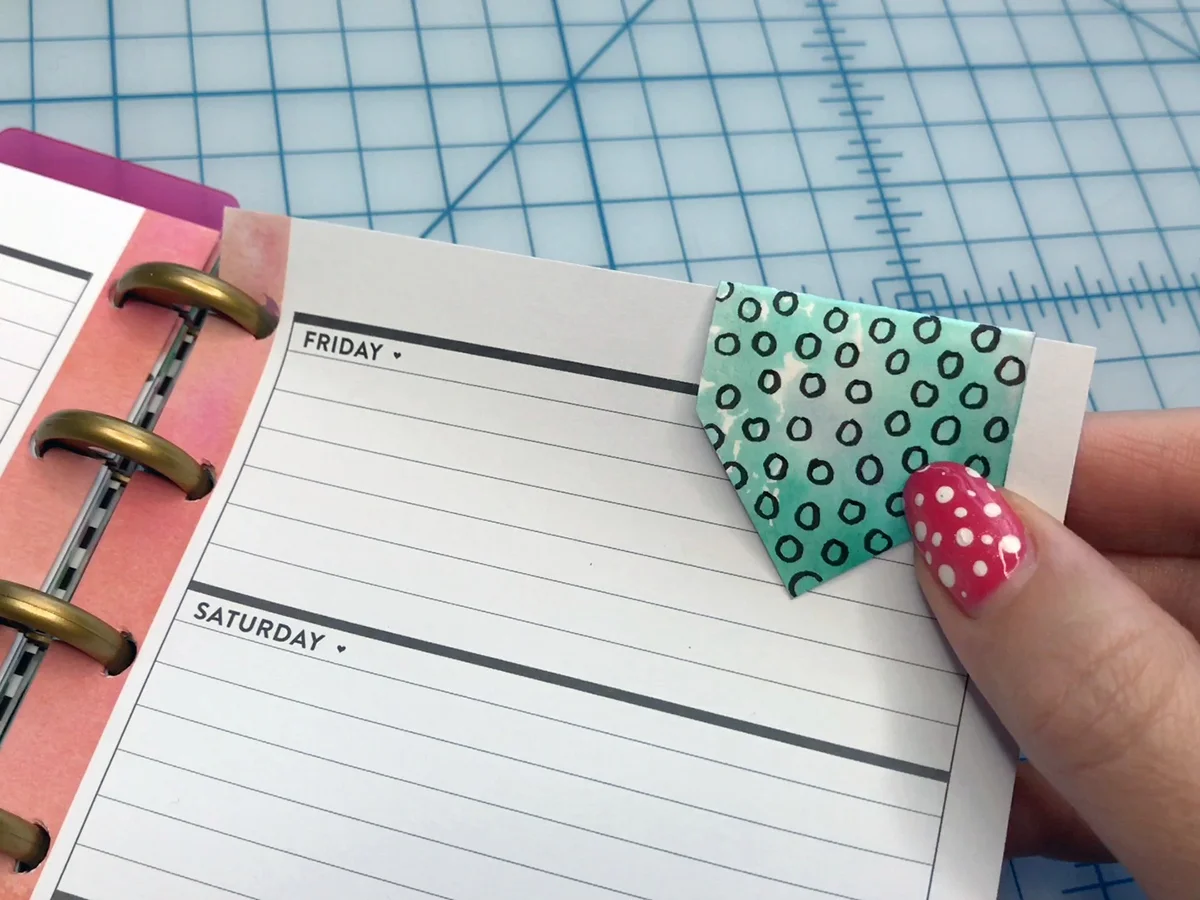
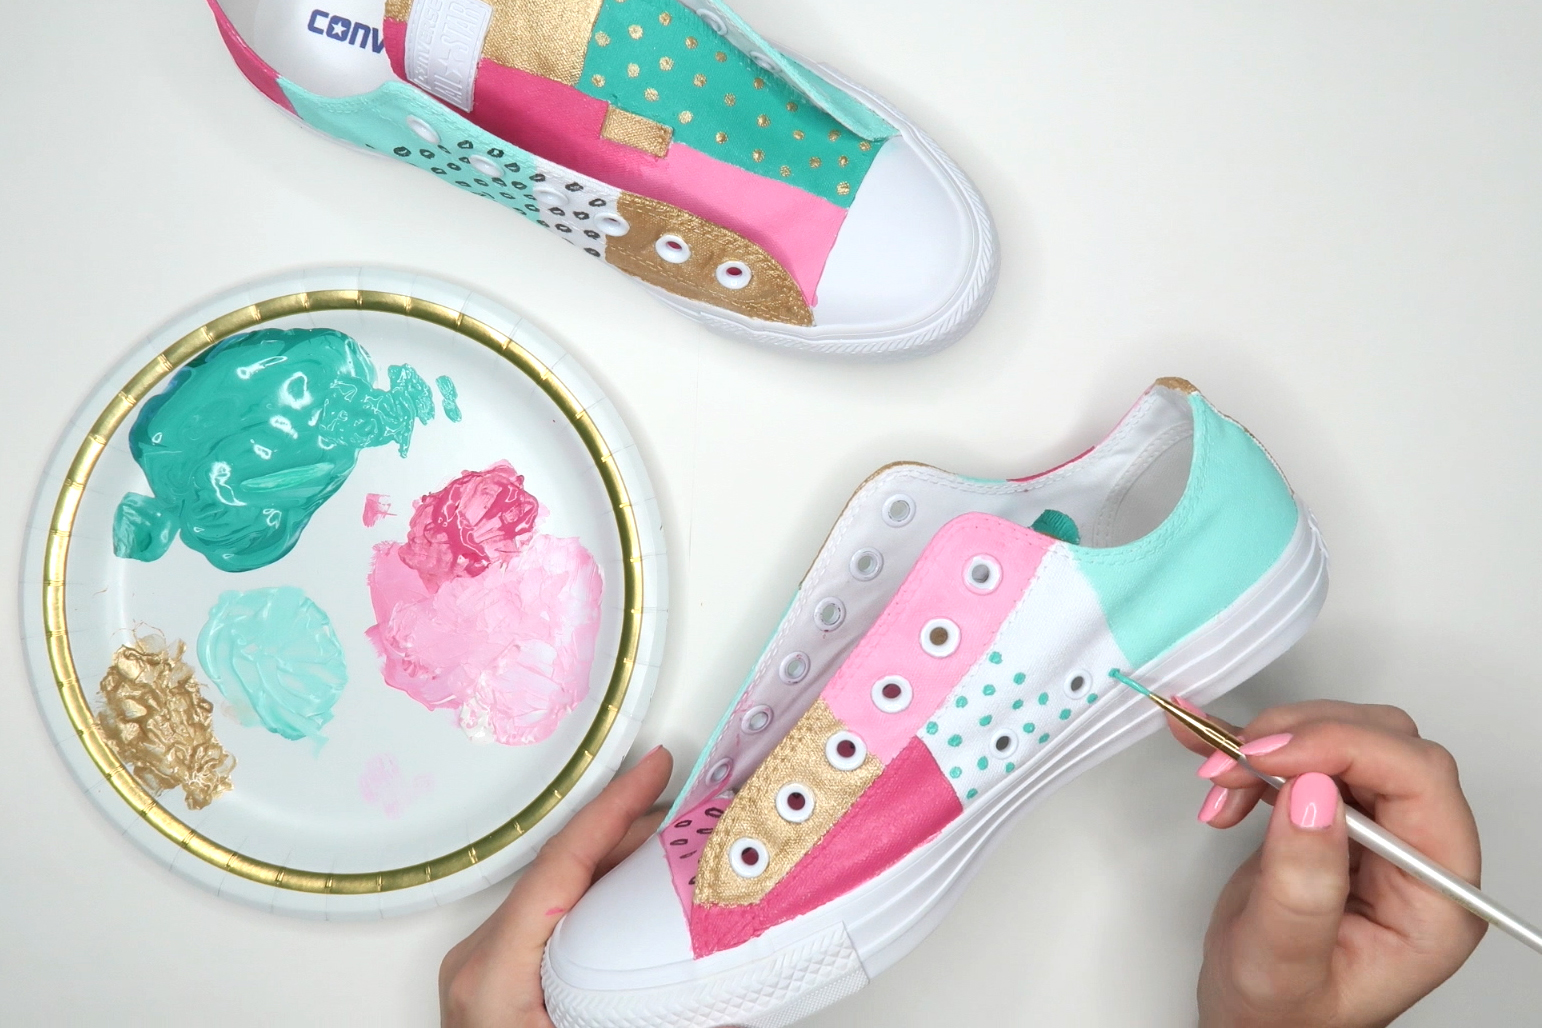
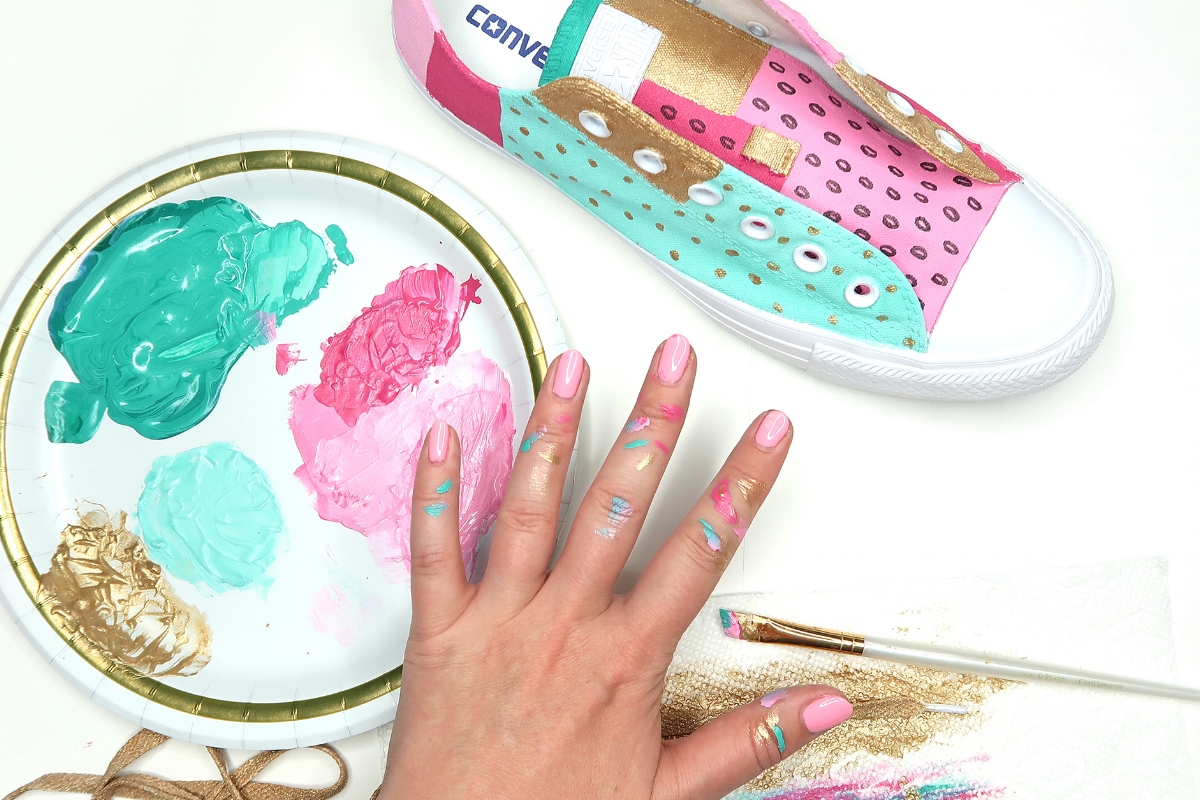
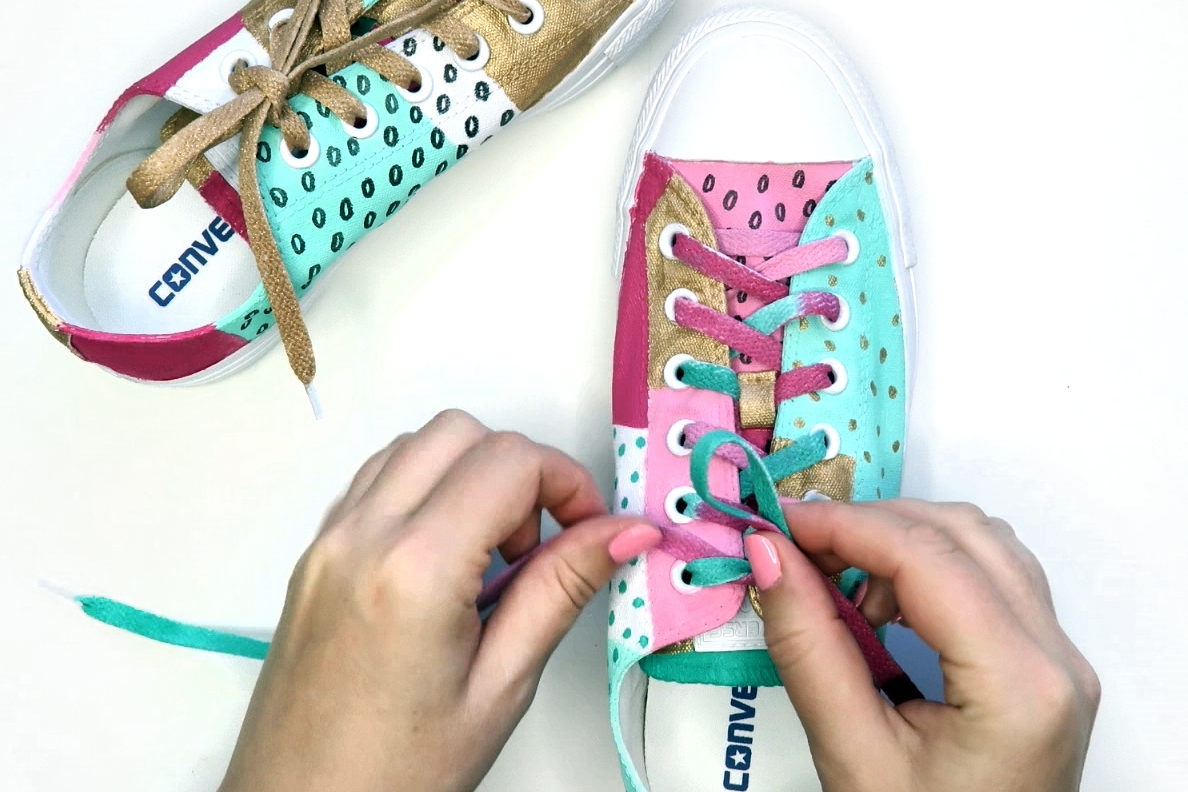
So here's how I customized the Converse All-Stars that Famous Footwear sent me, and made them my own. A year ago I might have painted them in black and white, but now they are full of color and gold and whimsy!


Tutorial: How to Customize Your Own Converse All-Stars

I started with white Converse All-Star Low-Top Sneakers, and removed the laces.

How to Paint Converse All Star Sneakers by BrownPaperBunny

I used a combination of Tulip Soft Fabric Paint and Sharpie Fabric Markers to customize my kicks. I let each color dry for 15-20 minutes before starting on the next, and once I was done painting the shoes I let them dry overnight before touching them too much. 

How to Paint Converse All Star Sneakers by BrownPaperBunny
How to Paint Your own Sneakers by BrownPaperBunny

I painted the shoelaces as well, one in gold and one multicolored and hung them up using bulldog clips and string overnight to let them dry. 

How to Paint Your own Sneakers by BrownPaperBunny

After about 24 hours I re-laced them and I was good to go!

How to Paint Converse All Star Sneakers by BrownPaperBunny

Do you ever customize your shoes, clothes, jewelry to be more 'you'?

In Fashion Illustration, March 2017, Tutorial
26 Comments
← Newer Posts Older Posts →

Subscribe

Sign up to receive social media tips, freebies, special promotions, and art tutorials!

Thank you!

Please click confirm in the email you were just sent!

Directory of Illustration Jessica Mack

Shop my work on Society6

Watercolor World Map by Jessica Mack of BrownPaperBunny

Follow on Instagram

For the 100 Days Project this year I’m keeping it super low pressure. I’ve got a very busy couple of months coming up and want to set myself up to be able to stick with it, while still making sure I do something creative every day. You ca

See my classes on Skillshare

Skillshare Classes by Jessica Mack

Popular Posts

Popular Posts
CRL-Horizontal-Laptop-Beige-Floral-Painting.jpg
Creative Retreat Live
Rainbow-Watercolor-Wreath-Using-Markers.JPG
Rainbow Wreath Tutorial
15 Ways to Journal by Jessica on BrownPaperBunny
15 Ways to Journal
Tombow Brush Pen Markers and Colored Pencils
Brown Paper Bunny

Privacy + Terms of Use

Shop

Watercolor with Markers Book

Classes

Art Tutorials

Art & Illustration Portfolio

About

Contact

Custom Book Print

Custom Book Mug

How to Paint Watercolor Flowers Using Markers

Free Fashion Croquis

Start an Art Journal

6 Easy Flowers to Draw with Tombow Markers

Make Your Own Watercolor Bookmarks